

Advanced setup
How to do it in Highlighter, one step at a time.
Last updated 8 Oct 2026
Most orgs do not need this chapter. It asks for more Salesforce skill. TAF offers paid help with it through a case.
Edit with highlights
Check first
The recordViewWithHighlights component already edits fields in place, with the highlights on. Set up a custom Edit page only if you want highlights in the Edit window too.
Open the object in Object Manager.
Open Setup. Click Object Manager. Click your object.
Open the standard Edit action.
Click Buttons, Links, and Actions. On the Edit row, open the menu at the right and click Edit. The Override Properties page opens.
Set the Lightning override to the Highlighter Edit component. Then click Save.
Under Lightning Experience Override, pick Lightning component. Choose:
highlighter:HighlightEdit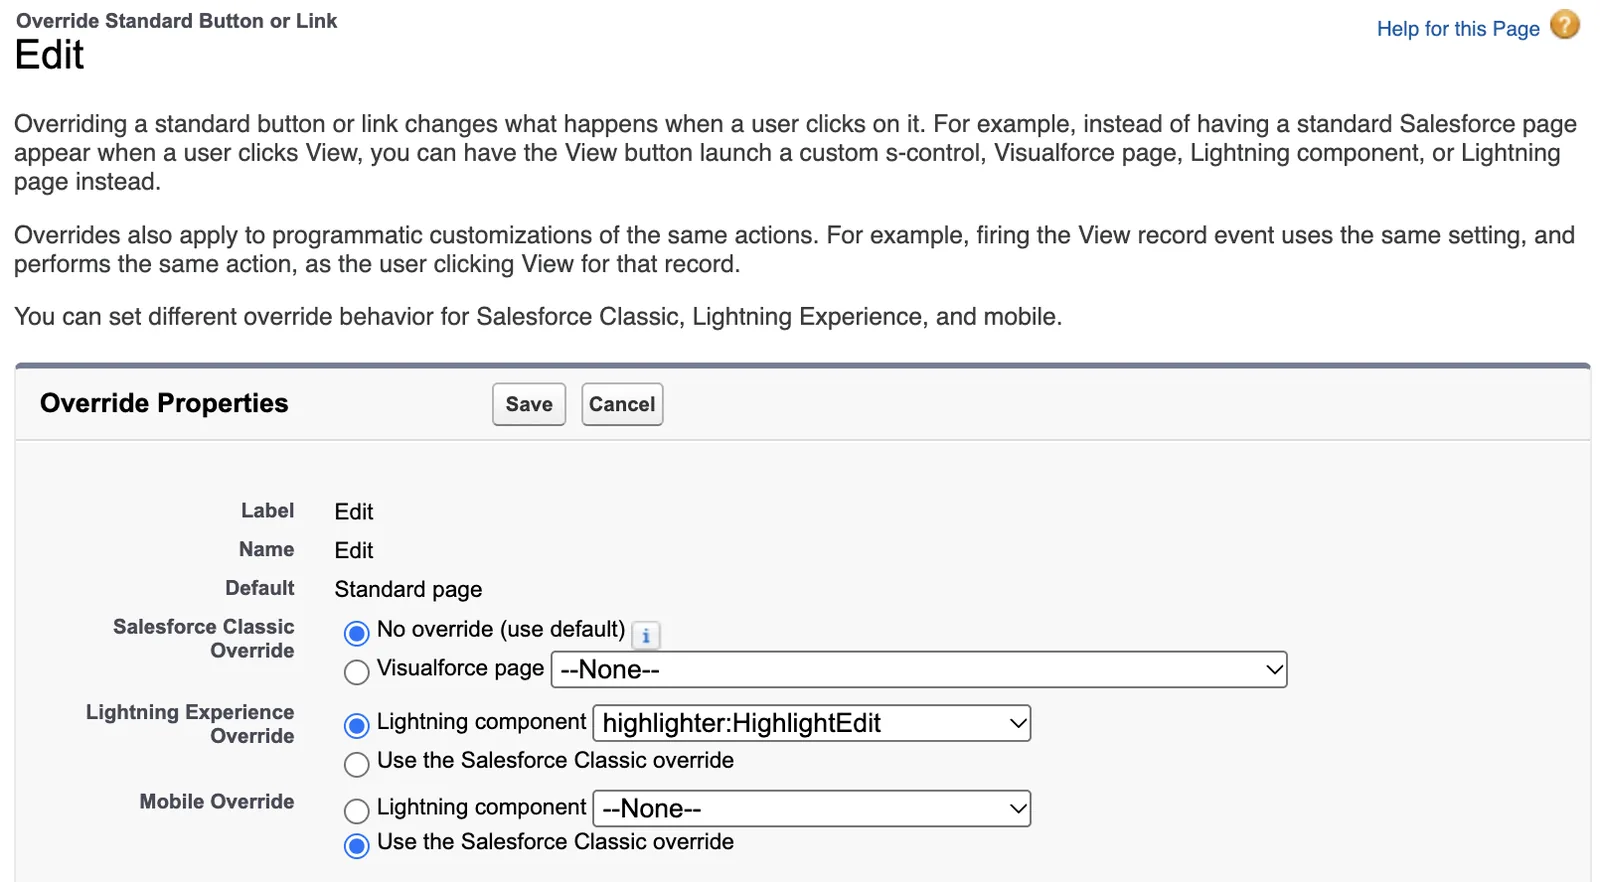
Wait ten seconds. Then refresh the record page several times.
Lightning takes a while to pick up the change. The new Edit window is a little wider and takes a little longer to load. That is how you know it works.
Show a field set with highlights
The fieldsetWithHighlights component shows a group of fields anywhere on a record page. It edits in place and keeps the highlights. You can add it several times to one page, and each copy works on its own. A field set is a named group of fields that you build in Setup.
Open the object in Object Manager.
Open Setup. Click Object Manager. Click your object.
Click Field Sets. Then click New.
To change a field set you already have, click its name instead, and skip the next step.
Name the field set. Then click Save.
Type a Field Set Label. Salesforce fills in Field Set Name. Type a short note in Where is this used?. Click Save. The field set editor opens.
Drag fields into the field set.
Drag from the field list at the top into In the Field Set. Drag a field back out to remove it.
Click Save.
Open the Lightning record page.
In Object Manager, click Lightning Record Pages and open the page. If that list is empty, open a record of the object. Click the gear icon, then Edit Page.
Drag fieldsetWithHighlights onto the page.
fieldsetWithHighlightsDrop it inside a region of the page, such as the right column. A region turns green when the component can drop there. The gray area outside the regions does not take the component.
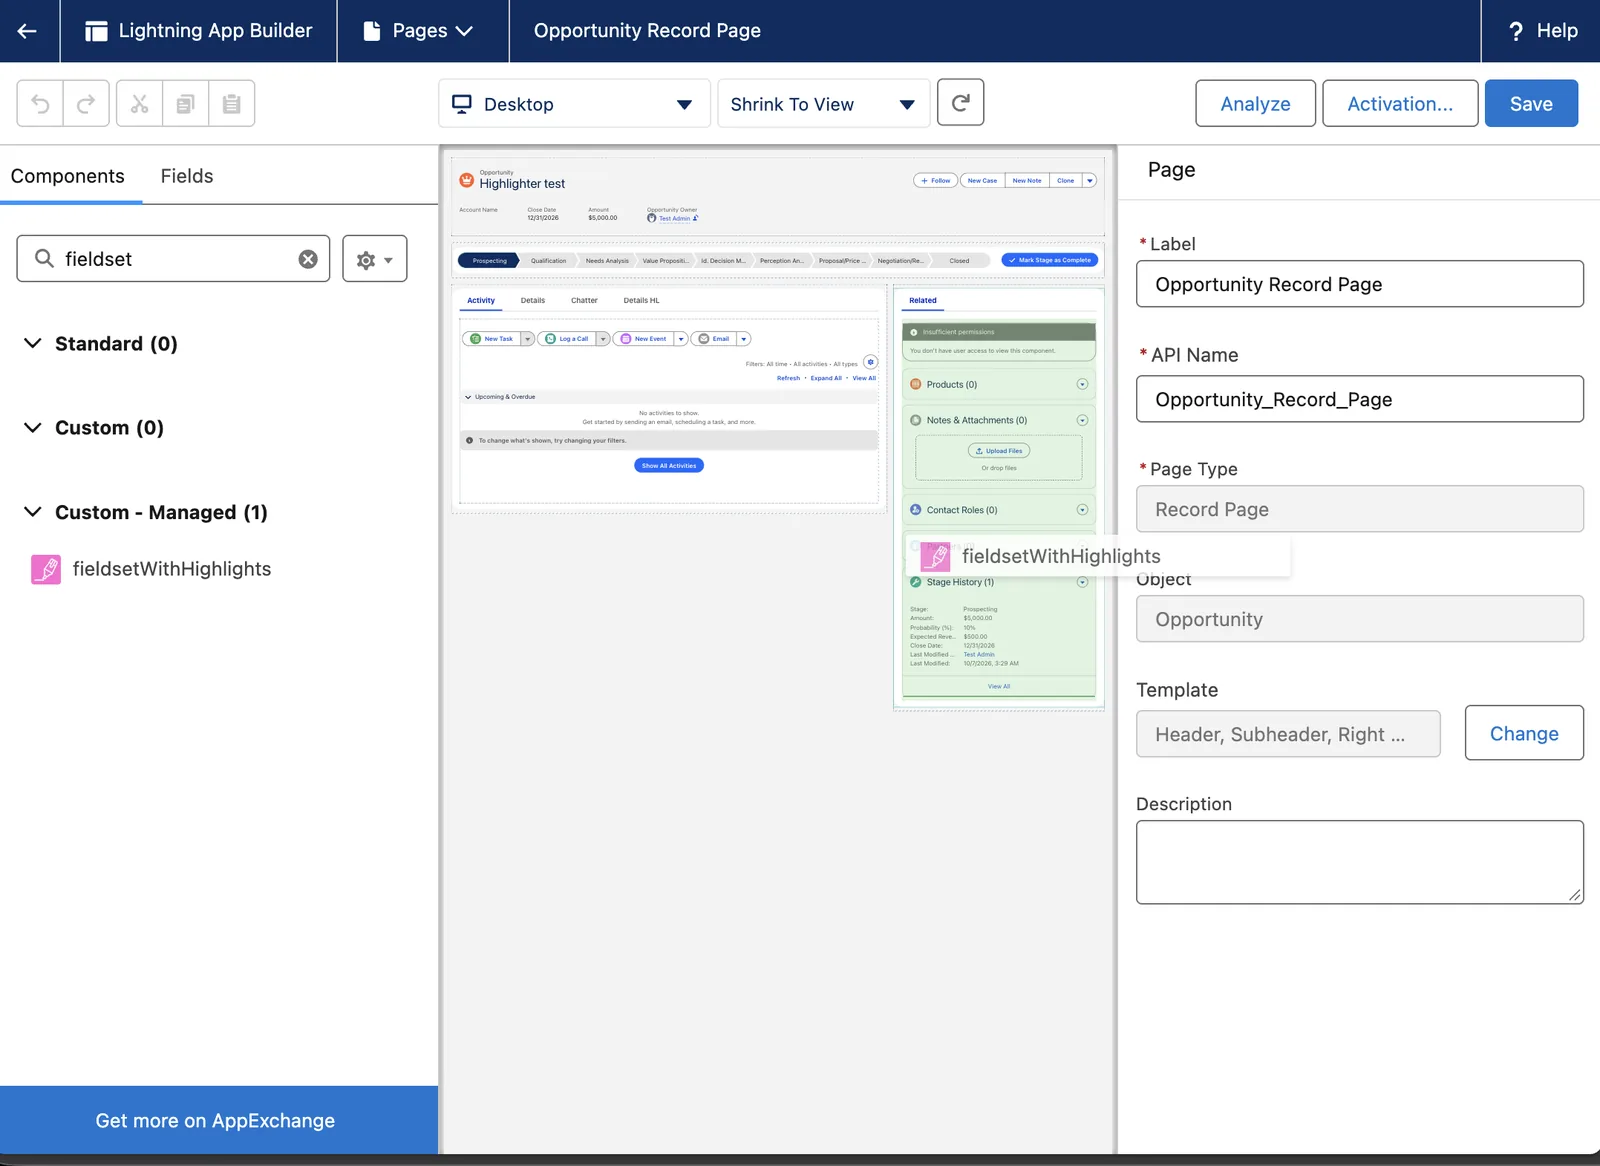
Click the component. Fill in its settings in the right panel.
Setting What to enter objectName Pick the object. Today the list holds only the current object. Enter Layout Title A title for this group of fields. Leave it blank to show the object name. Choose Field Set The field set from steps 2 to 5. Enter Icon Name Leave it blank for the object's own icon. For another icon, type icon_type:icon_name, for exampleutility:activity. The four types are utility, doctype, standard and action. See the Lightning Design System icons.No. Of Columns 1 or 2. Check the component. Click Save. Then click the back arrow.
The component updates as you fill in each setting. After you save, wait a couple of seconds. The back arrow sits at the top left.
The same field in two components
A change in one component may not show in the other until you refresh the page.
Options
The Options button sits at the bottom of the Highlighter setup page. Each option applies to every user in the org. TAF cannot turn one on for a single user.
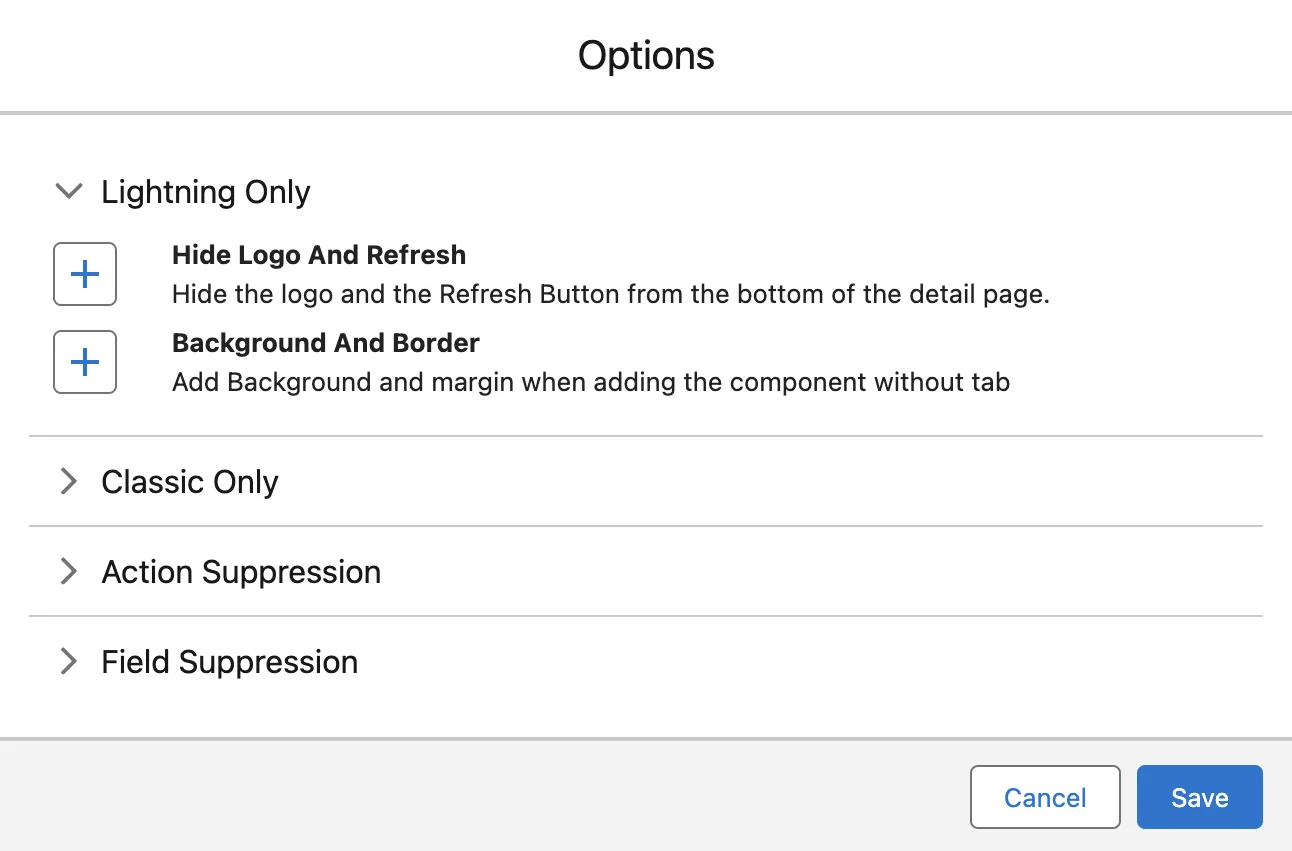
| Option | What it does |
|---|---|
| Hide Logo and Refresh | Removes the logo and the Refresh button from the bottom of the record page. |
| Background and Border | Adds a background and a margin when the component sits on the page without a tab. |
| Stop Highlight Fields Stop Hide Fields Stop Rename Field Label | Highlighter skips that action type. Turn on the ones you do not use, and pages load faster. |
| Disable Checkbox Fields Disable Formula Fields Disable Long Text Fields | Highlighter skips those field types when it checks a page for actions. Pages load faster. |
The window also lists Classic options and button options. They do not apply in Lightning. Some features are not in the window at all. Open a case, and TAF sets them up with access to your org or on a call.
Beta features
TAF is building two features that are not on the setup page yet. Open a case to join the trial. TAF sets each one up by hand, in your sandbox first and then in production, and charges for that time.
| Feature | What it does |
|---|---|
| Lookup Field Hover Replacement | When a user points at a lookup field, Salesforce shows a few fields of the linked record. This shows many more, which you choose. |
| Printable View Replacement | Replaces the standard Printable View. It adds your logo, and lets you pick the fields for an internal page and for a page for clients. |
Applies to
Highlighter 3.0.x. These steps come from the tested Highlighter implementation guide, where they sit with the steps before and after them.
Was this helpful?
Thank you. It helps us know which articles work.
Related
Still stuck?
Open a case and paste the exact error text. A person reads every case.