

Limit an action
How to do it in Highlighter, one step at a time.
Last updated 8 Oct 2026
Optional. Skip this chapter if your action applies everywhere.
You set these limits in the same New Action window, before you click Save.
Limit it to some users
In Only Valid For, pick User, Profile or Public Group.
Leave it on All to apply the action to everybody.
In the list that appears, pick the user, profile or group.
Limit it to some records
Click Add Filter.
A filter row appears, with the lists Field, Operator, Value Type, Value and And/Or.
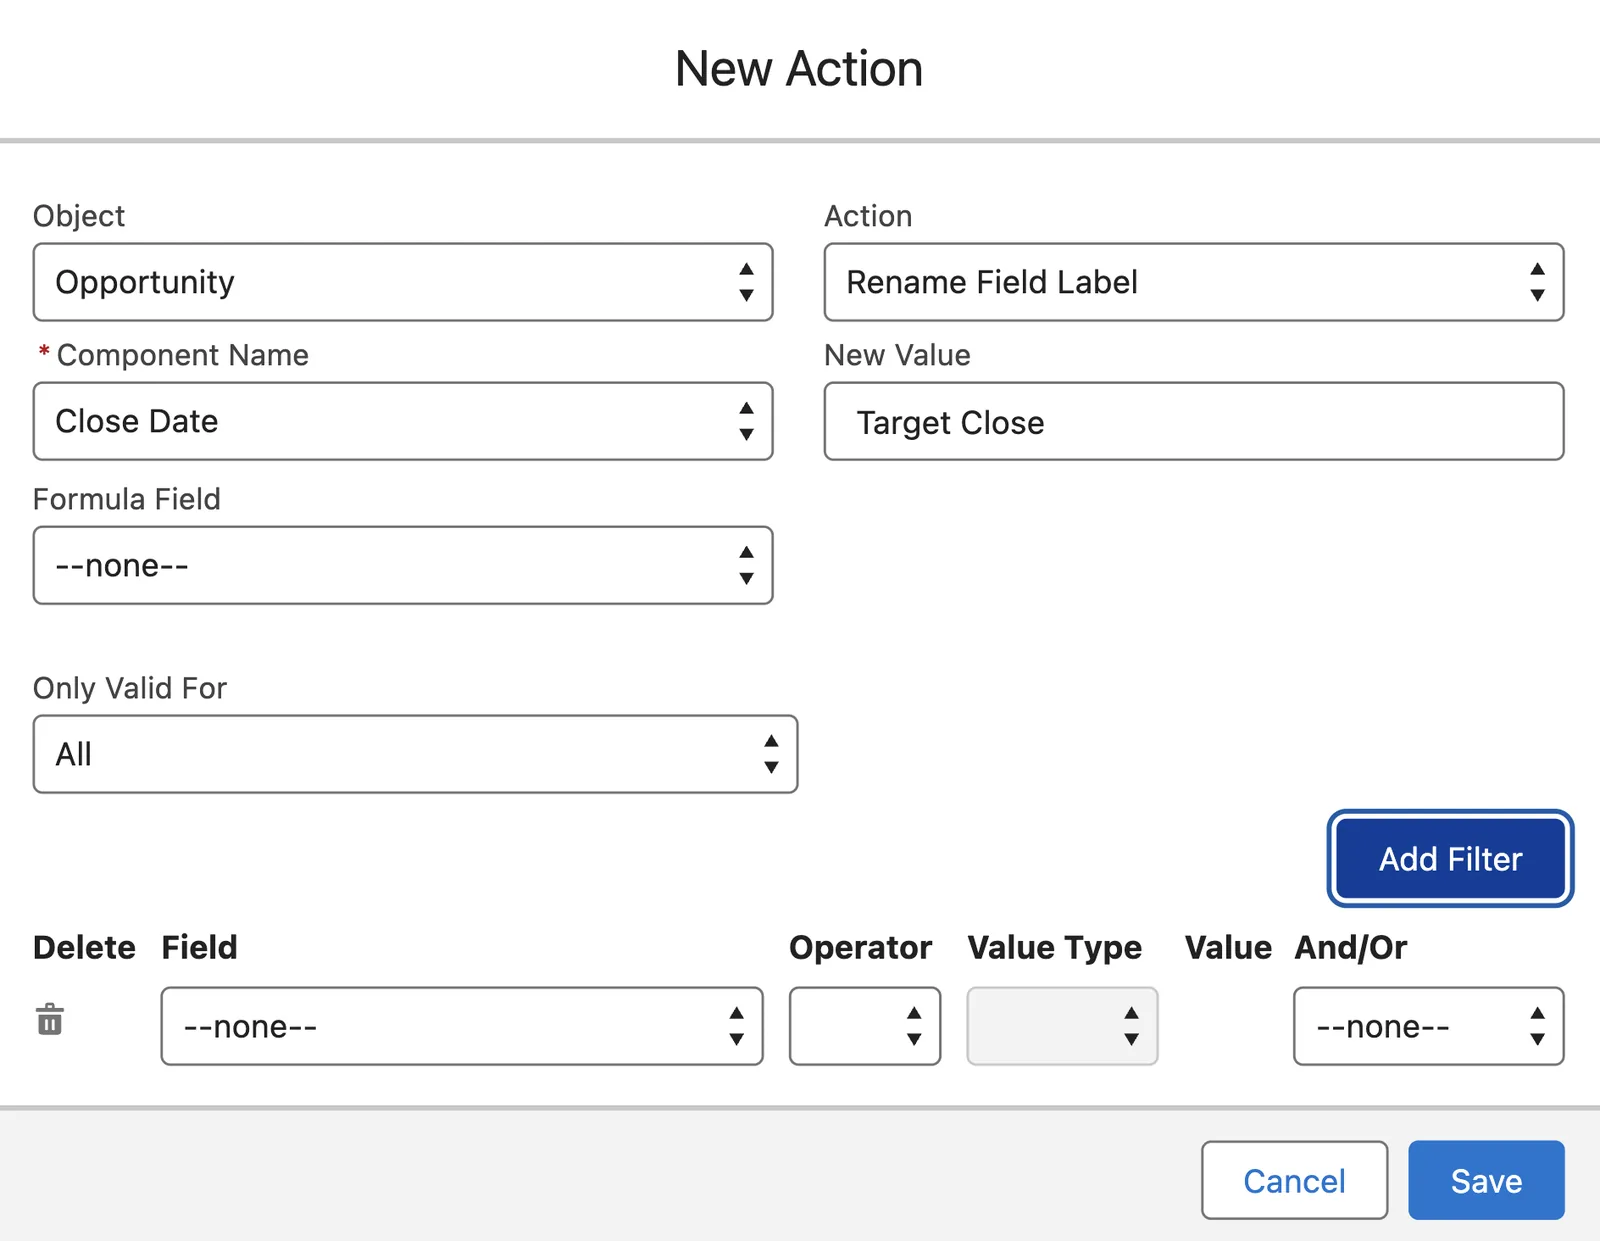
In Field, pick the field that decides whether the action runs.
It does not have to be the field in Component Name. It can be any field on the object.
In Operator, pick == or !=.
==means equals.!=means does not equal.For a Date or Date/Time field, pick a Value Type.
Pick a fixed date, or a date literal such as
TODAY,NEXT_WEEKorTHIS_YEAR. Skip this step for other field types.In Value, type or pick the value.
For a picklist, a checkbox or a date literal, pick the value from the list.
To add a second filter, click Add Filter again.
Then go back to the first filter and set its And/Or list.
&&means this filter and the next one must both be true.||means this filter or the next one must be true.
Click Save.
Highlighter goes back to the list of actions.
Keep filters few
Each filter adds time to the page load. For several conditions, build one formula field that returns True or False. Use that field as the only filter.
Highlighter does not support nested filters, or && and || mixed in one action.
Applies to
Highlighter 3.0.x. These steps come from the tested Highlighter implementation guide, where they sit with the steps before and after them.
Was this helpful?
Thank you. It helps us know which articles work.
Related
Still stuck?
Open a case and paste the exact error text. A person reads every case.