

Turn Highlighter on
How to do it in Highlighter, one step at a time.
Last updated 8 Oct 2026
Your actions do nothing until the Highlighter component sits on the record page. This example uses Opportunity. The steps are the same for any object.
Open a record of the object you set up.
Use a test record in your sandbox. If the object has no records yet, make one. For Opportunity, open the Opportunities tab and click New. Fill in Opportunity Name, Close Date and Stage. Click Save.
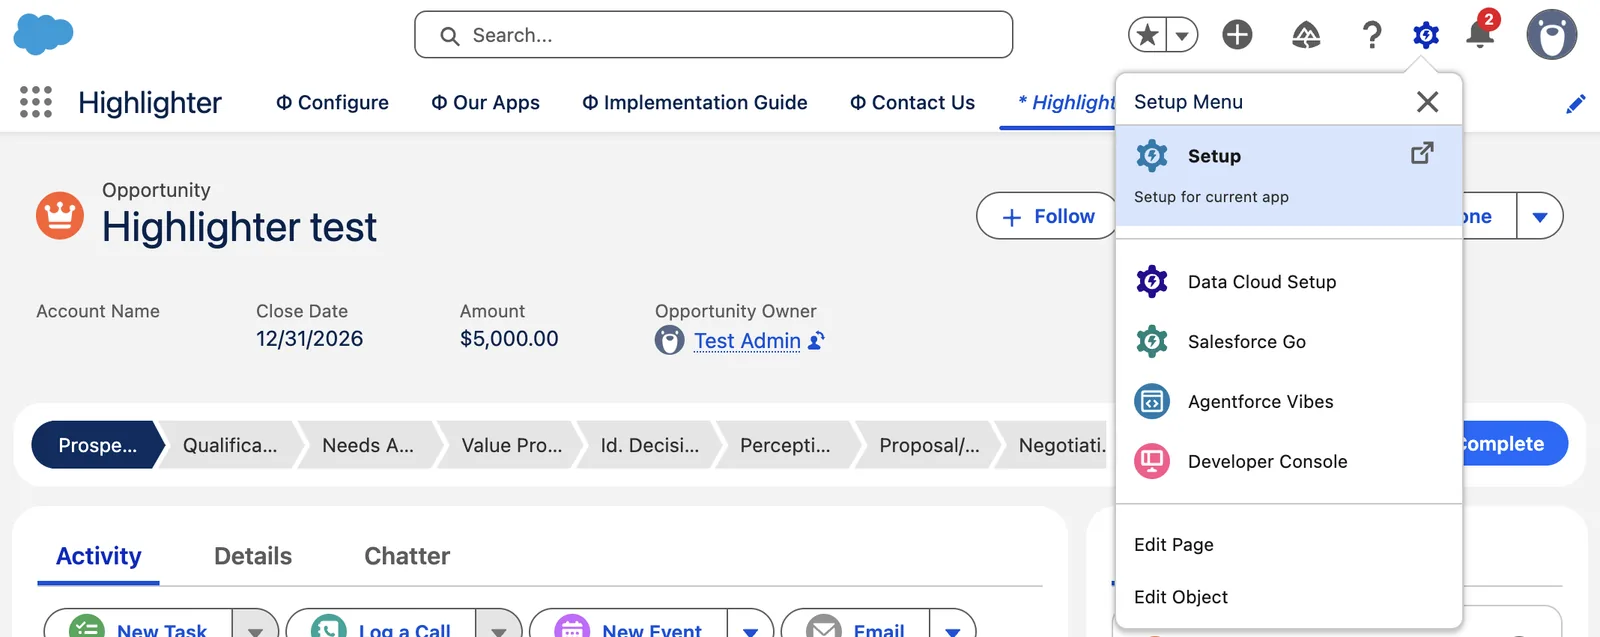
Click the gear icon at the top right. Click Edit Page.
The Lightning App Builder opens. Components sit in the left panel, the page sits in the middle, and the settings of the item you click sit in the right panel.
Add a new tab beside Details.
Click the tab bar on the page, the bar that holds Activity and Details. In the right panel, click Add Tab. Click the new tab in that list. In Tab Label, pick Custom, and type a name, for example
Details HL.Drag recordViewWithHighlights into the new tab.
recordViewWithHighlightsFind it under Custom - Managed in the left panel. Do not use the older HighlightDetail component.
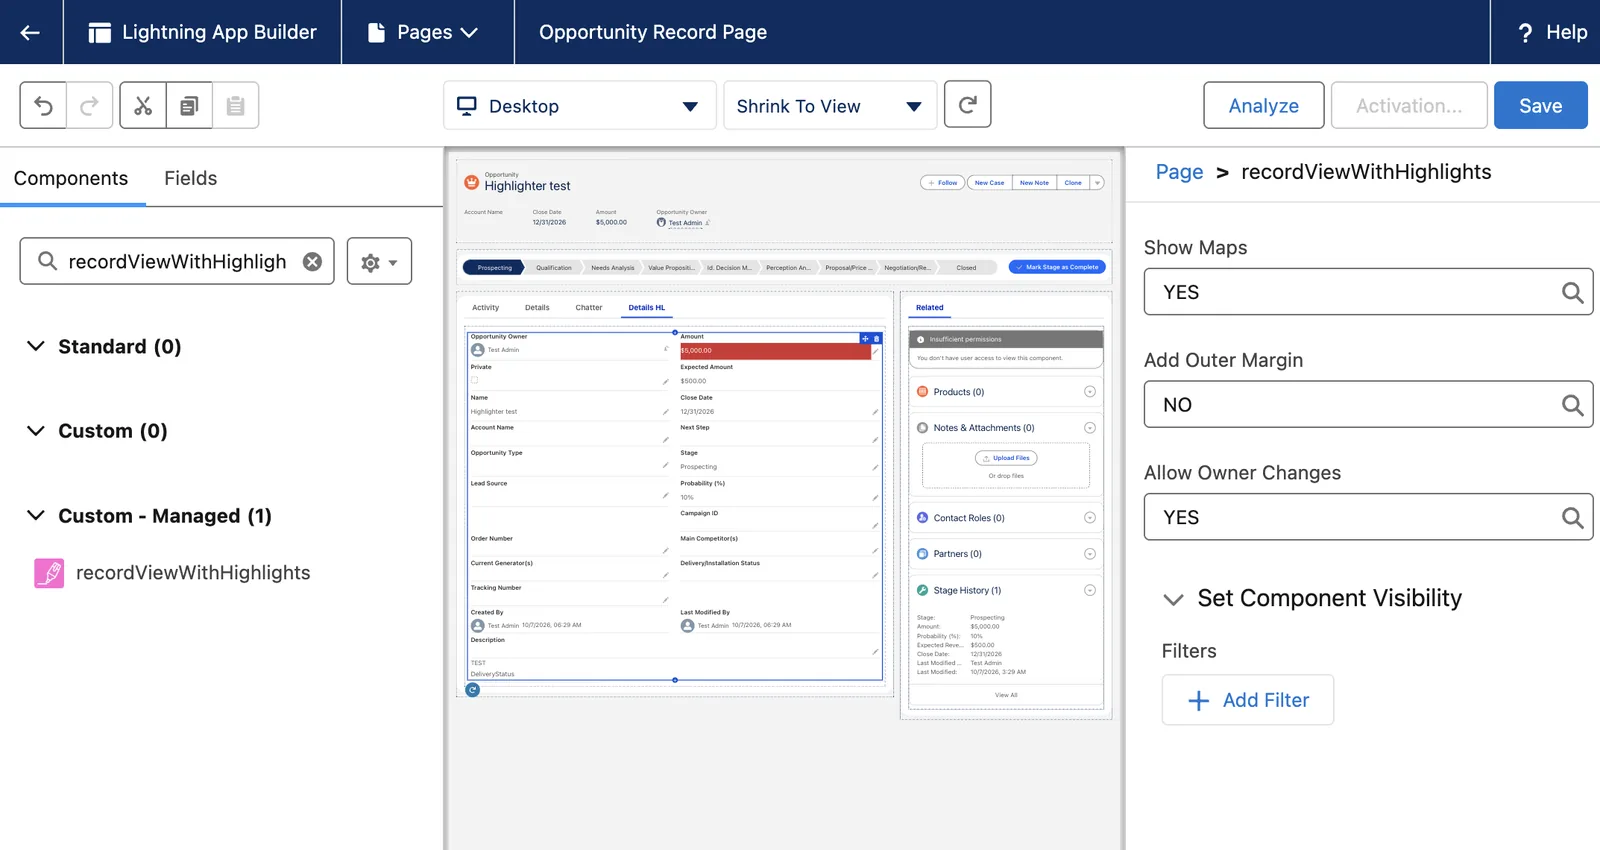
Wait for the component to load. Then click Save.
After a few seconds the component grows into a full view of the record. Click Save at the top right. If nothing happens after a few seconds, click Save anyway.
Optional: show maps beside address fields.
Click the component. In the panel on the right, choose whether maps show next to the standard address fields.
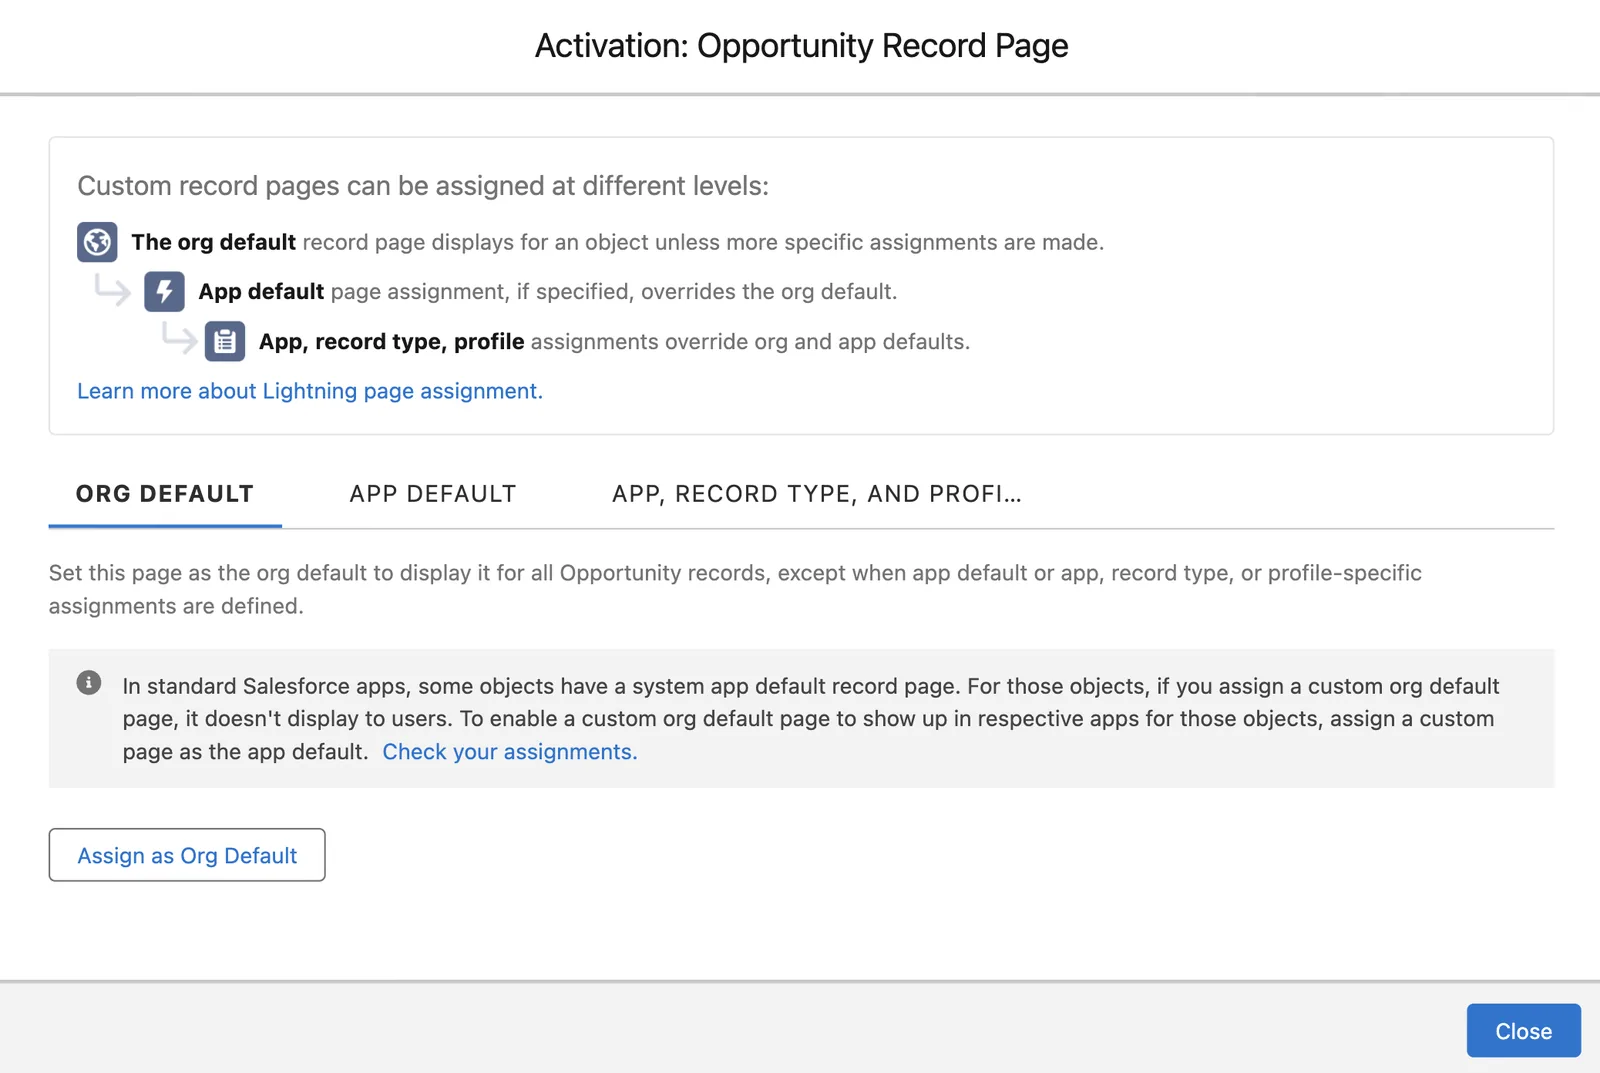
Activate the page, if Salesforce asks.
Salesforce asks the first time you edit the Lightning page of an object. Click Activate. Click Assign as Org Default. Choose Desktop. Click Next. Click Save.
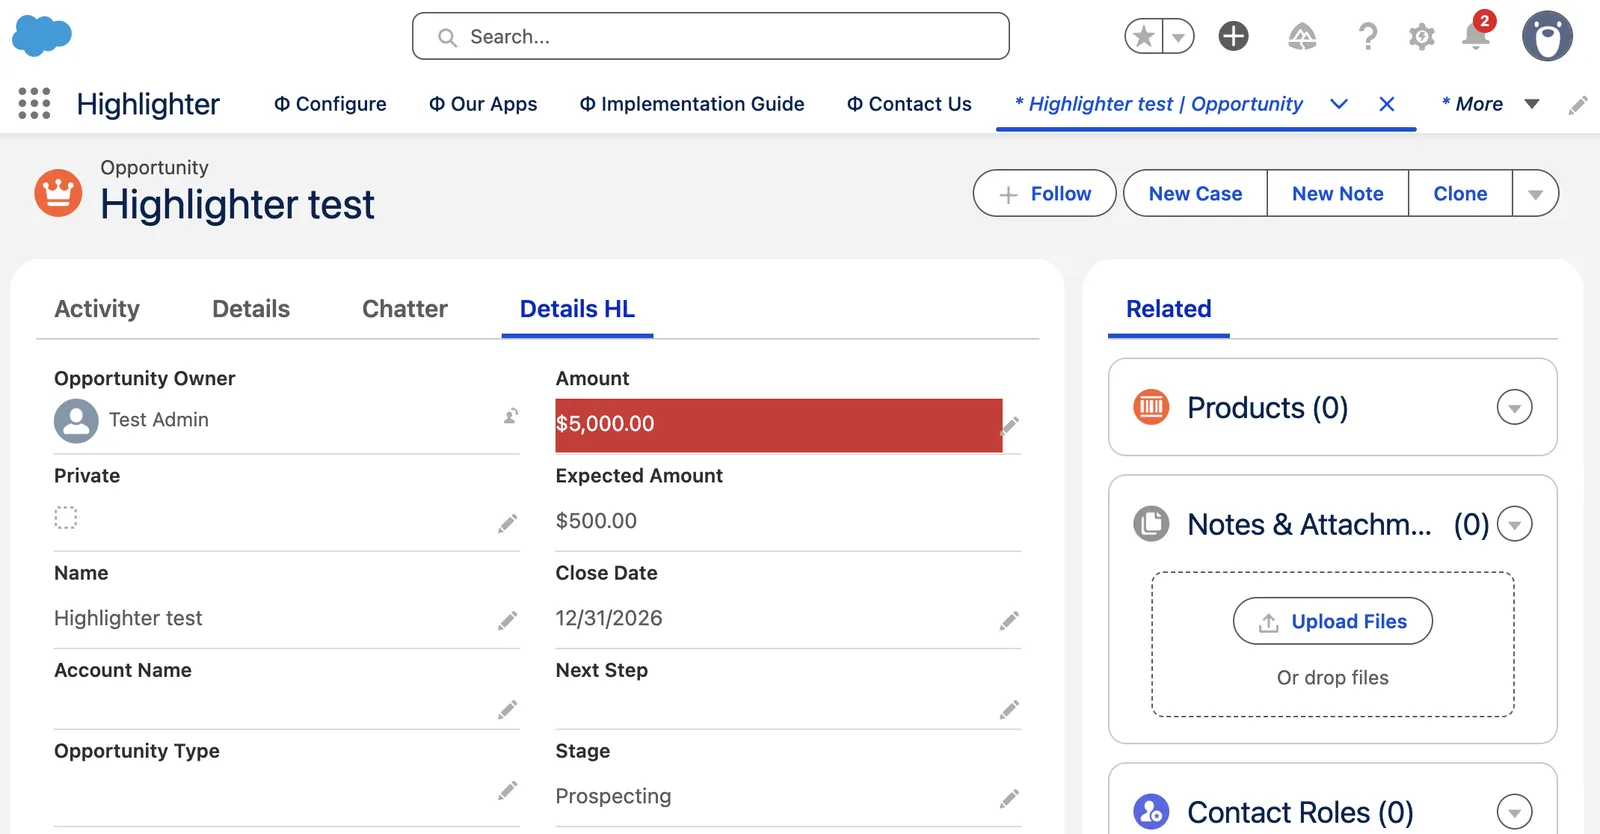
Click Back. Check the new tab.
Back sits at the top right of the Lightning App Builder. The record page opens with the new tab. Fields with actions show your colors, labels or blanks.
Tidy up when it works
When the new tab works well, remove the old Details tab. Then rename the new tab to Details.
Applies to
Highlighter 3.0.x. These steps come from the tested Highlighter implementation guide, where they sit with the steps before and after them.
Was this helpful?
Thank you. It helps us know which articles work.
Related
Still stuck?
Open a case and paste the exact error text. A person reads every case.