

Brand the form
How to do it in Simple Signature, one step at a time.
Last updated 9 Oct 2026
Paid version only. These steps do not count in the setup progress.
The paid version lets you put your own logo and colors on the form. You set the colors on the Configuration tab of the Configure page, and the logo in the Sign button component.
Open the Configure page. Click the Configuration tab.
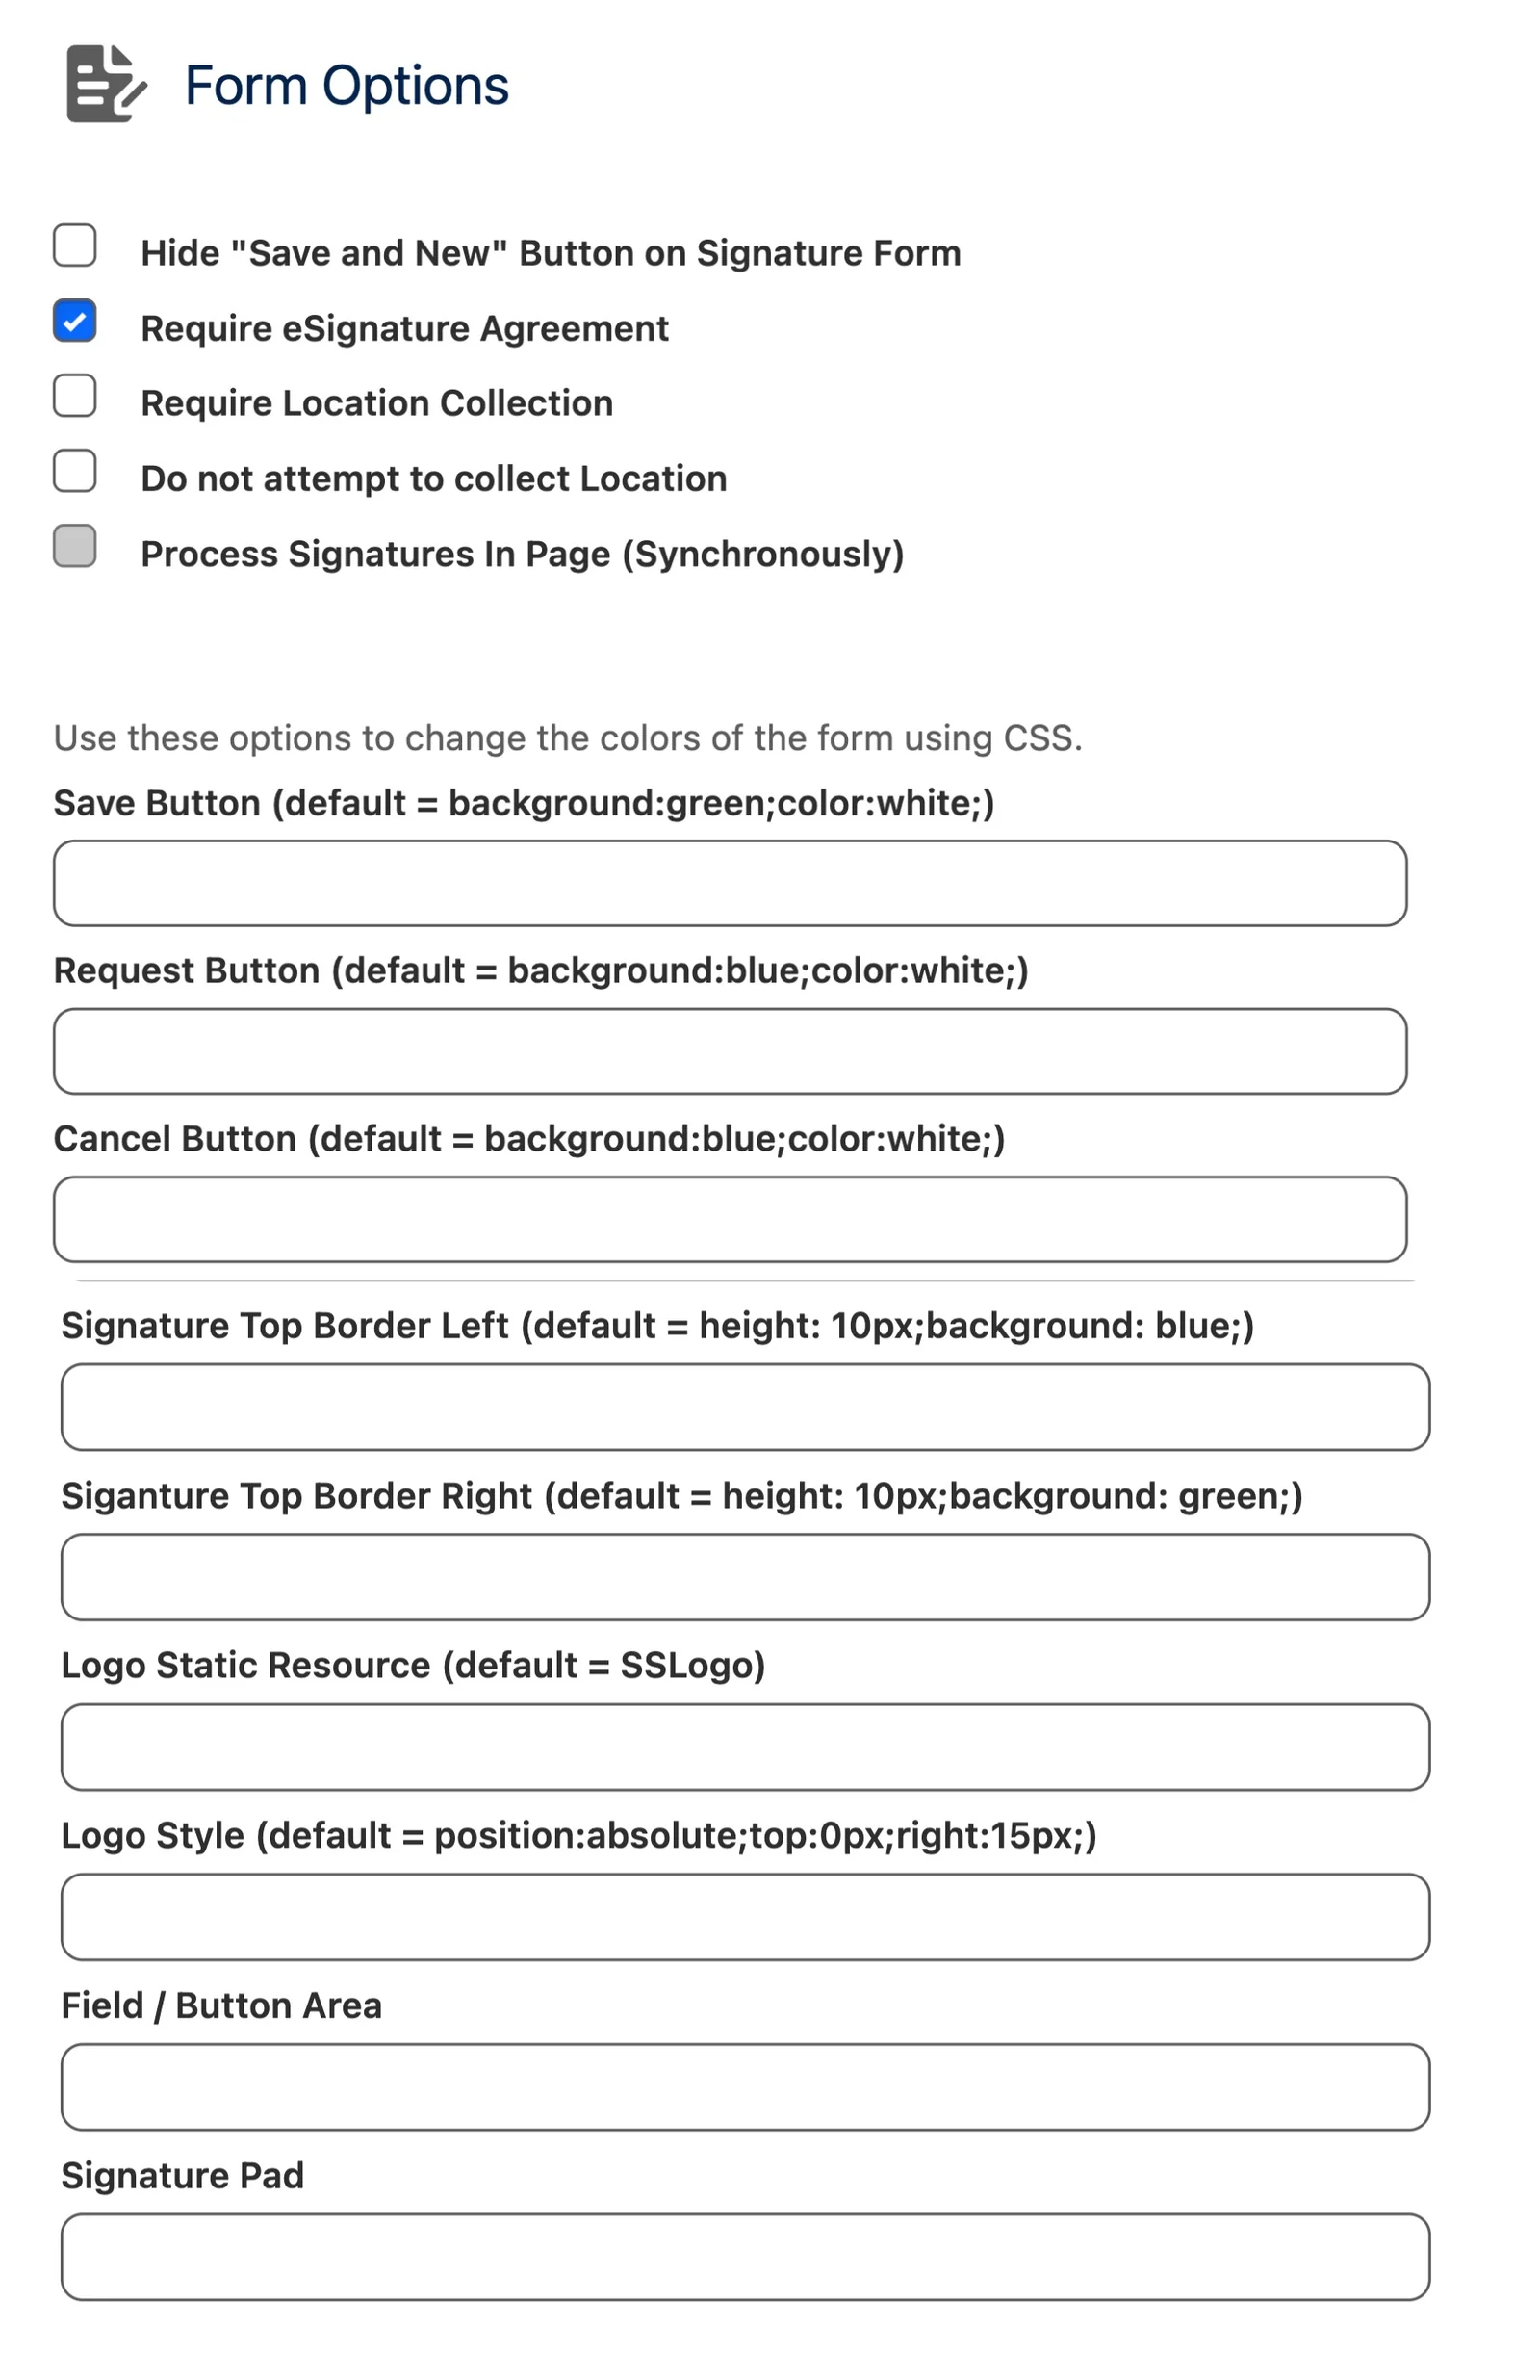
Find the section Form Options. If you open the page from the App Launcher, pick ß Configure. Other TAF apps have Configure tabs too.
Set the form options.
Option What to do Require eSignature Agreement Turn it on to show a window where the signer agrees to sign electronically, before the form opens. Require Location Collection Turn it on to save the location of the signer, as latitude and longitude, with every signature. If the browser blocks the location, the signer must allow it and load the page again. Do not attempt to collect Location Turn it on to never save a location. TAF does not advise it. Hide "Save and New" Button on Signature Form Leave it as it is. TAF retires this option soon. Process Signatures In Page (Synchronously) It shows grey and off. Leave it. The agreement window can put its Agree button below the edge of the window. Scroll down inside the window to reach it.
Upload your logo as a static resource.
Open Setup in a new tab. In the Quick Find box, type Static Resources. Click Static Resources. Click New.
Type a Name, for example
CompanyLogo, with letters, numbers and underscores only. Pick your logo file, for example a PNG. Cache Control starts on Private. Set it to Public. Click Save.Put your logo in the Sign button component.
Open the Developer Console. Click File, then Open Lightning Resources. Type
SignContactin the Filter box. Click c:SignContact, then COMPONENT. Click Open Selected. The tab SignContact.cmp opens.Find
$Resource.signature__SSLogo. Replacesignature__SSLogowith the Name of your static resource, for example$Resource.CompanyLogo. Save the component.To take the line Powered by Simple Signature off the form, delete the line near the end that starts with
<div align="center". Save again. The save shows no message. The * on the tab name goes away.Your browser keeps the old version of the form for a while. Before you test, reload the record page with Ctrl+Shift+R on Windows or Command+Shift+R on a Mac.
Change the colors, if you want.
Each element below takes CSS, the code that styles a web page. The label of each element shows its default value. Change one element at a time. Then test it, because a mistake in CSS can break the form.
Element What it styles Save Button The button that saves the signature. Request Button The button that sends a signature request. Cancel Button The Cancel button. Signature Top Border Left The left part of the colored bar above the signature box. Siganture Top Border Right The right part of the colored bar above the signature box. The label on screen has this typo. Field / Button Area The area with the fields and the buttons. It shows no default. Signature Pad The signature box. It shows no default. For example,
background:navy;color:white;makes a button dark blue with white text.Leave Logo Static Resource and Logo Style empty. They do not change the form of the Sign button.
Click Save Settings. Then check that your values stayed.
The green Save Settings button stays at the same spot on the screen while you scroll. After a save, a green bar with Setting Updated Successfully can show at the top of the page, out of view.
Reload the page and look at your values. If a value is gone, type it again and click Save Settings again.
Take a test signature.
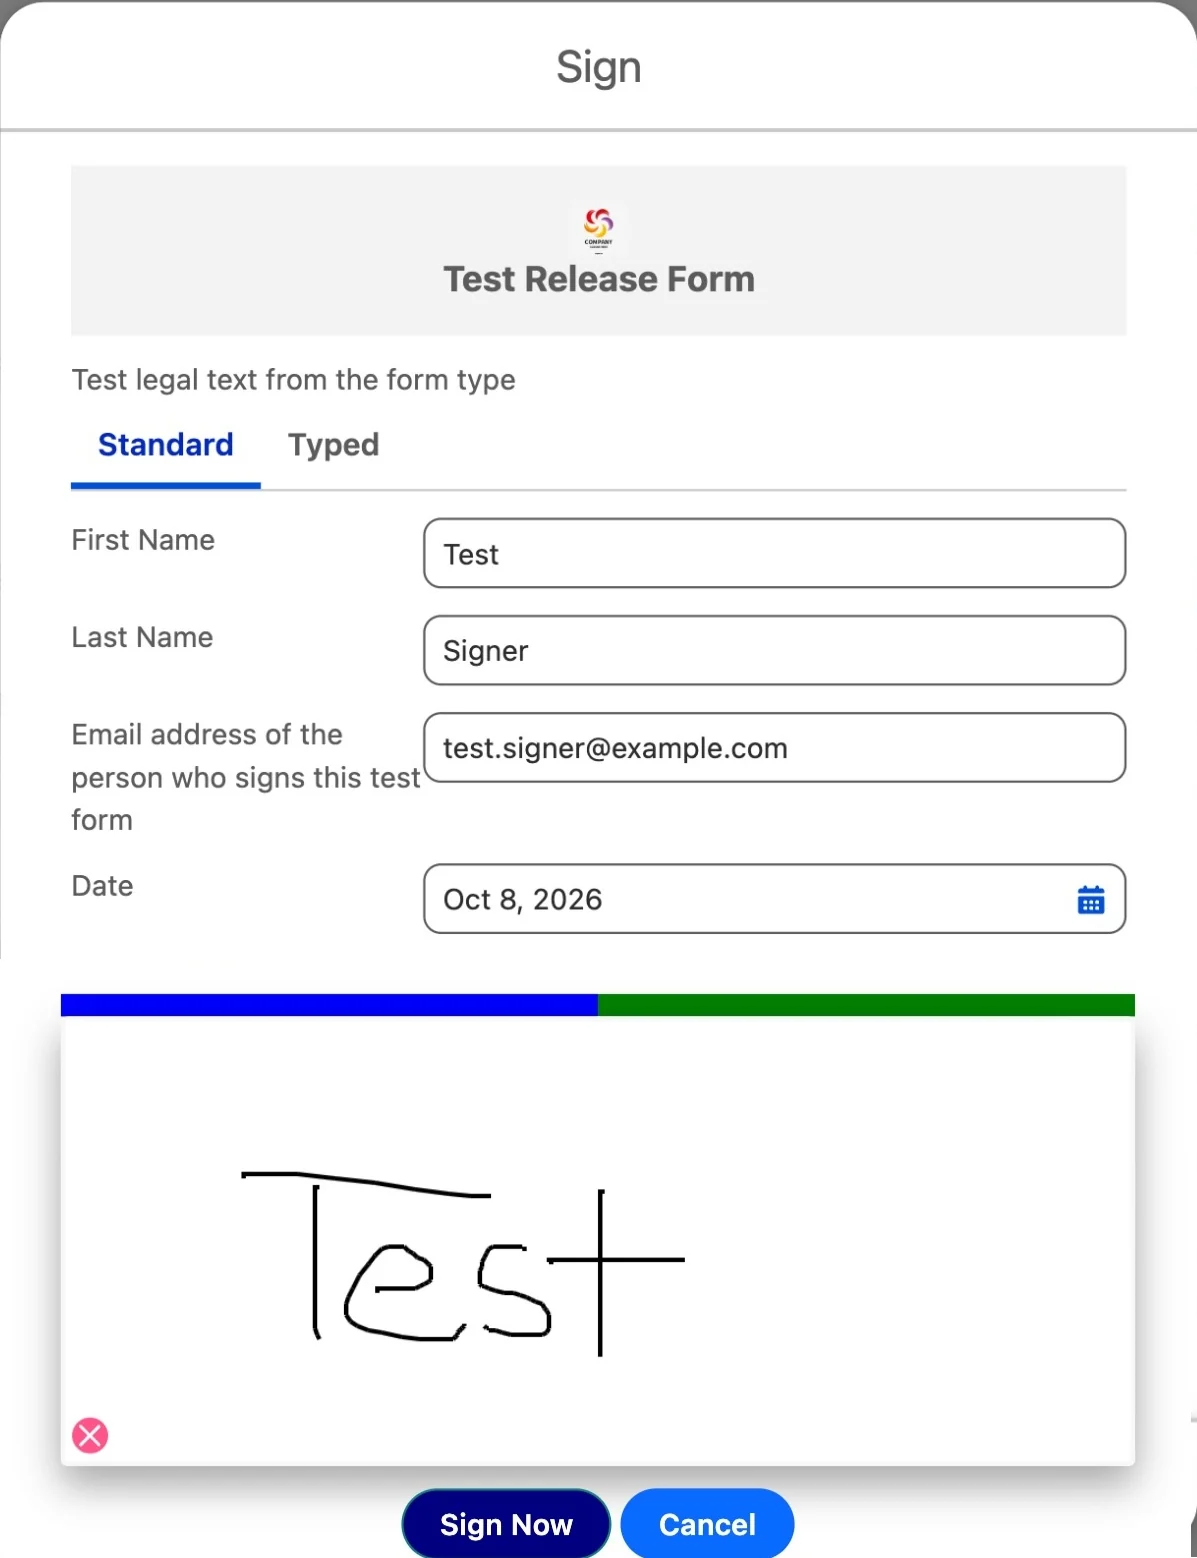
Use the Sign button from Add a Sign button for your experience. Check the logo and the colors. With Require eSignature Agreement on, a window asks the signer to agree first.
Applies to
Simple Signature 5.8.x, paid version. These steps come from the tested Simple Signature implementation guide, where they sit with the steps before and after them.
Was this helpful?
Thank you. It helps us know which articles work.
Related
Still stuck?
Open a case and paste the exact error text. A person reads every case.