

Set the wording of the form
How to do it in Simple Signature, one step at a time.
Last updated 9 Oct 2026
The title and the legal text of the form come from custom labels. A custom label is a piece of text that an app shows on its pages. You change a Simple Signature label with an override in your own language.
Until you change them, the title reads Salesforce.com, inc. Release Form and the legal text is a sample release that names Salesforce.
Set the wording before you take real signatures
When someone signs, Simple Signature copies the wording onto the Signature record. A change later does not change the records already signed.
Open Custom Labels.
Open Setup. In the Quick Find box, type Custom Labels. Click Custom Labels. The list holds the labels of every app in the org. The Simple Signature labels show Signature in the Categories column.
Click Page_Title.
Click the name Page_Title on a row with Signature in Categories. The Custom Label Detail page opens. Its Value reads Salesforce.com, inc. Release Form.
Click New Local Translations / Overrides.
The button sits in the Local Translations / Overrides section at the bottom of the page.
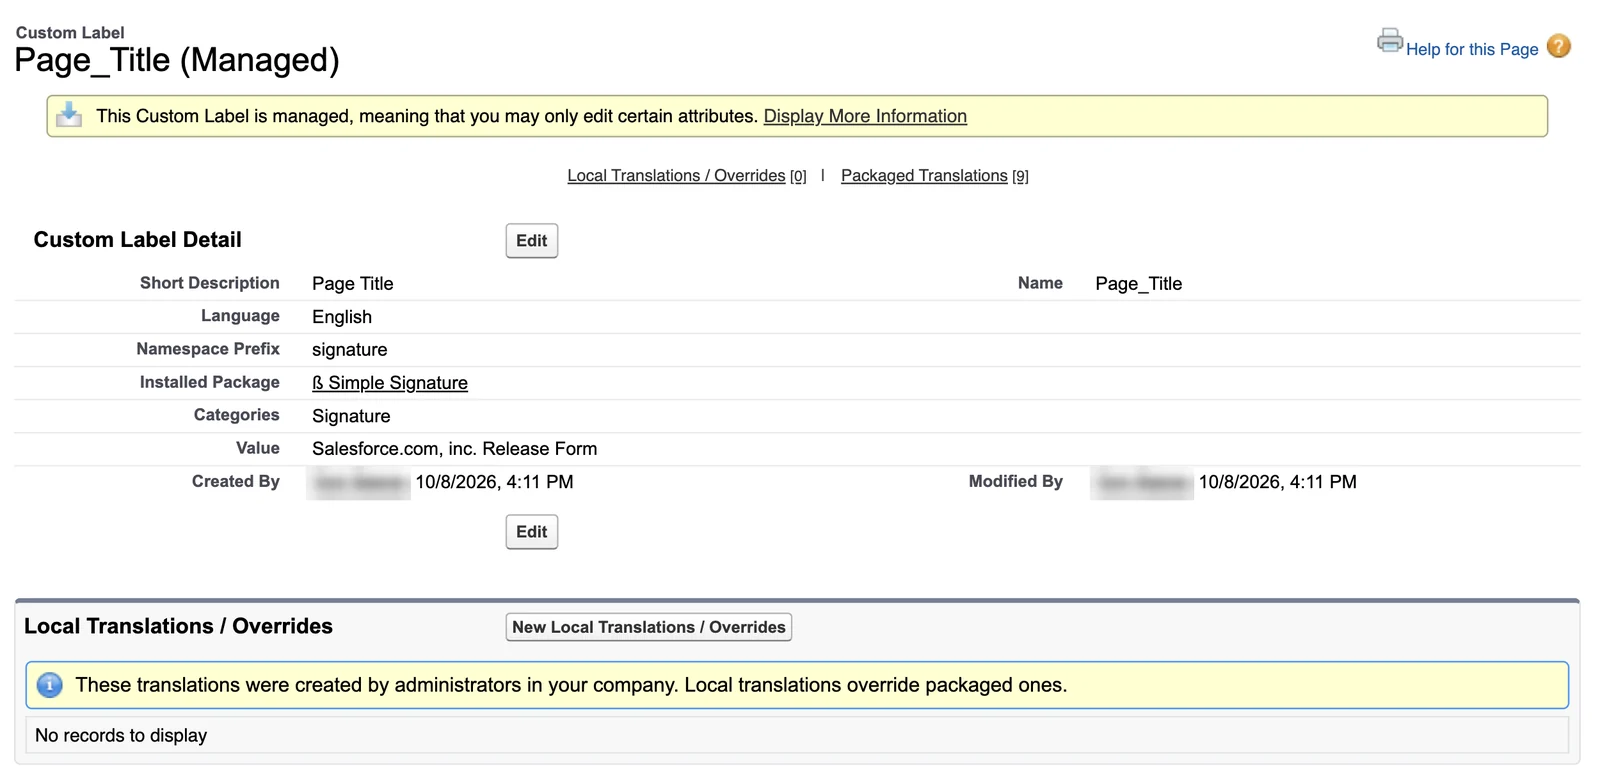
If the page has no such section, the Translation Workbench is off. In the Quick Find box, type Translation Language Settings and open that page. Turn the workbench on. Click Edit beside the language your users work in, for example English. Tick Active, add yourself as a translator, and click Save. Then come back to this step.
The page also shows Packaged Translations: the texts that come with the app in other languages.
Pick your language. Type the title of your form. Then click Save.
The New Translation page opens. In Language, pick the language your users work in, for example English. Do not press Enter in this list. Enter saves the form before you type the title.
In Translation Text, type the title you want at the top of the form, for example
Photo Release Form.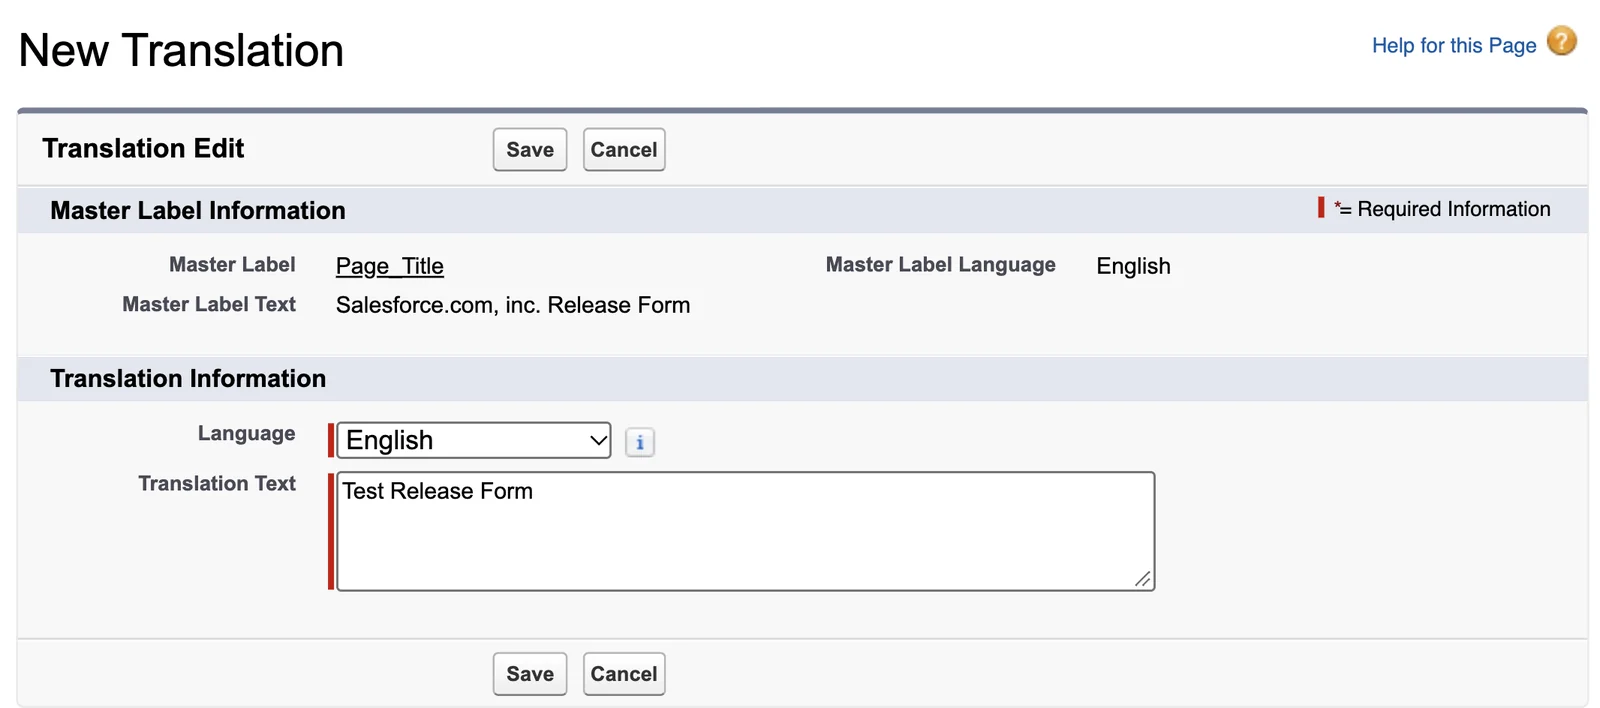
Add an override for each other language your users work in.
A user whose Salesforce language has no override sees the default title, or the packaged translation for that language. Do steps 3 and 4 again for each language. For a language under Packaged Translations, you can also click Override on its row.
Change Long_Legal_Text_1 the same way.
Go back to Custom Labels and click Long_Legal_Text_1. This is the text under the title, above the fields and the signature box. A label holds up to 1,000 characters.
Change Long_Legal_Text_2 the same way.
Put the rest of your legal text here. The form shows it right after Long_Legal_Text_1, on the same line. Today the form shows no space between the two texts, and TAF is fixing that. If your text fits in Long_Legal_Text_1, still move its last sentence here, so the sample text does not show.
Other labels you can change
Change these the same way, if you want other words on the form.
| Label | What it changes |
|---|---|
| Submit_Button | The words on the Save Signature button. |
| Cancel_Button | The words on the Cancel button. |
| City_Field, Date_Field, Date_Field_2 | The labels of the City, Date and Date of Birth fields. |
Applies to
Simple Signature 5.8.x. These steps come from the tested Simple Signature implementation guide, where they sit with the steps before and after them.
Was this helpful?
Thank you. It helps us know which articles work.
Related
Still stuck?
Open a case and paste the exact error text. A person reads every case.