

Take signatures in a Flow
How to do it in Simple Signature, one step at a time.
Last updated 9 Oct 2026
Paid version only. These steps do not count in the setup progress.
A screen Flow can hold a signature form as one of its screens. Use it when the signature is one step in a longer process, for example a check-in.
Open Flows. Click New Flow. Click Screen Flow.
Open Setup. In the Quick Find box, type Flows. Click Flows. Click New Flow. Flow Builder opens in a new browser tab, with the window New Automation. Under Frequently Used, click Screen Flow. The empty Flow opens at once.
Make a variable named recordId.
Click the Toolbox icon at the top left. Click Manager, then New Resource. Pick Variable as the Resource Type. In API Name, type
recordId, with exactly this case. Pick Text as the Data Type. Under Availability Outside the Flow, tick Available for input. Click Done.When the Flow starts from a record, Salesforce puts the ID of the record in this variable.
Add a screen.
Click the + on the line. The list Add Element opens. Under Interaction, click Screen. Type a Label, for example
Sign Screen. The Label is required.To keep the signer on the form until the signature saves, hide the footer: open Configure Footer and untick Show Footer. It is ticked at first.
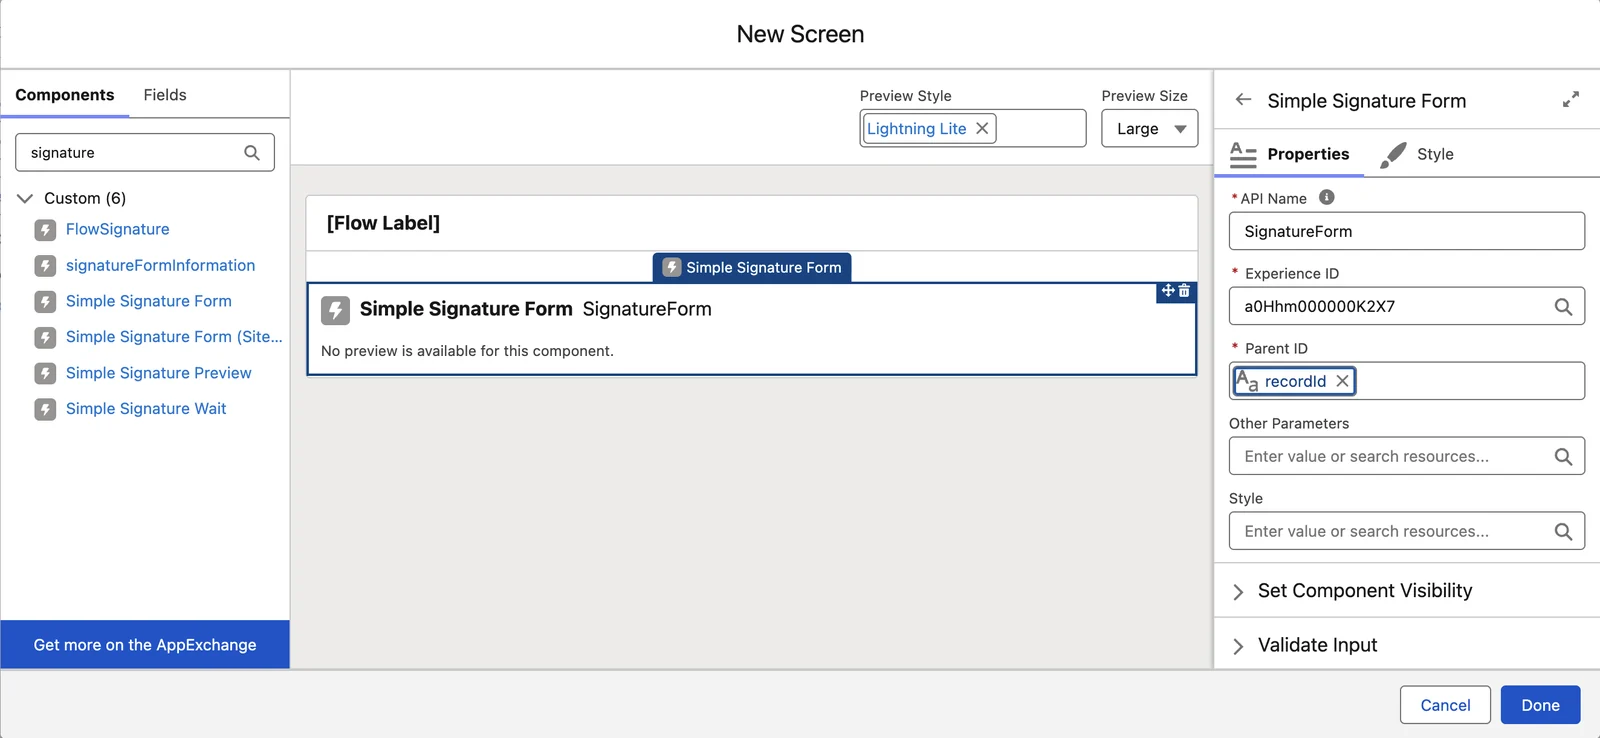
Drag Simple Signature Form onto the screen. Fill in its settings.
In the search box above the Components list, type
signature. Drag Simple Signature Form onto the screen. Do not use the one for a Site. Click it on the screen. Its settings show on the right. The screen shows no preview of the form.Setting Value API Name Type a name, for example SignatureForm.Experience ID Paste your Experience ID. Parent ID Pick the variable recordId.Other Parameters Leave it empty. Style Optional. CSS for the size of the form on the screen. When you click into Experience ID, a list of Flow resources opens and can cover Parent ID. Paste the ID, then click an empty part of the panel to close the list.
The Flow form shows no title and no legal text. To show them, drag a Display Text component onto the screen, above Simple Signature Form, and type them there.
Click Done. Save the Flow. Click Activate.
Click Save. In the window, type a Flow Label, for example
Sign Contact. Salesforce fills in the Flow API Name. Click Save. Then click Activate. Salesforce says the automation is active.To change an active Flow later, open it, make the change and click Save As New Version. Save is grey on an active Flow. Then activate the new version.
Make an action that starts the Flow.
Open Setup. Click Object Manager. Click Contact. Click Buttons, Links, and Actions. Click New Action. Pick Flow as the Action Type. Pick your Flow. Type a Label, for example
Sign in Flow. A Flow action has no Height. Click Save.Add the action to the page layout. Test it.
Drag it into Salesforce Mobile and Lightning Experience Actions, the same way as step 5 of Add the Sign button. Then open a test Contact. The new action can sit in the menu under the arrow at the end of the buttons. Click it.
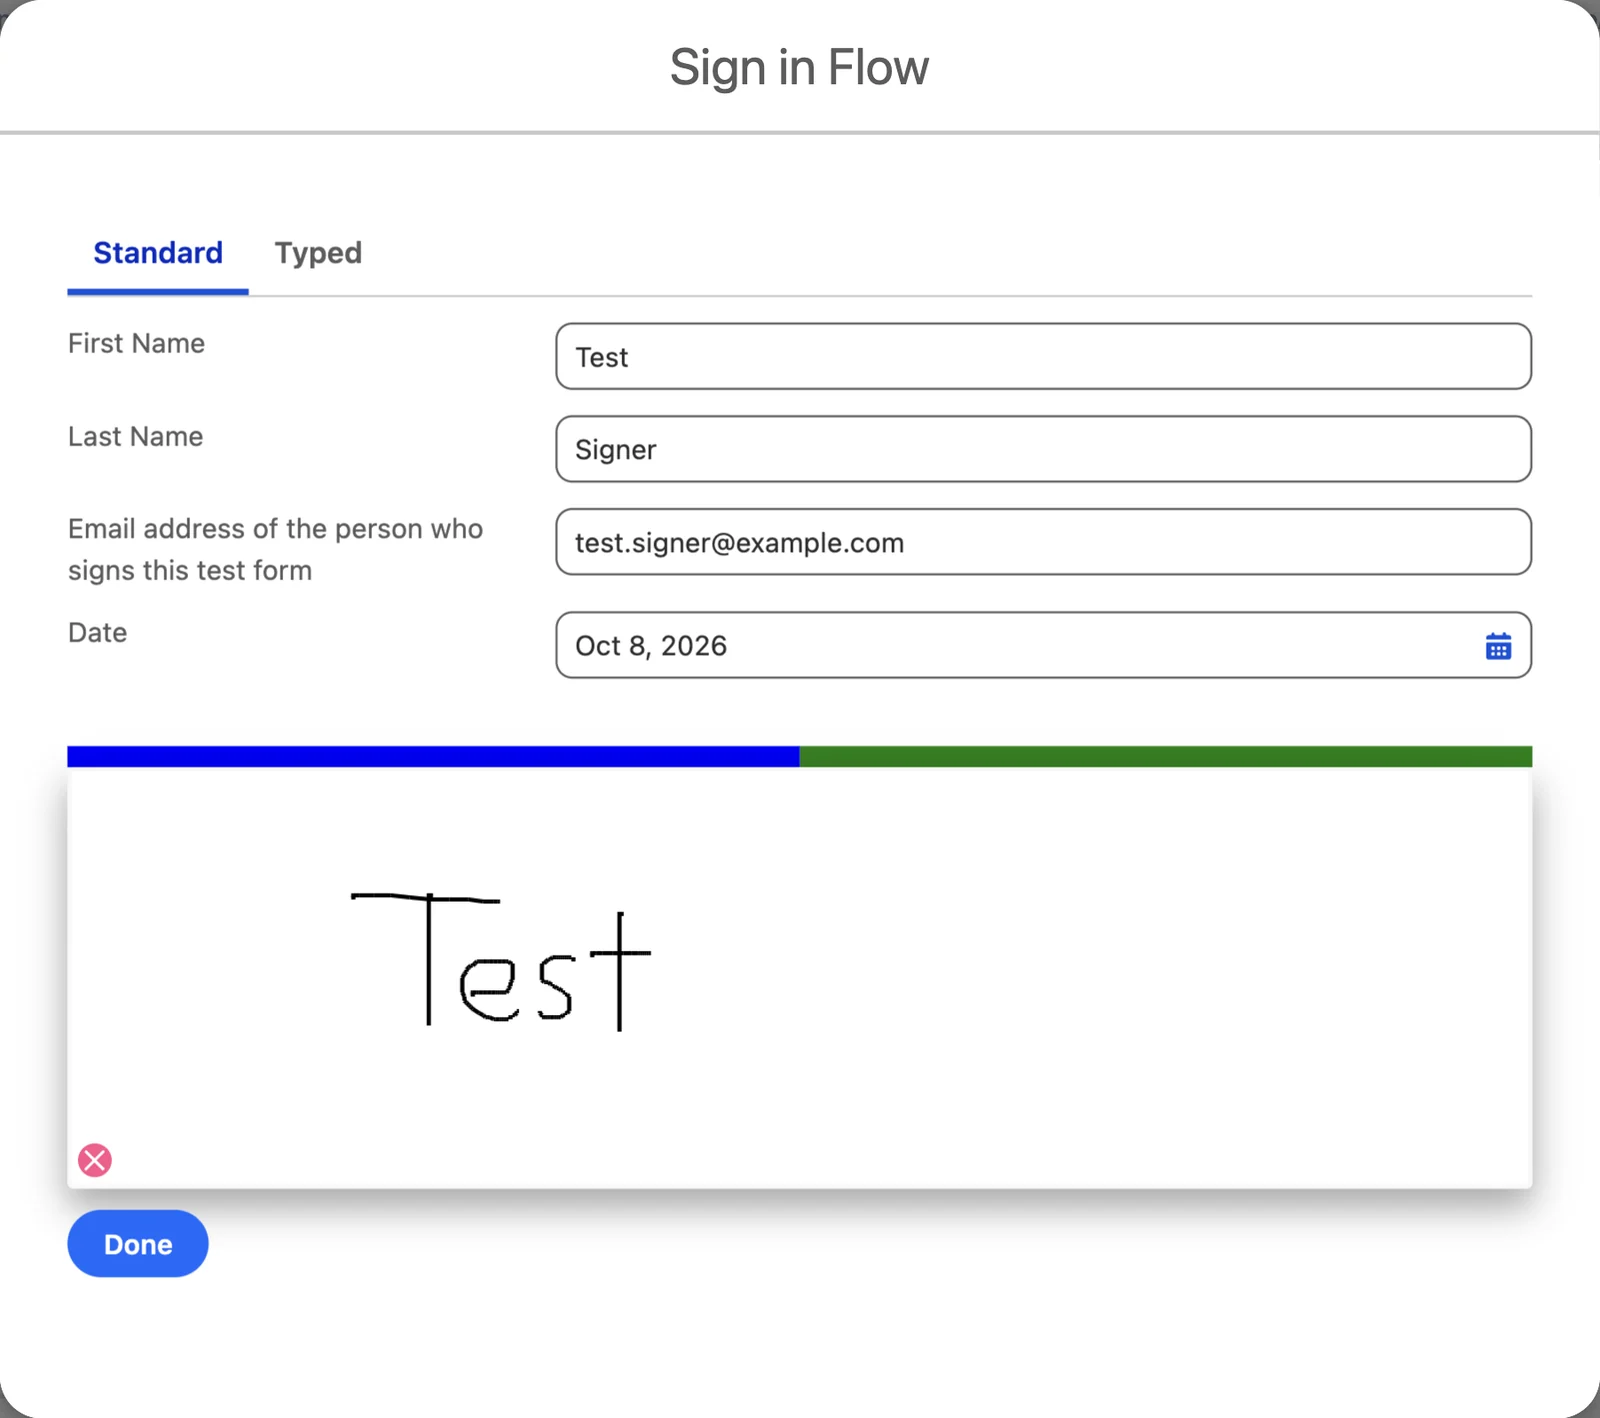
The form opens in a window. Its button reads Done. Done saves the signature and closes the window.
A Flow that shows a PDF first
With a document template, a Flow can make the Signature first, wait for a PDF preview and show it before the signer signs. See Show the PDF in a Flow before the signature.
Applies to
Simple Signature 5.8.x, paid version. These steps come from the tested Simple Signature implementation guide, where they sit with the steps before and after them.
Was this helpful?
Thank you. It helps us know which articles work.
Related
Still stuck?
Open a case and paste the exact error text. A person reads every case.