

Take a test signature
How to do it in Simple Signature, one step at a time.
Last updated 9 Oct 2026
Check the whole setup with one signature on a test Contact.
Open a test Contact.
In a sandbox with no contacts, open the Contacts tab and click New. Type a first name, a last name and an email address. Fill in any other field your org asks for, such as Account Name. Click Save.
Click Sign.
Sign sits with the buttons at the top right of the record, or in the menu under the arrow at the end of the buttons. The form opens with your title, your legal text, the fields First Name, Last Name, Email and Date, a signature box and the Save Signature button.
Fill in the fields.
Type the signer's first name, last name and email. The Date fills itself.
Sign in the box.
Use the mouse, or a finger on a touch screen.
Click Save Signature.
Simple Signature saves the signature and opens the new Signature record.
Check the Signature record.
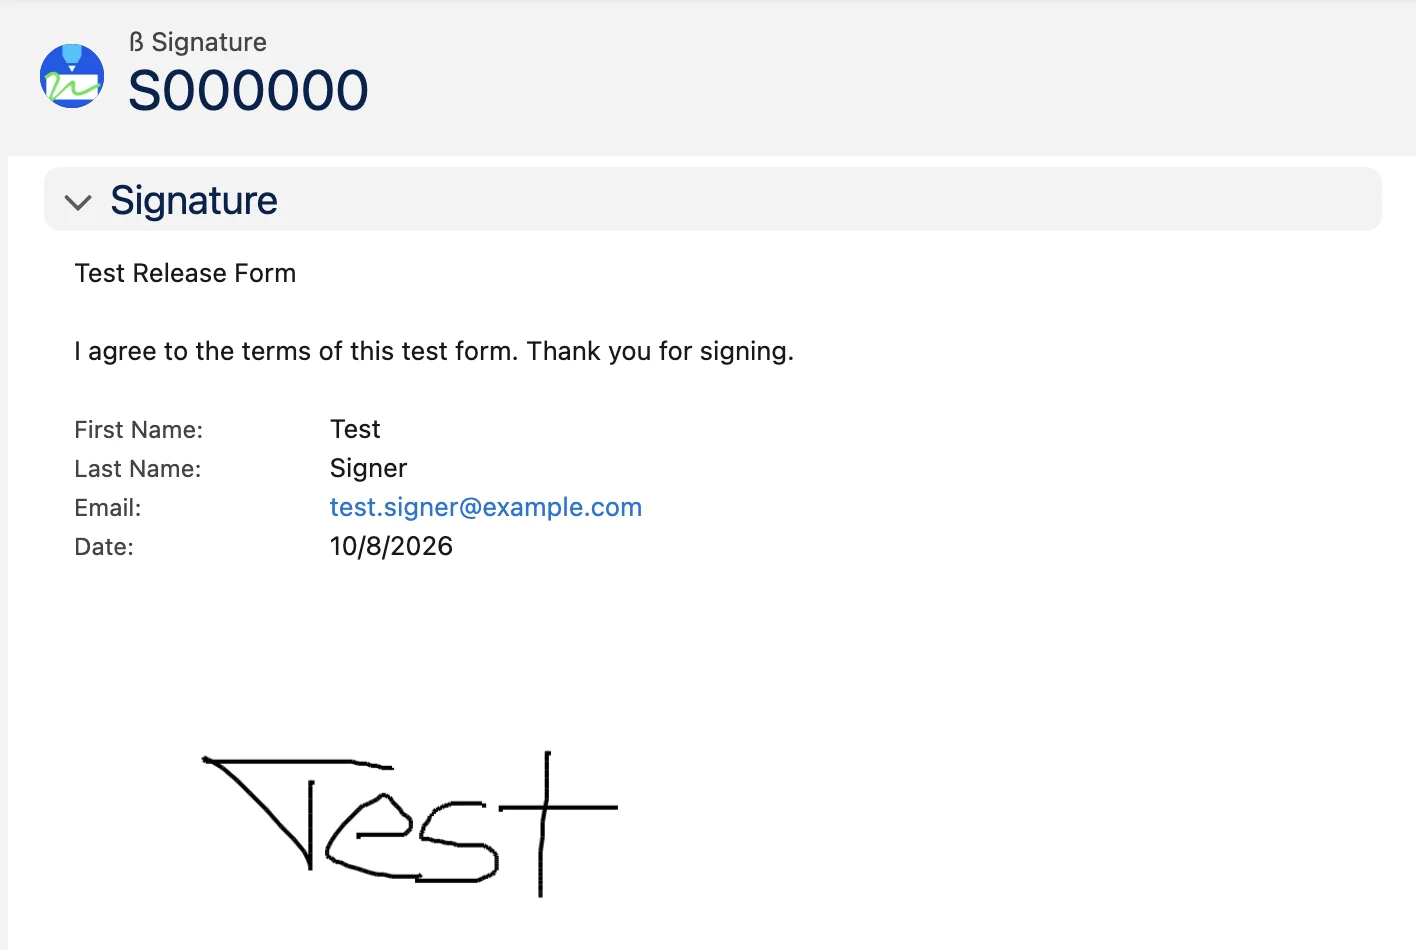
The Status reads Signed. The record shows the signature, the fields from the form, the title and the legal text the signer agreed to, and a link to the Contact. The record also shows in the ß Signatures related list on the Contact.
Sign on a phone
The Sign button works the same way in the Salesforce mobile app.
Applies to
Simple Signature 5.8.x. These steps come from the tested Simple Signature implementation guide, where they sit with the steps before and after them.
Was this helpful?
Thank you. It helps us know which articles work.
Related
Still stuck?
Open a case and paste the exact error text. A person reads every case.