

Set up the signature site
How to do it in Simple Signature, one step at a time.
Last updated 9 Oct 2026
Paid version only. These steps do not count in the setup progress.
A signature request sends the signer an email with a link. The link opens a page on a Salesforce Site, a public web site that your org hosts. The signer needs no Salesforce login.
The setup has four parts: the site, the connection between the site and Simple Signature, a button that sends the request, and the emails. Do them in this order.
Ask an admin who knows Sites
A site and its sharing rules control what people outside your org can see. If you have not set up a Salesforce Site before, ask an experienced admin to help, or open a case.
Open Sites. Click New.
Open Setup. In the Quick Find box, type Sites. Under Sites and Domains, click Sites.
The first time, the page asks you to register a domain for your sites, for example
yourcompany.my.salesforce-sites.com. Tick I have read and accepted the Salesforce Sites Terms of Use. Click Register My Salesforce Site Domain. The page then shows your site domain name.Then click New.
Fill in the site as below. Then click Save.
Field Value Site Label A name, for example Signatures. Salesforce fills in Site Name.Site Contact Salesforce fills in your name. Change it if another admin looks after the site. Default Web Address Type a short path in the box after the domain, for example sign. You can leave it empty if no other site uses the domain.Active Tick it. Active Site Home Page Pick SiteSignature, the signing page of Simple Signature.URL Rewriter Class Pick signatureURLRewriter.Cache public Visualforce pages Untick it. It is ticked at first. Other fields Leave them as they are. 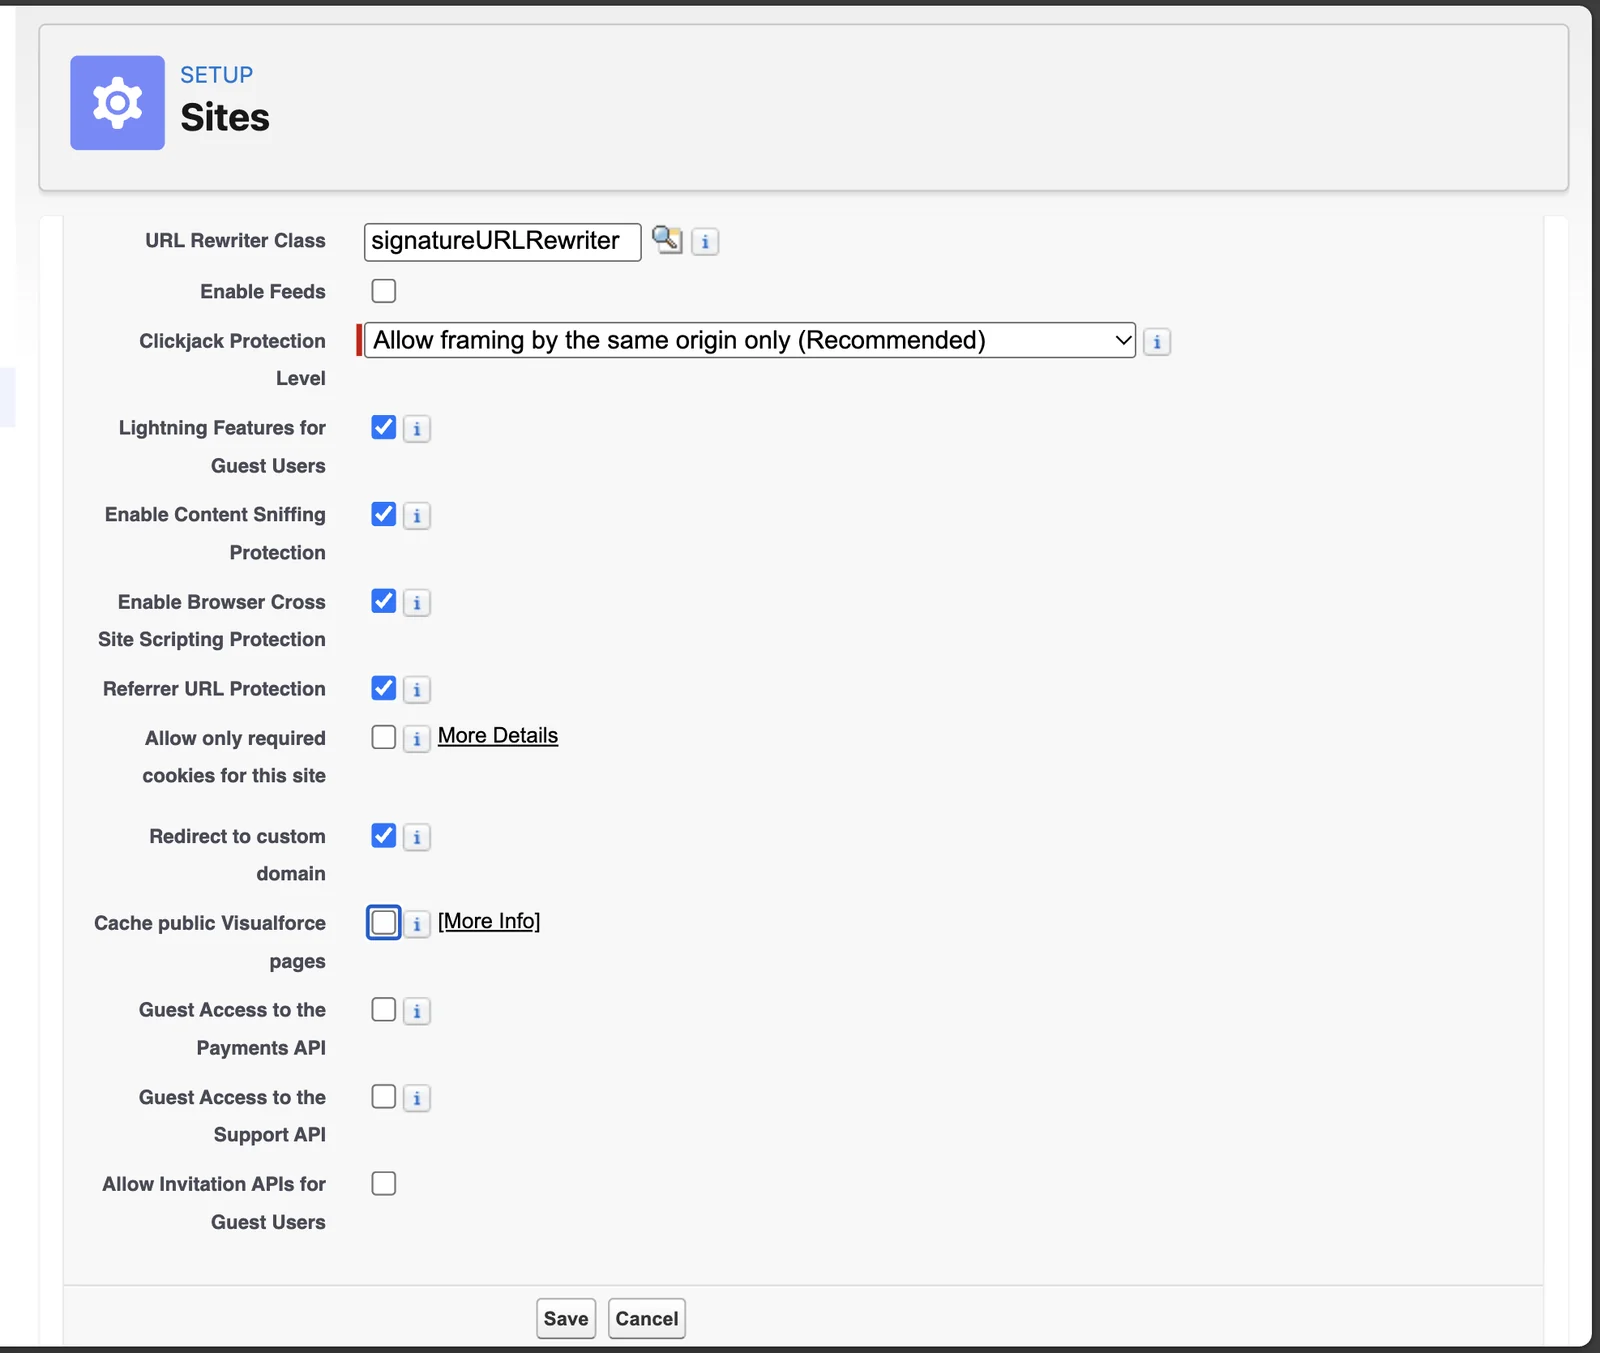
Write down the site address. Keep it for the next chapter.
The site page shows the address in two parts, in the Custom URLs list: Domain Name and Path. Put
https://in front and join them, for examplehttps://yourcompany.my.salesforce-sites.com/sign. Paste it into a text file.Add the two Simple Signature pages to the site.
On the site page, find Site Visualforce Pages. Click Edit. The page Enable Visualforce Page Access opens. Make sure these two pages sit in Enabled Visualforce Pages. Click Save.
signature.SiteSignature, the signing page. It is there already, because it is the home page.signature.TrackEmail, which records when the signer opens the email. Move it across.
Assign Simple Signature (Guest) to the guest user of the site.
Every site has a guest user. People outside your org work as this user on the site.
On the site page, click Public Access Settings. Click View Users. Click the guest user, for example Signatures Site Guest User. In Permission Set Assignments, click Edit Assignments. Add Simple Signature (Guest). Click Save.
The permission set gives the signer access to the fields of the form, for example First Name, Last Name and Email.
Share open Signature records with the guest user.
A guest user sees no records until a sharing rule shares them. Open Setup. In the Quick Find box, type Sharing Settings. Click Sharing Settings. Find ß Signature Sharing Rules. Click New.
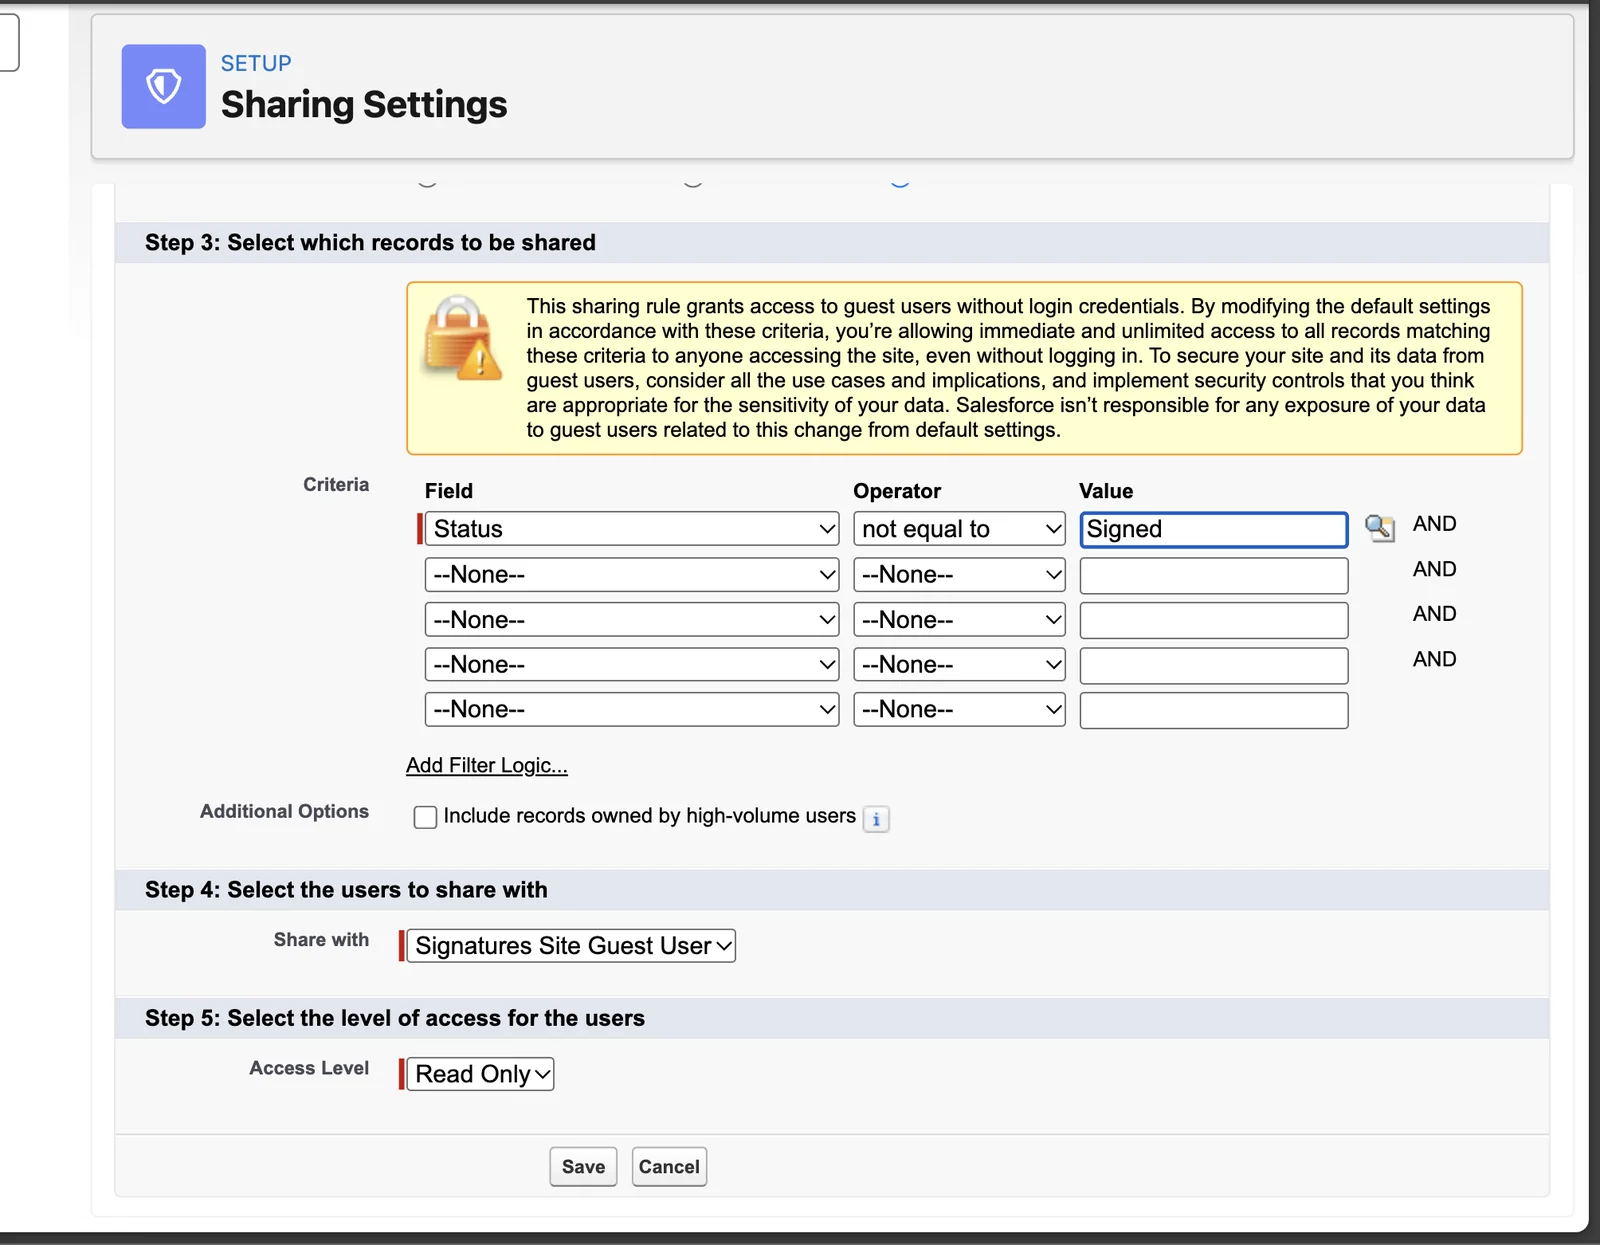
Field Value Label A name, for example Open requests for the site. Salesforce fills in Rule Name.Rule Type Pick Guest user access, based on criteria. Criteria Field Status, Operator not equal to, Value Signed. Pick each list value with the mouse. The Enter key saves the form too early, with the error Invalid or empty operator.Share with Pick the guest user of your site. Access Level Read Only. It cannot change. The page shows a yellow warning about guest user access. This rule shares only open requests, and only to read. Click Save. Salesforce can take some minutes to apply the rule. After the signature, the guest user no longer needs the record. This is why the rule leaves out Signed records.
Your own fields on the request form
Simple Signature (Guest) covers the standard fields of the form. You can add your own field to the field set. The signer then cannot see it or fill it in until you give the guest user access to it.
- On the site page, click Public Access Settings.
- With the new profile editor, click Object Settings, then ß Signatures. With the classic editor, find Custom Field-Level Security and click View beside ß Signature.
- Click Edit. Give Read and Edit access to your fields on the form. Click Save.
The form can show fields of another object, for example the Lead. Then add a sharing rule for that object too, the same way as step 6.
Applies to
Simple Signature 5.8.x, paid version. These steps come from the tested Simple Signature implementation guide, where they sit with the steps before and after them.
Was this helpful?
Thank you. It helps us know which articles work.
Related
Still stuck?
Open a case and paste the exact error text. A person reads every case.