

Add a Sign button for your experience
How to do it in Simple Signature, one step at a time.
Last updated 9 Oct 2026
Paid version only. These steps do not count in the setup progress.
The Sign button from Add the Sign button always shows the standard form. For a button that uses your experience, make a small Lightning component that holds the Experience ID. Then make an action from it. You copy the code from this guide.
Open the Developer Console.
Click the gear icon at the top right. Click Developer Console. It opens in a new window. If no window opens, allow pop-ups for Salesforce in your browser, and click Developer Console again.
Click File, then New, then Lightning Component.
In Name, type
SignContact. Use letters only, with no spaces. Leave the boxes under Component Configuration as they are. Click Submit.Replace the code in the Component tab with this code.
Select all the code in the tab and delete it. Then paste this code.
<aura:component implements="force:appHostable,flexipage:availableForAllPageTypes,flexipage:availableForRecordHome,force:hasRecordId,forceCommunity:availableForAllPageTypes,force:lightningQuickAction" > <aura:attribute name="recordId" type="String" /> <aura:attribute name="experienceId" type="String" default="XXXXXXXXXXXXXXX" /> <div class="slds"> <div class="slds-page-header" role="banner" id="mobHeader"> <div width="100%"> <span><center><img src="{!$Resource.signature__SSLogo}" style="height:25px;" /></center></span> <span class="slds-text-heading--small"><center><b>{!$Label.signature.Page_Title}</b></center></span> </div> </div> </div> <signature:SignatureFormInfo experienceId="{!v.experienceId}" showLegalText="true"></signature:SignatureFormInfo> <!-- THIS CODE CAN BE USED TO INCLUDE A PDF ABOVE THE FIELDS - MAKE UPDATES TO THE width, height, PDF_name - CHANGE THE "Id" PARAMETER AS APPROPRIATE FOR THE PDF - ADD THE NAME OF THE COMMUNITY NAME IF BEING USED IN A COMMUNITY, SUCH AS: /apex/community_name/PDF_name <iframe src="{! '/apex/PDF_name?isLight=yes&Id=' + v.recordId }" width="100%" frameBorder="0" height="500px"/> <br /> // --> <signature:SignatureFormConnector recordId="{!v.recordId}" ExperienceID="{!v.experienceId}" isQuickAction="true"/> <div align="center" style="color:gray"><br/><br />Powered by <i><a href="http://www.simplesignatureapp.com/" target="_blank">Simple Signature</a></i> from To A Finish</div> </aura:component>The code is the file StandaloneSignatureForm-Simple.html in the lightning folder of the Simple Signature sample code on GitHub.
Replace XXXXXXXXXXXXXXX with your Experience ID.
It sits in the line that starts with
<aura:attribute name="experienceId". Keep the quote marks. Put no space inside them.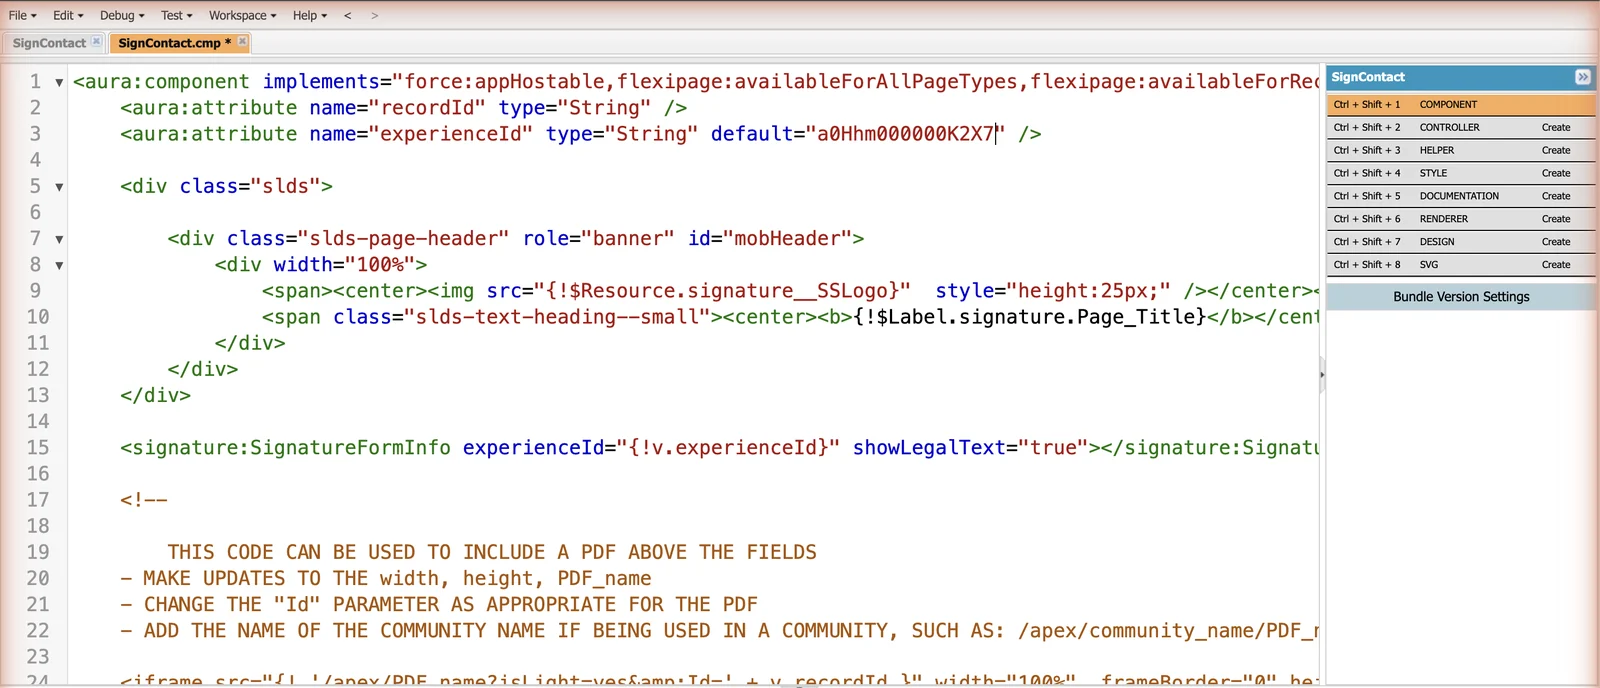
Save the component. Close the Developer Console.
Press Ctrl+S on Windows or Command+S on a Mac. You can also click File, then Save.
Rename the free Sign action.
Open Setup. Click Object Manager. Click Contact. Click Buttons, Links, and Actions. Click the arrow at the end of the Sign row. Click Edit. Change Label to
Sign (free). Click Save.The new button takes the label Sign. The old one leaves the page layout in step 8.
Click New Action. Fill it in as below. Then click Save.
Field Value Action Type Pick Lightning Component. Lightning Component Pick c:SignContact, the component you made.Height Type 600px.Label Type Sign.Name Salesforce fills in Sign. Clear it and type Sign_Experience. The name Sign belongs to the free action.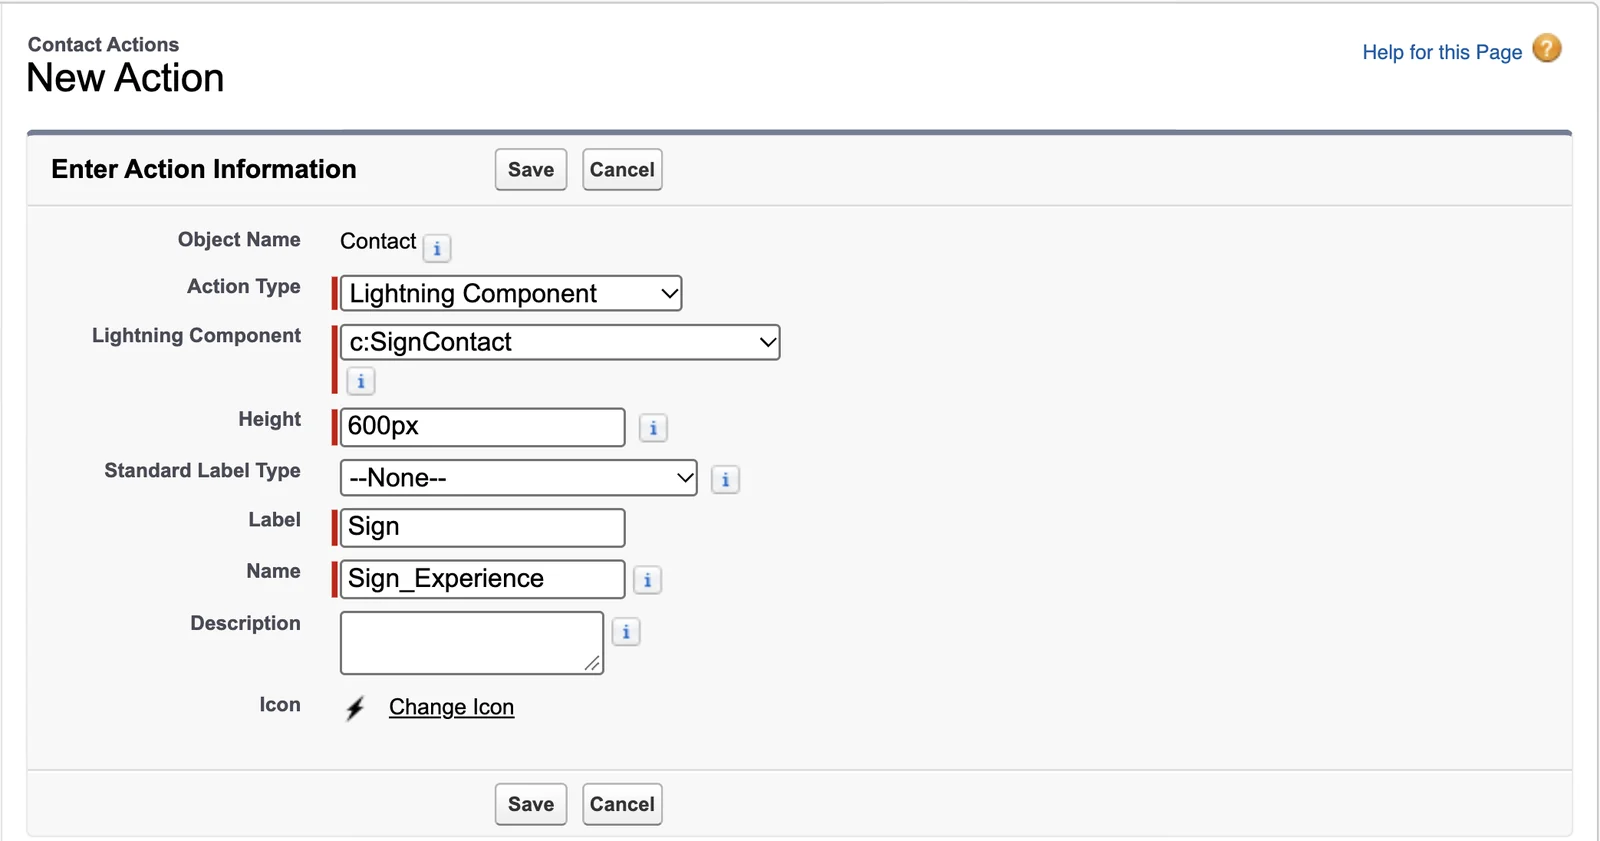
Swap the actions on the page layout.
Open Page Layouts and the layout from step 4 of Add the Sign button. In the palette, click Mobile & Lightning Actions. Drag Sign (free) out of Salesforce Mobile and Lightning Experience Actions, back to the palette. Drag the new Sign into that section. Click Save.
Take a test signature with the new button.
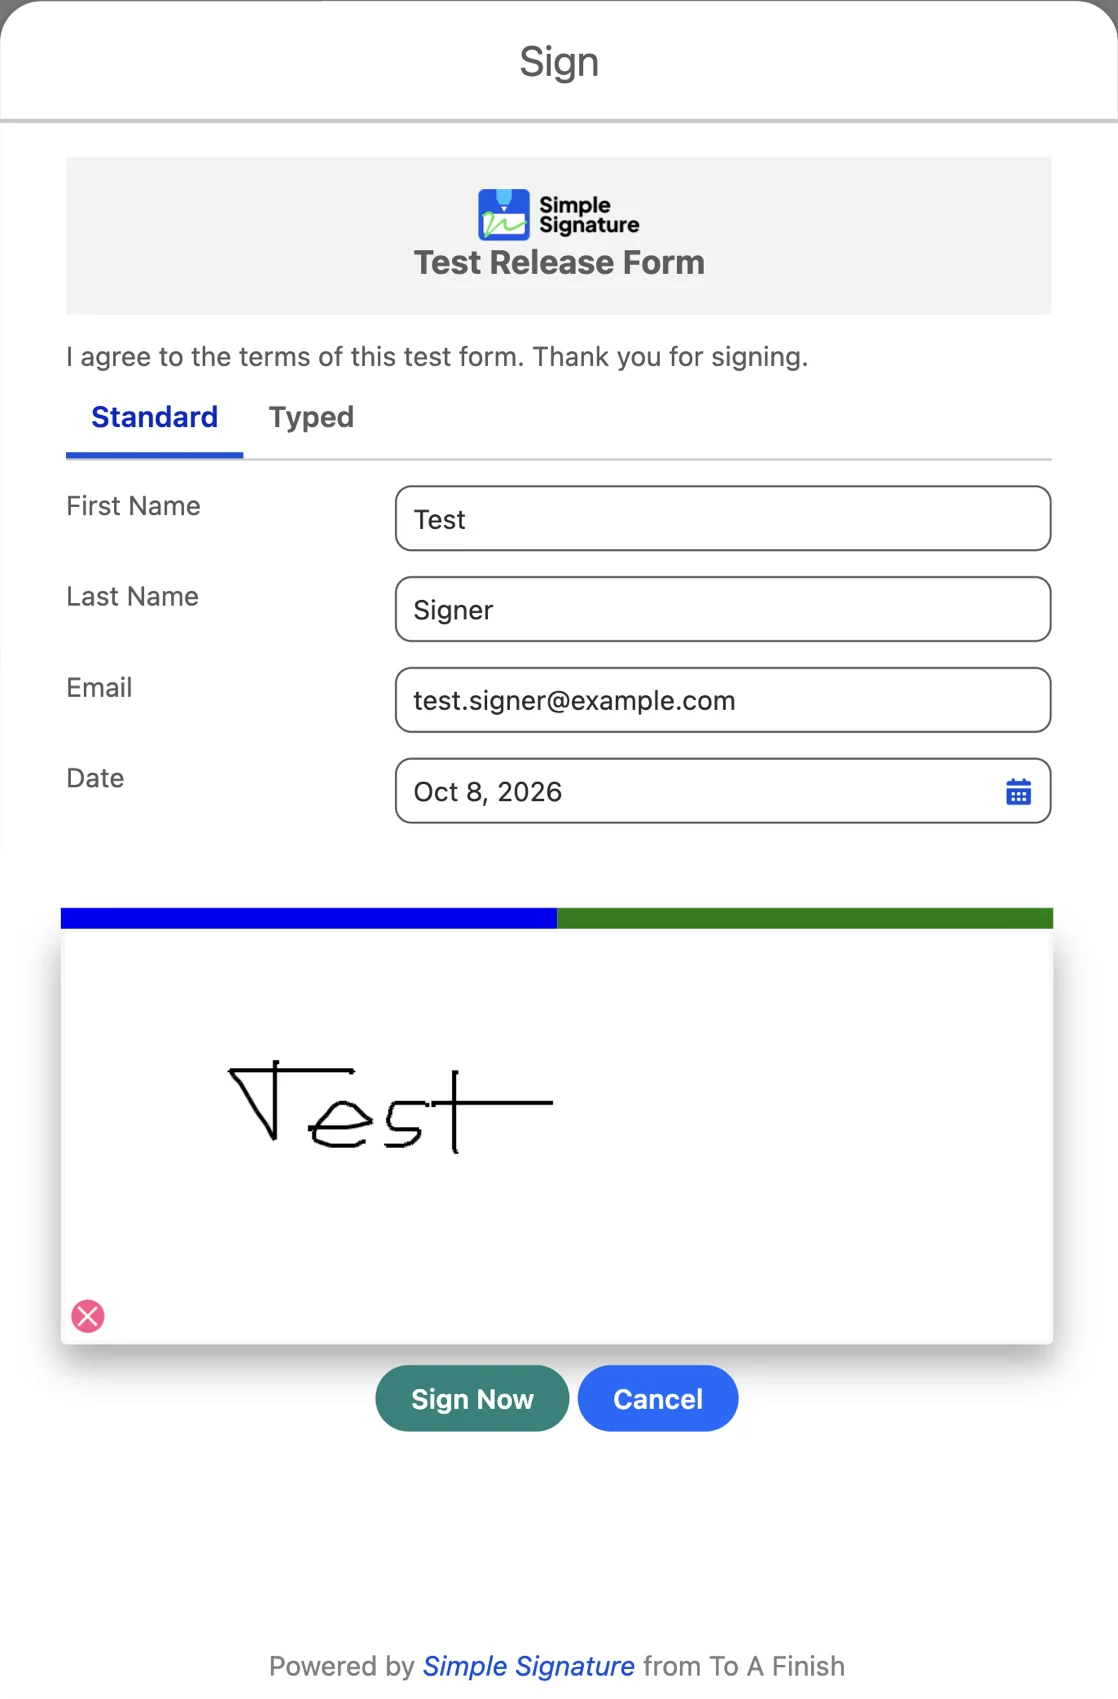
Follow Take a test signature. The form now follows your experience.
For developers
The same GitHub folder holds a Lightning web component version of this button, StandaloneSignatureFormLWC-Simple, and a full-screen form, Fullscreen_Component. Open a case if you want help with them.
Applies to
Simple Signature 5.8.x, paid version. These steps come from the tested Simple Signature implementation guide, where they sit with the steps before and after them.
Was this helpful?
Thank you. It helps us know which articles work.
Related
Still stuck?
Open a case and paste the exact error text. A person reads every case.