

Connect the site to Simple Signature
How to do it in Simple Signature, one step at a time.
Last updated 9 Oct 2026
Paid version only. These steps do not count in the setup progress.
Simple Signature needs a connection to your org to save the signatures that come in from the site. In this chapter you set the site address, make an External Client App and authorize the connection. An External Client App is the Salesforce record that lets an outside page connect to your org.
The user who authorizes holds the connection
Use an admin user with Simple Signature (Admin), with full access to ß Signature and to the objects you request signatures from. Simple Signature saves the signed PDF as this user. It also sends the email with the signed PDF as this user, unless you set a sender address. See The sender of the emails.
Open the Configure page. Click the Configuration tab.
Open it the same way as in step 2 of Turn on the paid version. Use Lightning Experience for steps 1 to 8.
Paste the site address into Site URL for Signature Requests.
End the address with a slash, for example
https://yourcompany.my.salesforce-sites.com/sign/. The label on the page says so too: include final '/'.Turn on the three options below.
- Process Signatures in Batch Mode. Simple Signature then processes every Signature record, however it is made. TAF advises it strongly.
- Email Requested Signature with PDF Attachment. The request email then carries the PDF to sign. The label ends with (please turn off workflow rule). The old Send Email workflow rules of Simple Signature must stay off.
- Run PDF Automation on Save, under the automation options. Without it, the signer signs, but Simple Signature makes no signed PDF and sends no second email.
In a new install, all three are off.
Check Template VisualForce Page for PDF. Click Save Settings.
Leave it empty to use the standard PDF of Simple Signature. To use a PDF page of your own, type its name with
c__in front, for examplec__Signature_PDF. See Make a PDF page in Visualforce. Withoutc__, Simple Signature cannot find the page.Click Save Settings. Reload the page and check that your values stayed.
Click the Site Configuration tab. Add a remote site, if the tab asks for one.
Under Connected APP Configuration, leave the option on Default. A change there resets the authorization.
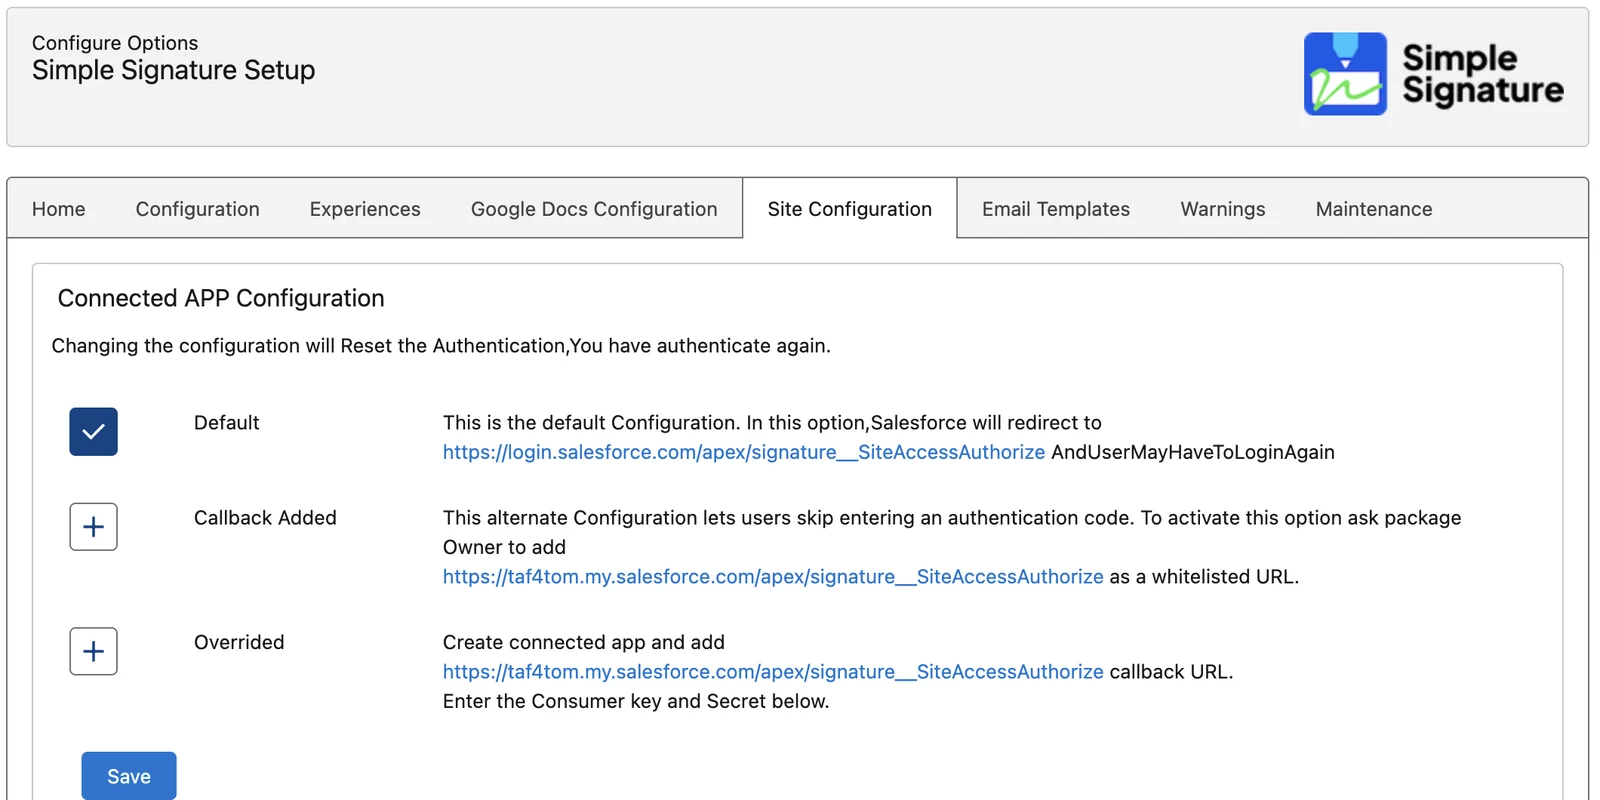
The Authorize Site box can ask you to add your org address to the remote site settings, for example
https://yourcompany.my.salesforce.com. Copy the address from the message. Open Setup. In the Quick Find box, type Remote Site Settings. Click New Remote Site. Type a name, for exampleSimpleSignatureSite. Paste the address into Remote Site URL. Click Save.Open External Client App Manager. Click New External Client App.
Open Setup. In the Quick Find box, type External Client App Manager. Click it.
Fill in the app as below. Then click Create.
Section Field Value Basic Information External Client App Name A name, for example Simple Signature Site. Salesforce fills in API Name.Basic Information Contact Email Your email address. It is required. API (Enable OAuth Settings) Enable OAuth Tick it. App Settings Callback URL, in production https://login.salesforce.com/apex/signature__SiteAccessAuthorizeApp Settings Callback URL, in a sandbox https://test.salesforce.com/apex/signature__SiteAccessAuthorizeApp Settings OAuth Scopes Move these three scopes to Selected OAuth Scopes. Manage user data via APIs (api). Manage user data via Web browsers (web). Perform requests at any time (refresh_token, offline_access). Security Require Proof Key for Code Exchange (PKCE) extension for Supported Authorization Flows Leave it ticked. Older guides said to untick it. Salesforce now requires it. Other sections Leave them as they are. 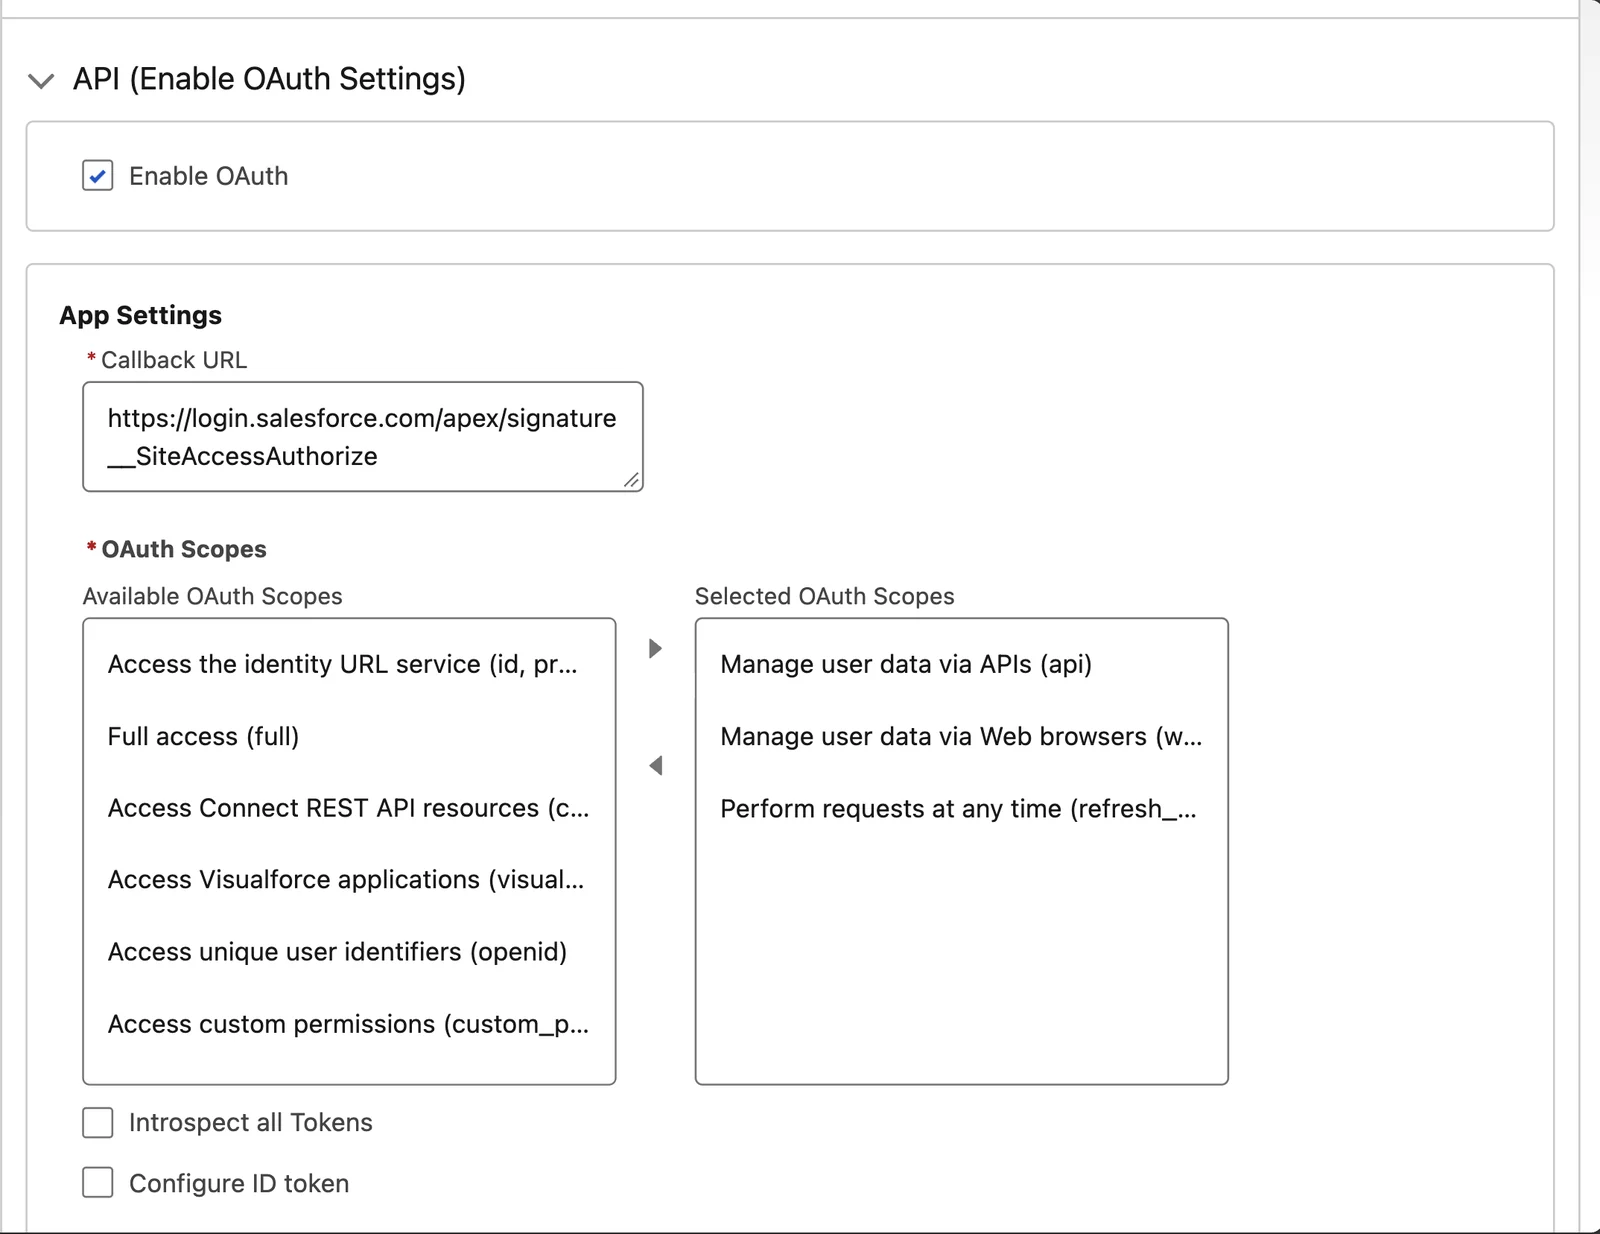
Copy the Consumer Key and the Consumer Secret.
After Create, the app opens on its Policies tab. Click the Settings tab. Click OAuth Settings to open that section. It is closed at first. Click Consumer Key and Secret. A new browser tab opens. Salesforce sends you a code to check your identity. Type the code.
Copy the two values into a text file. Keep them private. Anyone who has them can try to connect to your org.
If Salesforce shows Insufficient Privileges here, see If something does not work.
Switch to Salesforce Classic.
Click your profile picture at the top right. Click Switch to Salesforce Classic.
The authorization works only in Classic. In Lightning it can fail with no message, or with the message login.salesforce.com refused to connect.
Open the Configure page in Classic. Click the Site Configuration tab.
Classic is the older look of Salesforce. Click Setup at the top right. If a window Welcome to the Improved Setup! opens, close it. In the Quick Find box, type Installed Packages. Click Configure beside ß Simple Signature.
Paste the key and the secret. Click Save Settings.
Under External Client App Settings, paste the Consumer Key into Client Id. Paste the Consumer Secret into Client Secret. Click Save Settings.
Always save before you authorize, also when you changed nothing.
Click Authorize. Sign in and allow access.
Sign in with the admin user from the note at the top of this chapter, if Salesforce asks. The page Allow Access? names your app and the access it asks for. Click Allow.
After a few seconds, the page shows Date, User and Updated By above the Authorize button. No date means no authorization. Then click Authorize again. In some orgs the first click fails. Later, the date changes each time the refresh job runs.
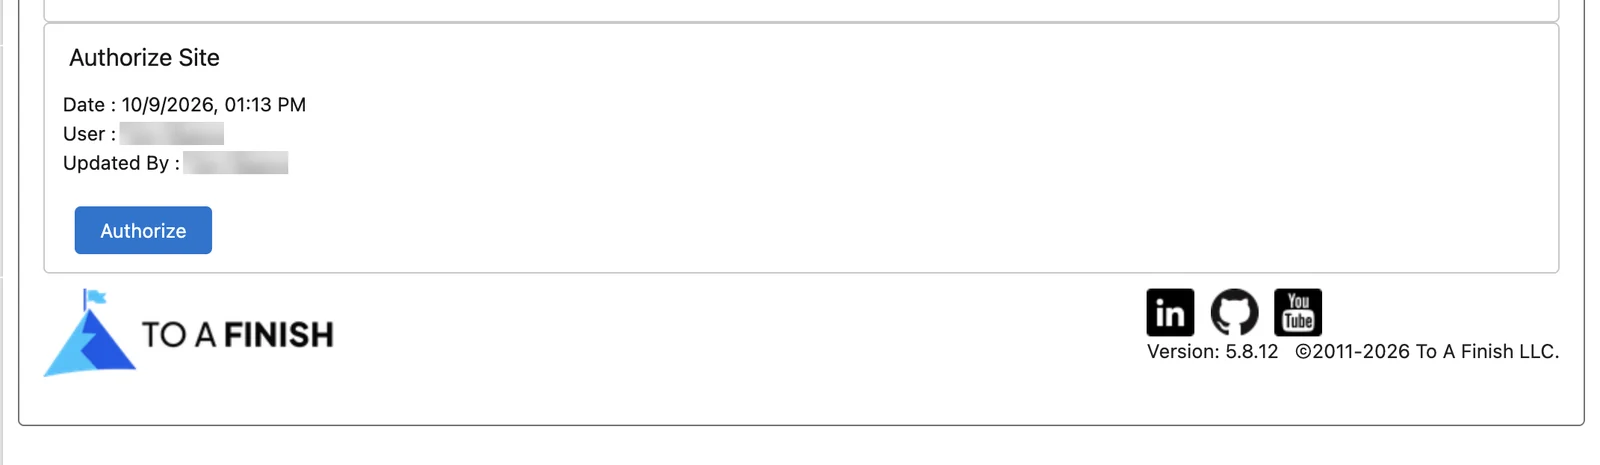
Schedule the refresh job.
In Schedule Refresh Job Interval (Hours), type
1. Click Schedule Refresh Job. The job renews the connection every hour. Without it, the connection can stop.To check the job, open Setup and type Scheduled Jobs in the Quick Find box. The page All Scheduled Jobs lists Refresh Token Job Simple Signature.
Switch back to Lightning Experience.
Click Switch to Lightning Experience at the top of the page.
Authorize the connection again
The connection can stop, for example after a Salesforce outage. The signer then sees the message Site Configuration not done.Please ask Admin to Authorize.
To fix it, do steps 9 to 12 again. Switch to Classic. Open the Site Configuration tab. Click Save Settings. Then click Authorize.
Applies to
Simple Signature 5.8.x, paid version. These steps come from the tested Simple Signature implementation guide, where they sit with the steps before and after them.
Was this helpful?
Thank you. It helps us know which articles work.
Related
Still stuck?
Open a case and paste the exact error text. A person reads every case.