

Build a signature experience
How to do it in Simple Signature, one step at a time.
Last updated 9 Oct 2026
Paid version only. These steps do not count in the setup progress.
A signature experience is a saved set of settings for one signature form. It sets which fields show, how the signer signs, where Salesforce goes after the signature, and more. Each experience gets an Experience ID. A Sign button, a record page or a Flow uses that ID to show the form your way.
Open the Configure page. Click the Experiences tab.
Open the Configure page the same way as in step 2 of Turn on the paid version. The Simple Signature app also has a ß Configure tab that opens the same page.
Click Add an Experience. Type a name.
Type a Name, for example
Contact Release. The Description is optional. Use it to say where the form runs.Click Add Parameter. Pick a parameter and set its value.
Each parameter changes one thing on the form. Pick it in the list in the Parameter column. A parameter with a checkbox is on when you tick it. Other parameters take a value. Type it in Hardcoded Value/Field Reference, and leave Is Field Reference? unticked.
If the list in the Parameter column does not open with a click, click it once, type the parameter name and press Enter.
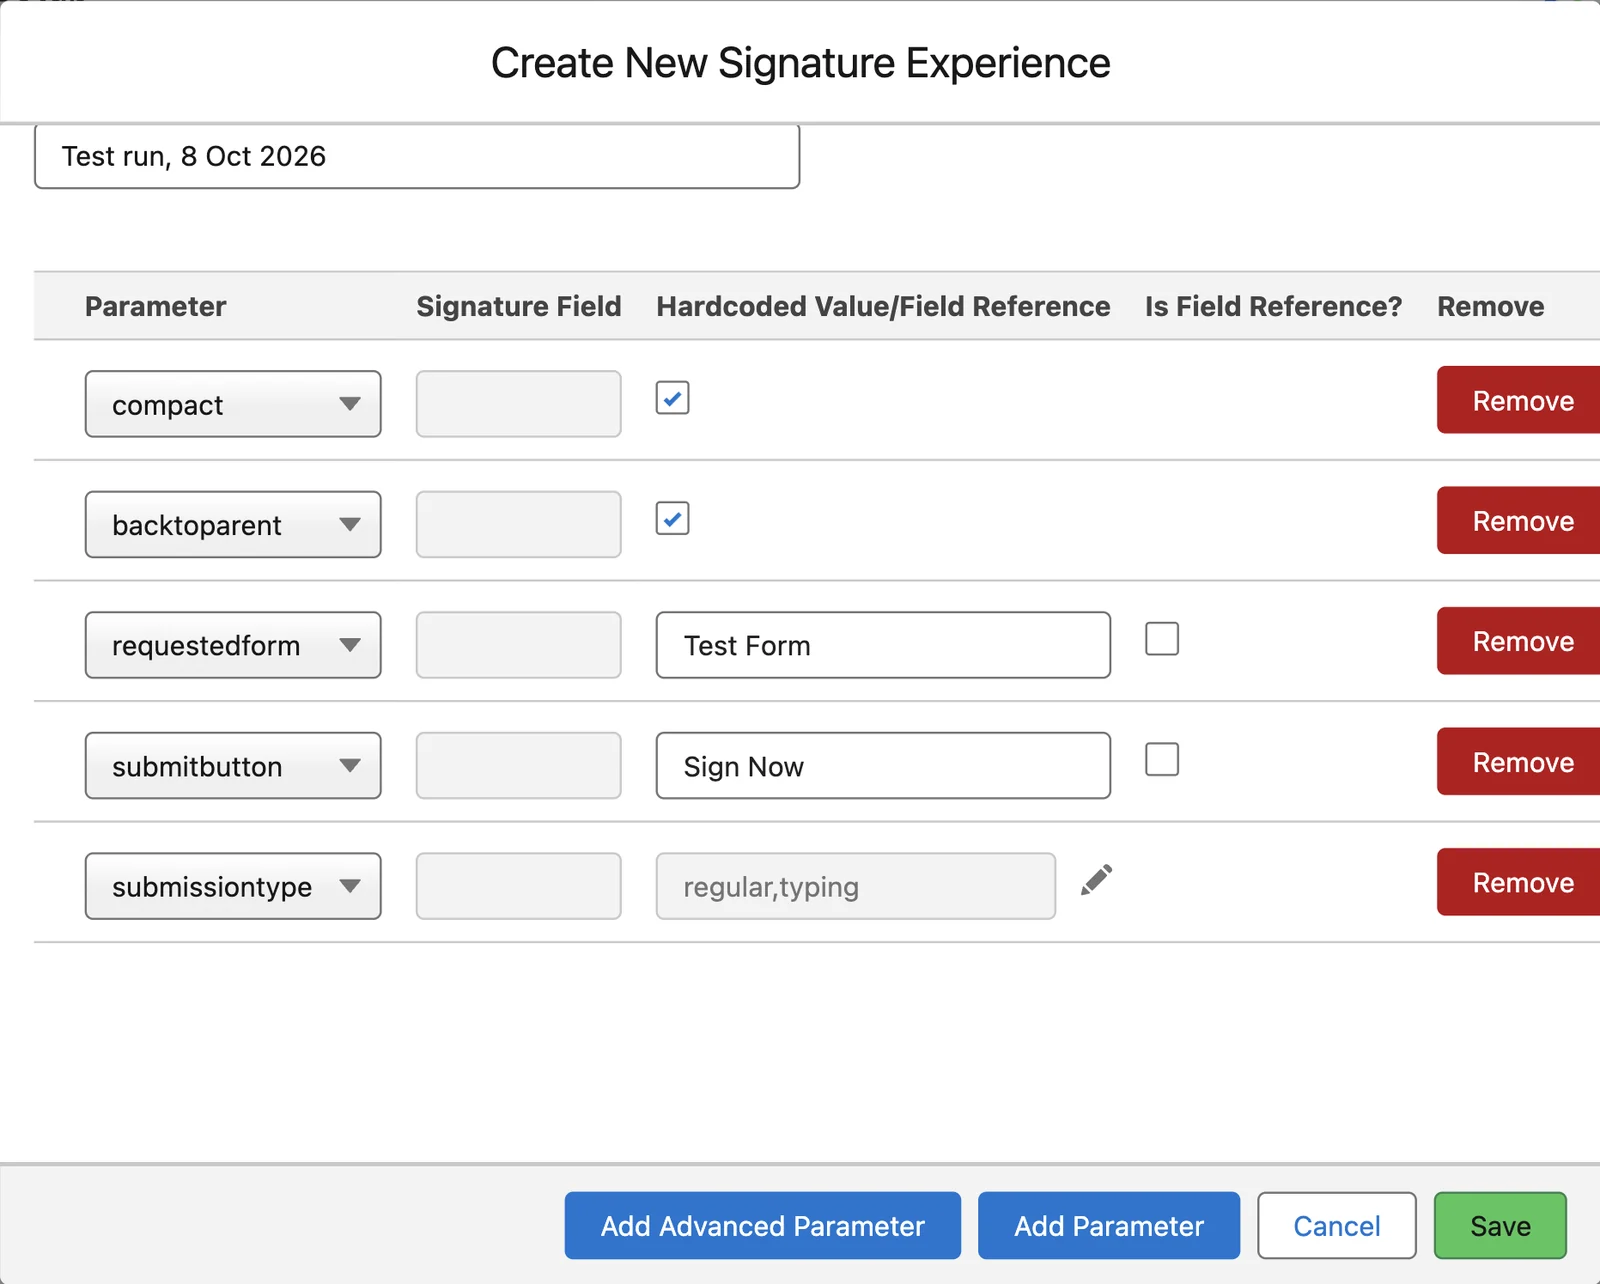
Add the other parameters you need.
The table lists the parameters for the form itself. Add Advanced Parameter opens the parameters that orgs need less often. The parameters for signature requests are in More request options. The parameters for PDF documents are in Document parameters for an experience.
Parameter Button What it does fieldsetAdd Parameter Shows the fields of another field set on the form. The value is the field set name. Without it, the form uses SignatureFields. compactAdd Parameter Puts each label on the same line as its field. fieldreadonlyAdd Parameter Shows the fields you list as read-only. List field API names, with commas between them. fieldheaderAdd Parameter Shows the fields you list as headings. fieldhidelabelAdd Parameter Shows the fields you list with no label. hideblanksAdd Parameter Hides the fields that are blank. defaultvalue_Add Parameter Puts a value in a field of the Signature. Pick the field in Signature Field. Type the value in Hardcoded Value/Field Reference. contactfieldAdd Parameter For a parent record that is not a Contact. Gives the API name of the Contact lookup field on the parent. The PDF and email features need a Contact on the Signature. backtoparentAdd Parameter After the signature, opens the parent record, not the new Signature record. returlAdd Parameter After the signature, opens this web address. hidecancelAdd Parameter Hides the Cancel button. initialsAdd Parameter Adds a second, smaller box for the signer's initials. multisignatureAdd Parameter Shows up to 5 signature boxes. The value is their names, with commas between them. The first box is required. A * in front of a name makes that box required too, for example One,*Two.requestedformAdd Parameter Gives the form a name. The name goes on each Signature record, so you can tell the forms apart. preauthorizedAdd Parameter Skips the eSignature Agreement window for this form. See Brand the form. submissiontypeAdd Advanced Parameter The ways the signer can sign. Click the pencil. In the window Select option, pick one or more. Regular, the default, is a mouse or a finger. Typed lets the signer type a name and pick a font. None shows a checkbox. Paper lets the signer print, sign on paper and upload a scan. Topaz uses a Topaz signature pad. submissiontypedefaultAdd Advanced Parameter The way to sign that shows first, when the form offers more than one. submitbuttonAdd Advanced Parameter The text on the button that saves the signature, for this form only. Paper signatures need one more step
A paper signature saves with the Status Uploaded, not Signed. Simple Signature cannot check the scan. After a person checks it, a Flow or the person sets the Status to Signed.
Click Save.
Save sits at the bottom of the experience.
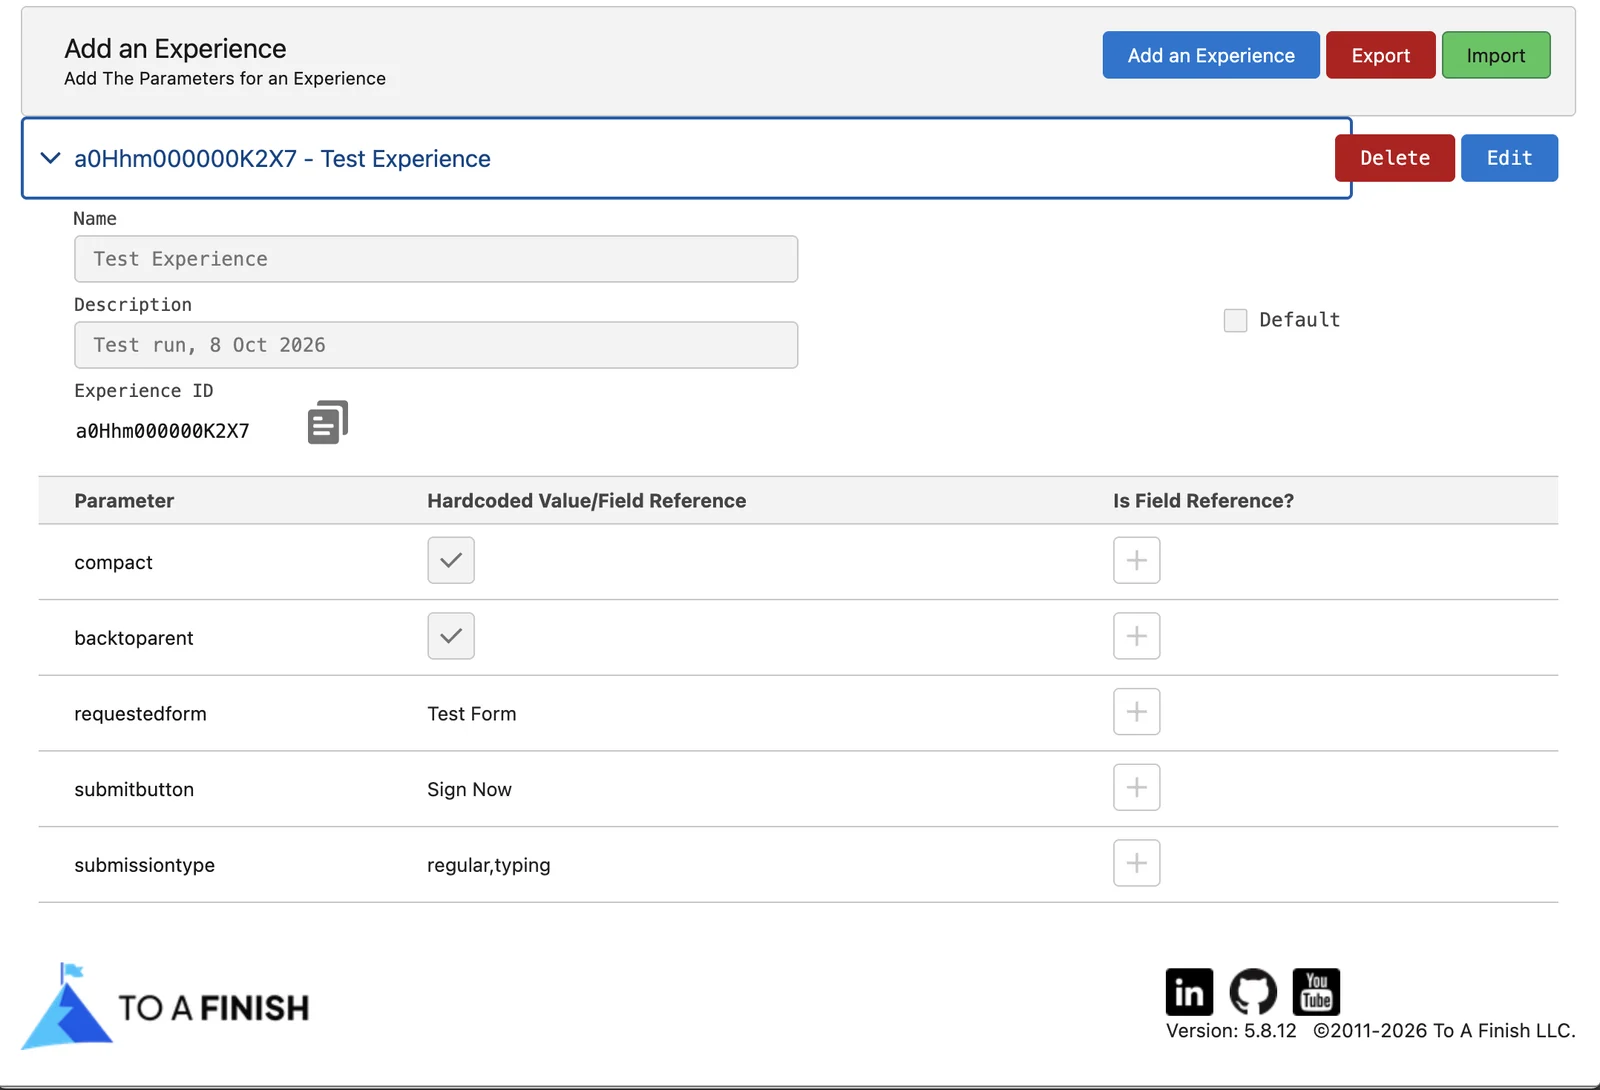
Copy the Experience ID.
The saved experience shows its Experience ID. Click the copy icon beside it. Keep the ID at hand. The next chapters use it.
A form with other fields
The free version always uses the SignatureFields field set. With the paid version, an experience can use another one.
- Open Setup. Click Object Manager. Click ß Signature. Click Field Sets. Click New.
- Type a Field Set Label, for example
Visitor Fields. Salesforce fills in the Field Set Name. Fill in Where is this used?, then click Save. - Drag the fields for this form into In the Field Set. Click Save.
- In the experience, add the parameter
fieldset. Its value is the Field Set Name.
Applies to
Simple Signature 5.8.x, paid version. These steps come from the tested Simple Signature implementation guide, where they sit with the steps before and after them.
Was this helpful?
Thank you. It helps us know which articles work.
Related
Still stuck?
Open a case and paste the exact error text. A person reads every case.