

Make a PDF template in Google Docs
How to do it in Simple Signature, one step at a time.
Last updated 9 Oct 2026
Paid version only. These steps do not count in the setup progress.
A Google Docs template is a Google document with merge codes in it. Simple Signature fills in the Salesforce data and the signature, and saves the result as a PDF. TAF advises Google Docs for most orgs. A free Google account works too.
Use a standard Salesforce user
A user with a Salesforce Platform license cannot connect Simple Signature to Google.
Switch to Salesforce Classic. Open the Configure page.
Click your profile picture at the top right. Click Switch to Salesforce Classic. Click Setup. In the Quick Find box, type Installed Packages. Click Configure beside ß Simple Signature.
The Google connection works only in Classic, the same as the site authorization.
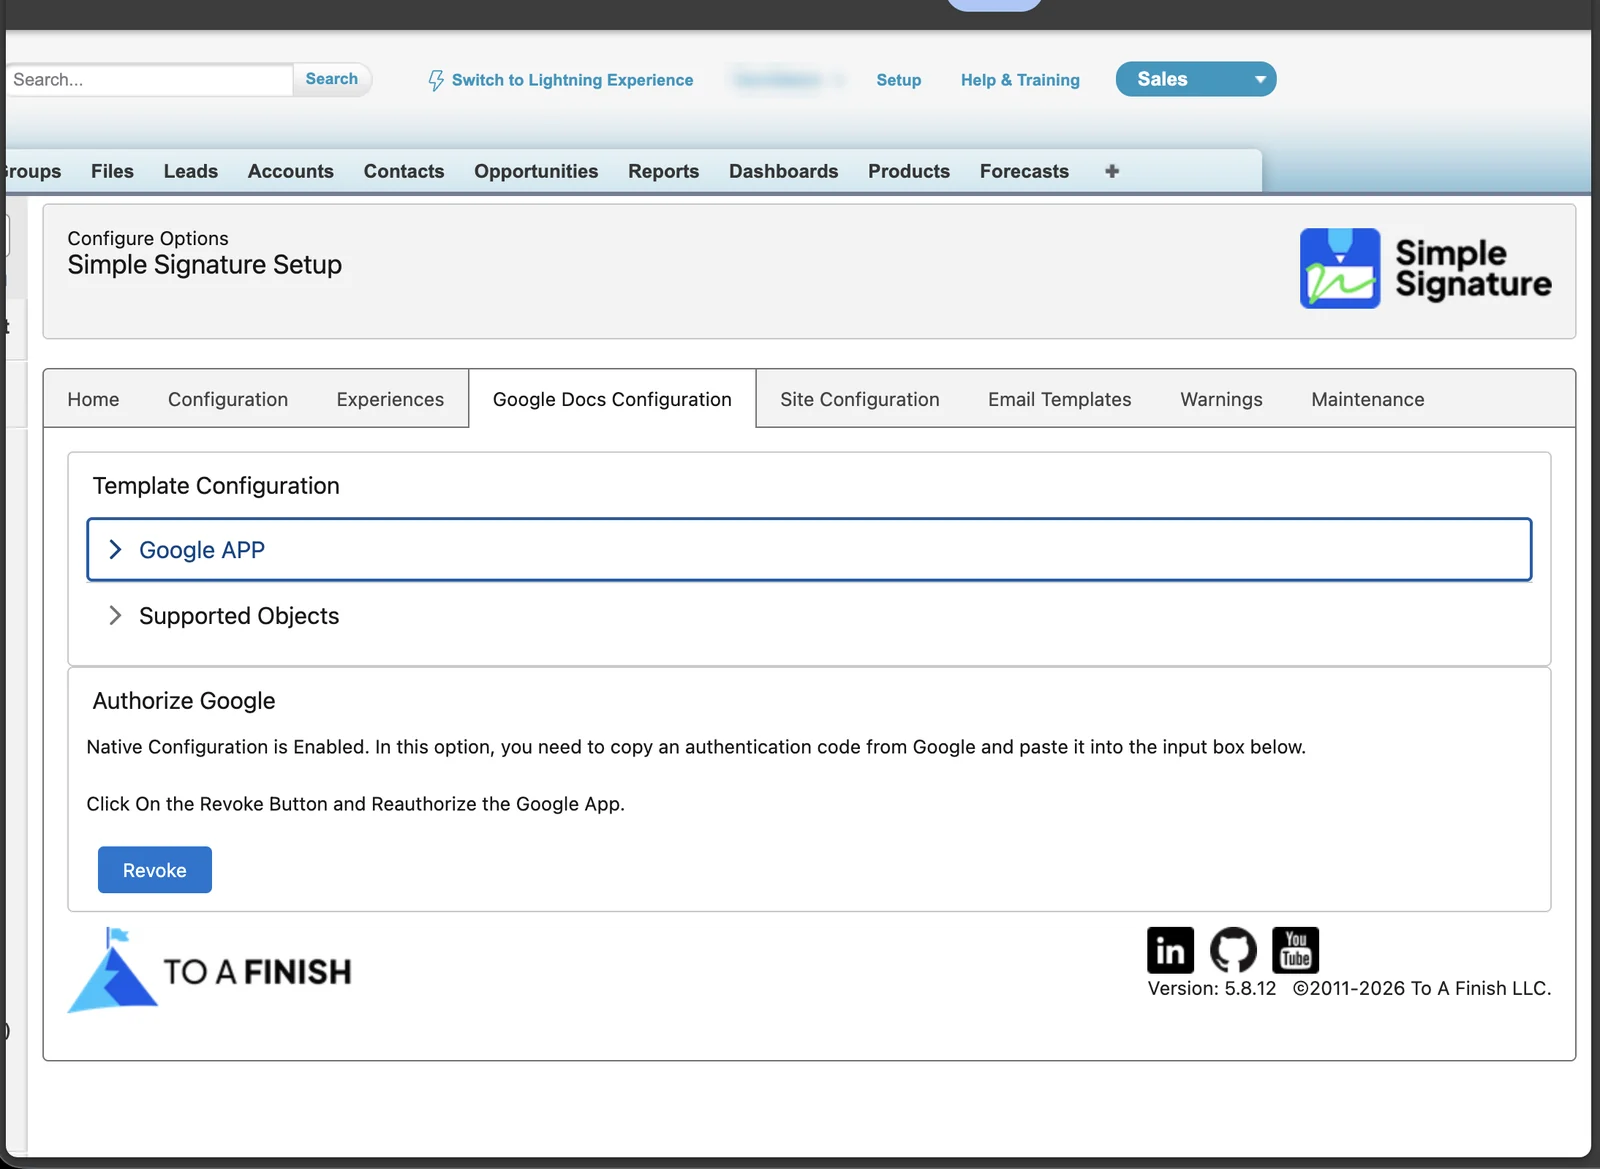
Click the Google Docs Configuration tab. Add the remote sites, if the tab asks for them.
If a message lists remote sites, add each one in Remote Site Settings, the same way as step 5 of Connect the site.
Open Google APP. Check the setting.
Under Template Configuration, click Google APP to open it. Native is ticked and Web Configuration is not. This is the setting at first. Change nothing.
Click Authenticate. Sign in to Google. Paste the code. Click Submit.
Under Authorize Google, click Authenticate. Sign in to the Google account that keeps your templates. Accept the permissions. Google then shows a code. Copy it.
Back in Salesforce, paste the code into Authorization Code. Click Submit.
The section then shows a Revoke button. The connection works. Do not click Revoke now. Click it only to connect again, for example in a sandbox. See step 8 of Set up a sandbox made from production.
Switch back to Lightning Experience. Open ß Templates. Click New.
In the App Launcher, type
Templates. Click ß Templates.Pick Google Docs. Click Next. Pick Create New Template. Click Next.
The two screens are Document Platform and Choose Template.
Fill in the template as below. Then click Save.
Field Value Name Any name. Simple Signature does not use it in code. Google Id Leave it empty. To start from a Google document you have, paste its ID from its web address. Copy Template A + button. Leave it as it is. Use it only with a Google Id. Object Name Pick ß Signature. For a document that nobody signs, pick another object. User Permission Type Pick Any one with link. Other Salesforce users can then use the template. Action Permission Type Pick writer. Other Salesforce users can then edit it. Pick another value to keep the editing to yourself. 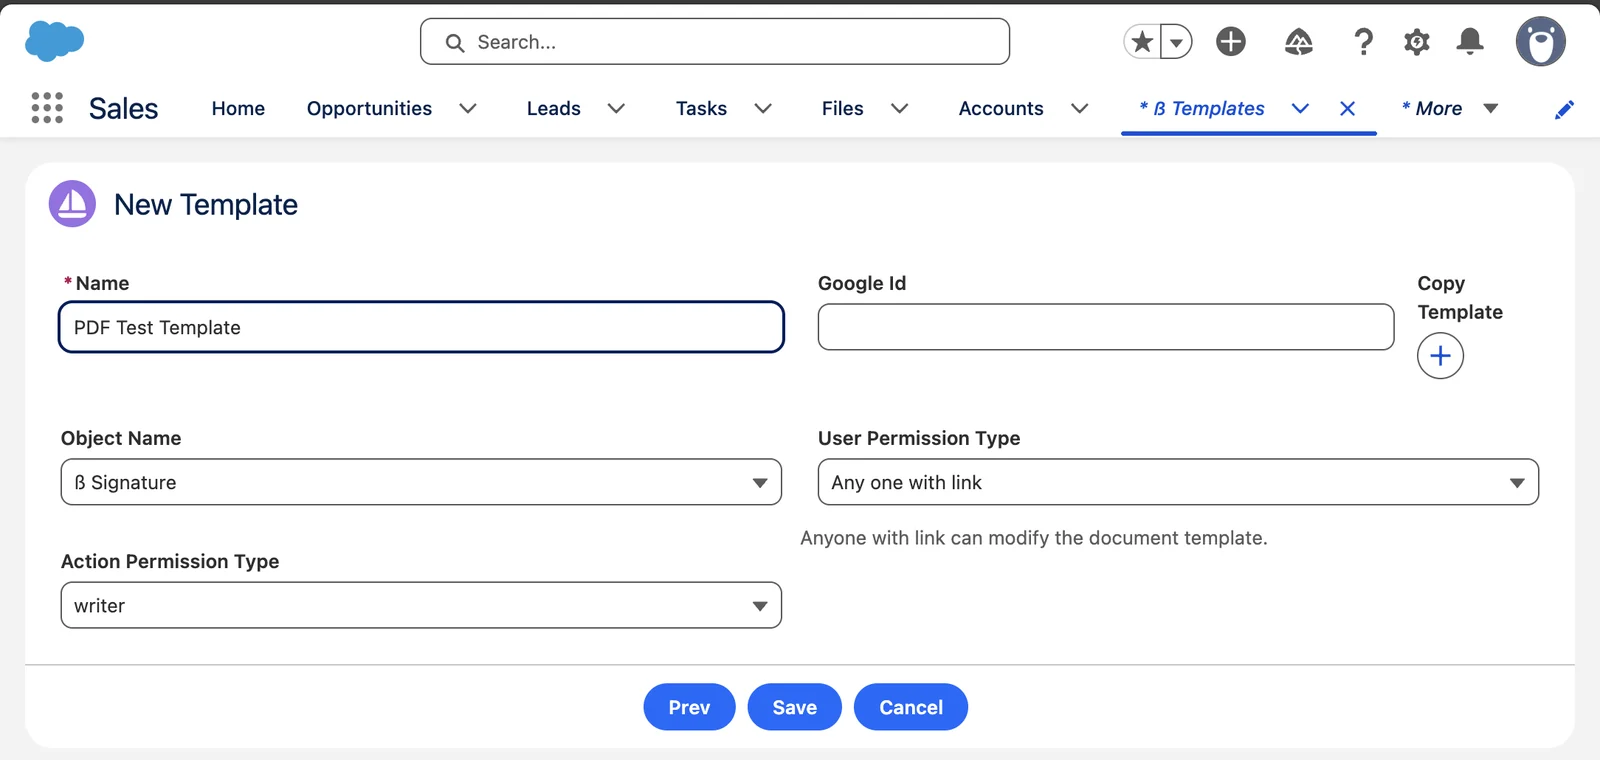
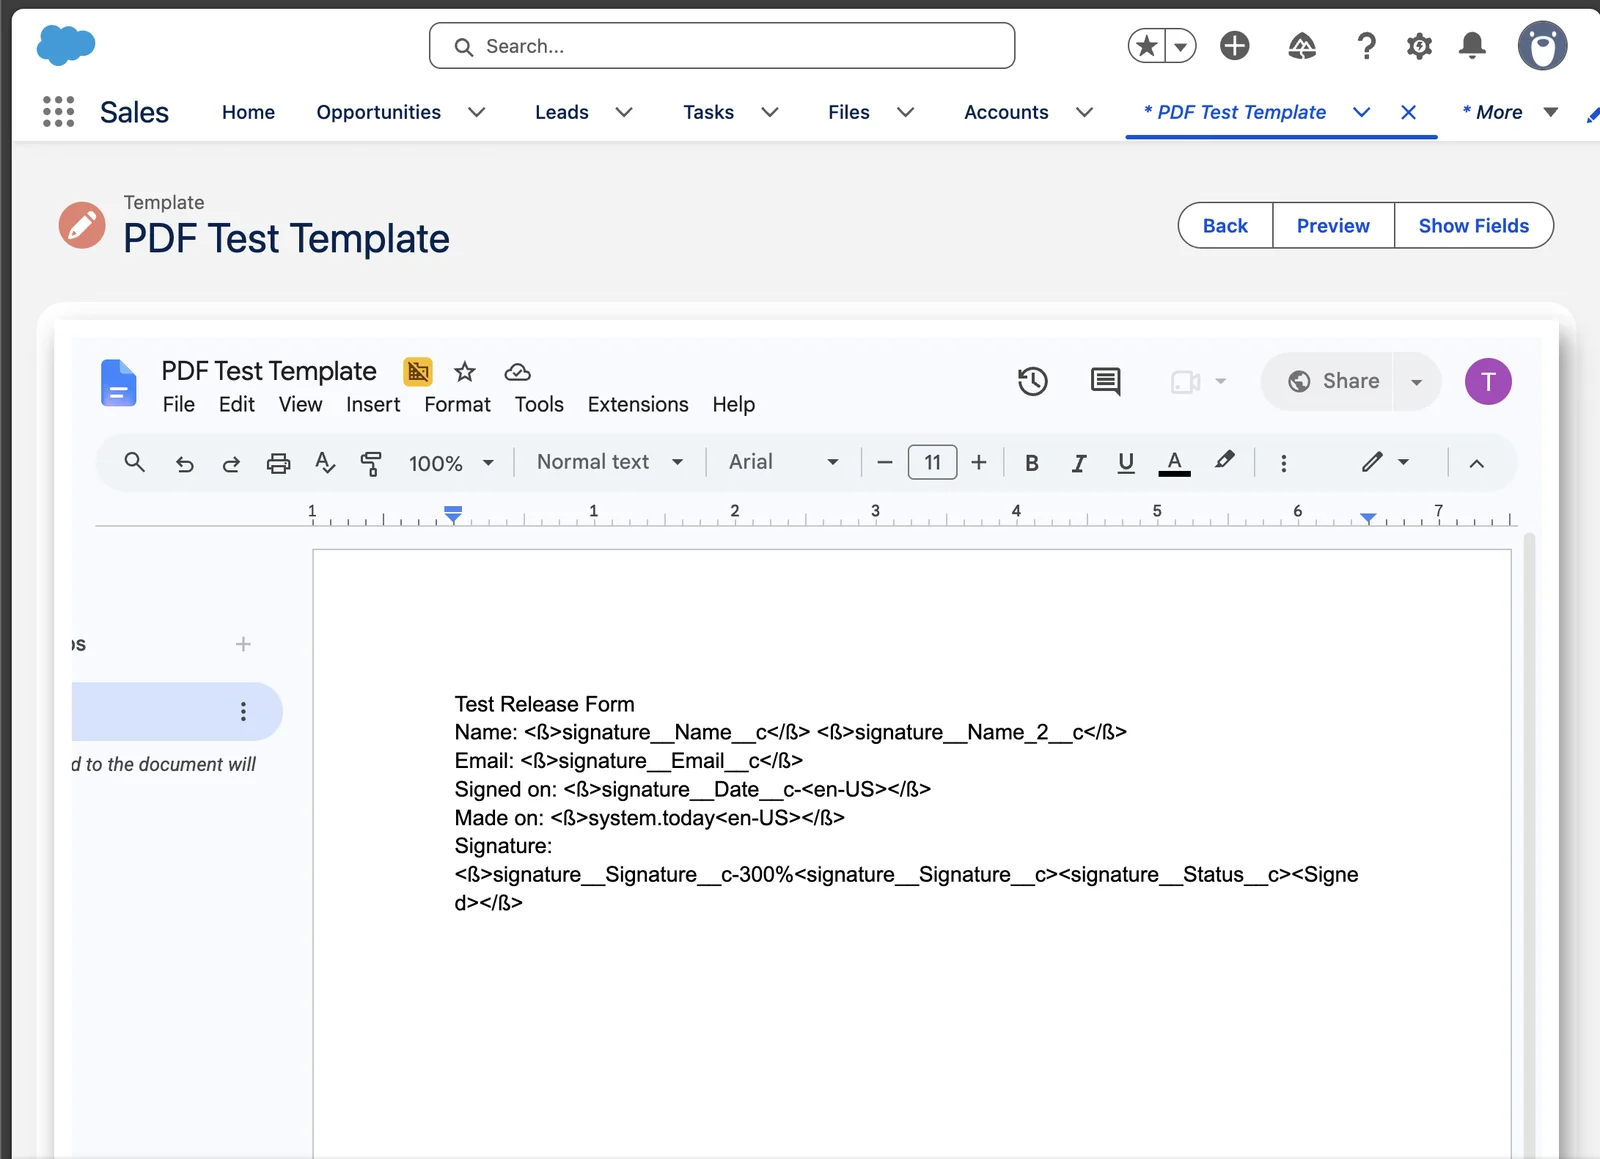
Click Edit Google Doc. Write the document.
Google Docs opens inside the Salesforce page. Write the text, and add tables and pictures as you need.
Simple Signature cannot merge a Microsoft Word file. To use one, open it in Google Docs. Click File, then Save as Google Docs.
Add Salesforce data with merge codes.
Click Show Fields. Browse to a field or a related list. Copy its merge code. Paste it into the document. Other buttons add the signature image and a time stamp of the merge.
Show Fields keeps your last search. Clear the search box before you look for the next field. If a window is wider than the screen, zoom the browser out to reach its buttons.
See Merge codes for Google Docs below.
Copy the ID of the template. Add it to your request.
Click Back. Copy the ID of the template from the address bar of the browser. It has 18 characters, for example
a0Qhm000001oVZVEA2.For an experience, add the parameter
templateswith the ID as its value. For the Request Signature action, add a predefined value for Templates. Type the ID in quote marks. See step 4 of Send a signature request.Pick Templates in the Field Name list with the mouse. The Enter key there saves the form, with an error.
Several templates can go in one value, with commas between their IDs.
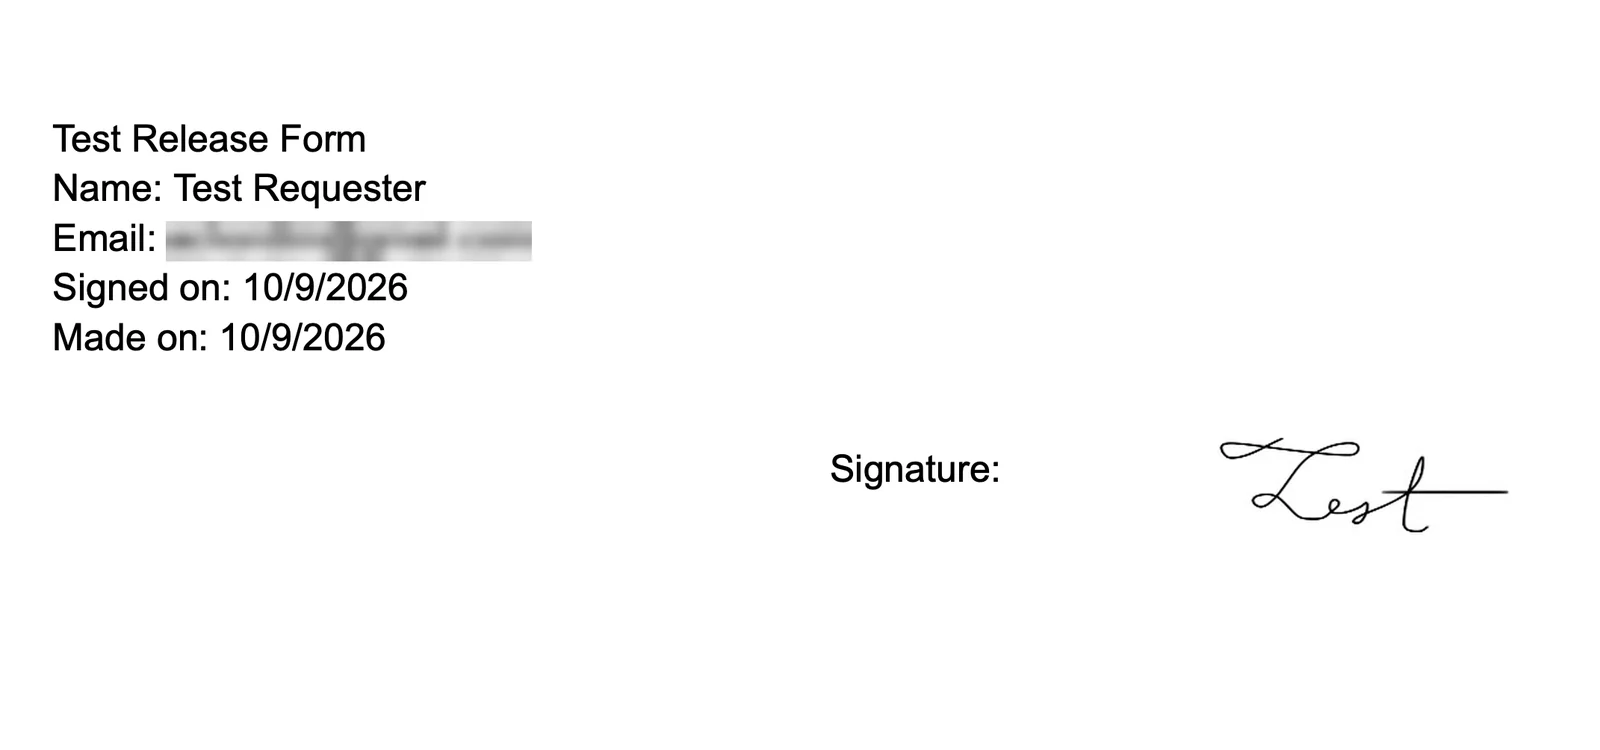
Send a test request. Open the signed PDF.
Follow steps 6 to 9 of Send a signature request. The request email carries the PDF to sign.
After the signature, open the signed PDF in Notes & Attachments of the Signature or of the Lead. It has the Name of the template. It shows your data and the signature.
Merge codes for Google Docs
Start with a merge code from Show Fields. Then add options and filters as below. A merge code starts with <ß> and ends with </ß>.
| What it shows | Merge code |
|---|---|
| The first name of the signer | <ß>signature__Name__c</ß> |
| The last name of the signer | <ß>signature__Name_2__c</ß> |
| The email of the signer | <ß>signature__Email__c</ß> |
| The signature image, 300 pixels wide | <ß>signature__Signature__c-300</ß> |
| The signature image, only when the Status is Signed | <ß>signature__Signature__c-300%<signature__Signature__c><signature__Status__c><Signed></ß> |
| The countersignature of the user | <ß>User.LibrarySignature-300</ß> |
| The countersignature, only when the Status is Signed | <ß>User.LibrarySignature-300%<signature__Signature__c><signature__Status__c><Signed></ß> |
| A signature from a Rich Text field on the user | <ß>User.User_Signature__c-300%<User><IsActive><true></ß> |
| The signature date, United States format | <ß>signature__Date__c-<en-US></ß> |
| The signature date, India format | <ß>signature__Date__c-<hi-IN></ß> |
| 5 days after today, United States format | <ß>system.today<day#5><en-US></ß> |
| 5 days before today, India format | <ß>system.today<day-5><hi-IN></ß> |
| 6 days after now, with the time, United States format | <ß>system.now<day#6><en-US></ß> |
| The signature date, only when the First Name is Testing | <ß>signature__Date__c-<en-US>%<signature__Signature__c><signature__Name__c><Testing></ß> |
A filter follows the % sign: the object, the field and the value, each in angle brackets.
Dates, numbers and money
Show Fields adds format tags to date, money, number and location fields: -<LOCALE><CURRENCY>. With more than one tag, put the format tags first, then the filter tags, then the sort tags. Only the first tag starts with a dash. For example:
<ß>signature__Opportunity__r.OpportunityLineItems.TotalPrice-<en-US><USD><#FIL-DEC-3600><#SORT-UP></ß>
To show all the decimals of a number, put a format just before </ß>, for example:
<ß>signature__ActualSignedLocation__Latitude__s-<en-US>#0.00000000#</ß>
Lists of related records
A template can list child records, for example the products of an Opportunity. Show Fields offers two ways. The related list itself gives a table with no format and no filter. TAF does not advise it. Use the second way:
- In Show Fields, click the object name with the > sign, for example Opportunity >. The list shows the merge codes of its fields.
- In Google Docs, click Insert, then Table. Make a table two rows high, with a column for each field.
- Type the column titles in the first row. Paste a merge code into each cell of the second row.
To sort the table, add a sort tag at the end of one cell, once per table: -<#SORT-UP> or -<#SORT-DOWN>. The dash goes in only when it is the first tag in the cell.
To filter the table, add a filter tag at the end of one cell: -<#FIL-TYPE-OPERATOR-VALUE>. TYPE is DEC for decimal numbers, INT for whole numbers, BOL for checkboxes, STR for text, DT for dates or DTT for date and time. VALUE is optional. Without it, the filter compares with a blank value. For dates, TODAY and YESTERDAY also work.
| Operator | Meaning | Works with | Example |
|---|---|---|---|
| EQ | equal | checkbox, text, date, number | <#FIL-STR-EQ-Sample> |
| NEQ | not equal | checkbox, text, date, number | <#FIL-STR-NEQ-Sample> |
| GR | greater than | text, date, number | <#FIL-DEC-GR-100> |
| LS | less than | text, date, number | <#FIL-DEC-LS-100> |
| GREQ | greater than or equal | text, date, number | <#FIL-DEC-GREQ-100> |
| LSEQ | less than or equal | text, date, number | <#FIL-DEC-LSEQ-100> |
| STWH | starts with | text | <#FIL-STR-STWH-Sample> |
| ENWH | ends with | text | <#FIL-STR-ENWH-Sample> |
| CTNS | contains | text | <#FIL-STR-CTNS-Sample> |
Sections that show or hide
A checkbox field can show or hide a part of the document. Put a start tag before the part, with the checkbox field. When the field is True, the part shows. Put an end tag after the part.
<ß>CONDITIONSTART<Display__c><true></ß>
<ß>CONDITIONEND</ß>
Document parameters for an experience
Add these parameters to a signature experience. See Build a signature experience.
| Parameter | What it does |
|---|---|
templates | The ID of one or more templates, with commas between them. Simple Signature makes the PDF from them, before and after the signature. |
pdftemplate | The name of a Visualforce PDF page, with c__ in front. |
attachpdf | Saves the PDF on the Signature record. |
attachpdftoparent | Saves the PDF on the parent record. |
emailpdf | Emails the PDF to the Contact of the Signature. |
embedpdf | Shows the PDF above the form, so the signer can read it first. |
requestedpdfname | The file name of the PDF. It can hold fields, for example {!Contact.Name}_Release. |
requestedpdfnamepreview | Also names the preview PDF in the request email, with _Preview at the end. Google Docs only. |
deletesigantureafter | Deletes the picture of the signature after Simple Signature makes the PDF. The parameter name has this typo. |
Applies to
Simple Signature 5.8.x, paid version. These steps come from the tested Simple Signature implementation guide, where they sit with the steps before and after them.
Was this helpful?
Thank you. It helps us know which articles work.
Related
Still stuck?
Open a case and paste the exact error text. A person reads every case.