

Send a signature request
How to do it in Simple Signature, one step at a time.
Last updated 9 Oct 2026
Paid version only. These steps do not count in the setup progress.
A request starts when Salesforce gets a new ß Signature record with the Status Requested and an email address. Simple Signature then emails the signer a link to the site.
In this chapter you make a Request Signature button on Leads with a Salesforce action. The same steps work on Contacts and on other objects.
Open Object Manager. Click Lead, then Buttons, Links, and Actions. Click New Action.
Use Lightning Experience, with admin rights.
Fill in the action as below. Then click Save.
Field Value Action Type Pick Create a Record. Target Object Pick ß Signature. Label Type Request Signature. Salesforce fills in Name.Success Message Type Signature Request Created.Other fields Leave them as they are. The page has no field for the link to the Lead. After the save, the action shows Relationship Field Lead.
Put First Name, Last Name and Email on the action layout. Click Save.
Salesforce opens the layout of the action. Drag the three fields into it. The user who sends the request sees these fields, and can change them before the save.
Add the predefined field values below.
Below the layout, find Predefined Field Values. Click New for each row. Pick the Field Name. Set the value in Specify New Field Value. Click Save.
If New opens a blank page, go back to the action and click New again.
Field Name Value What it does Attach PDF to Parent? True Saves the signed PDF on the Lead. Attach PDF? True Saves the signed PDF on the Signature record. Email PDF? True Emails the signed PDF to the signer. Email Lead.EmailThe address that gets the request. First Name Lead.FirstNameThe first name of the signer. Last Name Lead.LastNameThe last name of the signer. Status Requested Starts the request. Type True and the Lead fields, such as
Lead.Email, in Formula Value. Show Formula Editor opens a larger editor, if you need one. For Status, pick Requested in the Specific Value list. If Formula Value then stays empty, type"Requested", with the quote marks.On Contacts, use
Contact.Email,Contact.FirstNameandContact.LastName.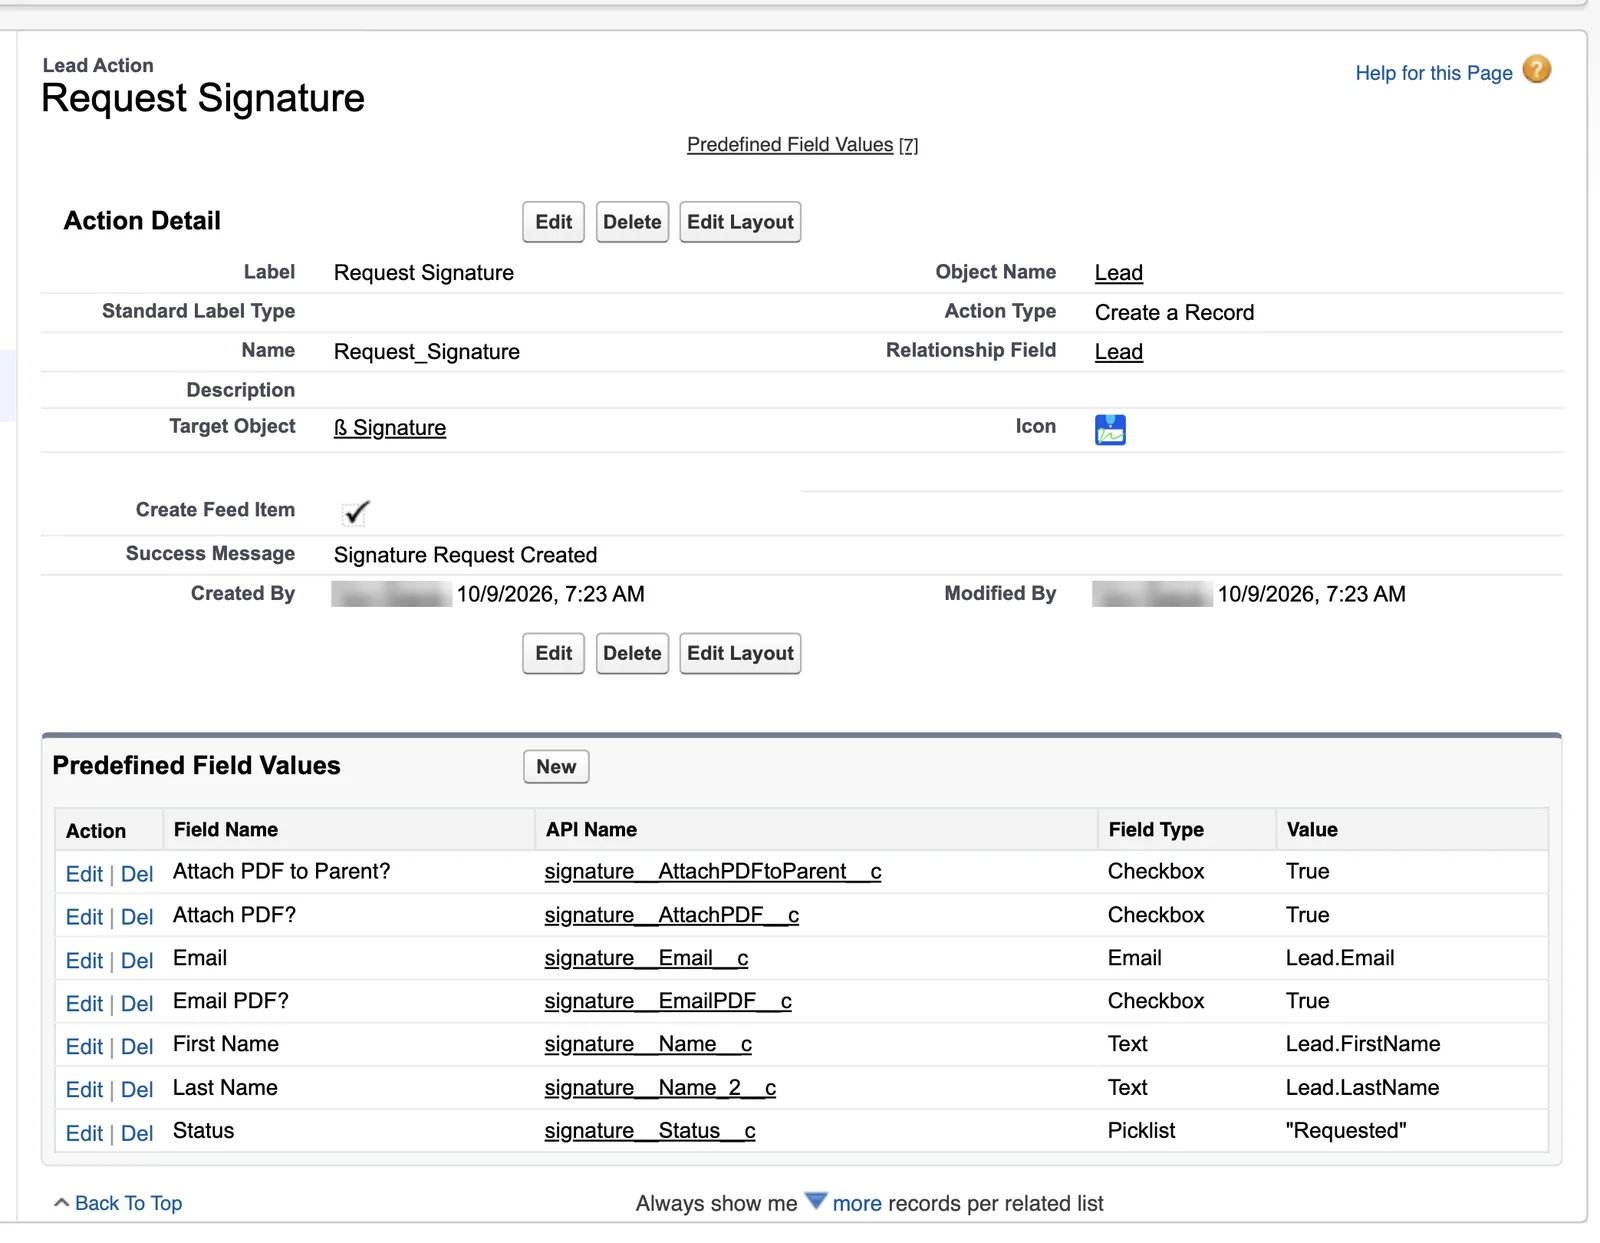
Add the action and two related lists to the Lead page layout.
Click Page Layouts, then the Lead layout. In the palette, click Mobile & Lightning Actions. Drag Request Signature into Salesforce Mobile and Lightning Experience Actions. If that section asks you to override the predefined actions, click the link to do so first.
In the palette, click Related Lists. Drag ß Signatures and Notes & Attachments into the Related Lists section, if they are not there. The requests and the signed PDFs show in them. Click Save.
Open a test Lead with your own email address. Click Request Signature. Click Save.
If the button row is full, Request Signature sits in the menu under the arrow at the end of the row.
The action shows the name and the email of the Lead. Salesforce shows Signature Request Created.
The new record shows in the ß Signatures related list of the Lead. Within a minute, its Status changes from Requested to Emailed.
Open the request email. Open its link in a private browser window.
A private window has no Salesforce login. It shows the page the way your signers see it. In Chrome, press Ctrl+Shift+N on Windows or Command+Shift+N on a Mac. Paste the link there.
The email has the Subject Signature Requested and a Sign Online button. It carries the PDF to sign as an attachment. Until you make your own document, Simple Signature uses its standard PDF. To change the words, see Change the request emails.
The sender can show as an address that ends in
sfcustomeremail.com. Salesforce puts it in place of an address it cannot send from. See The sender of the emails.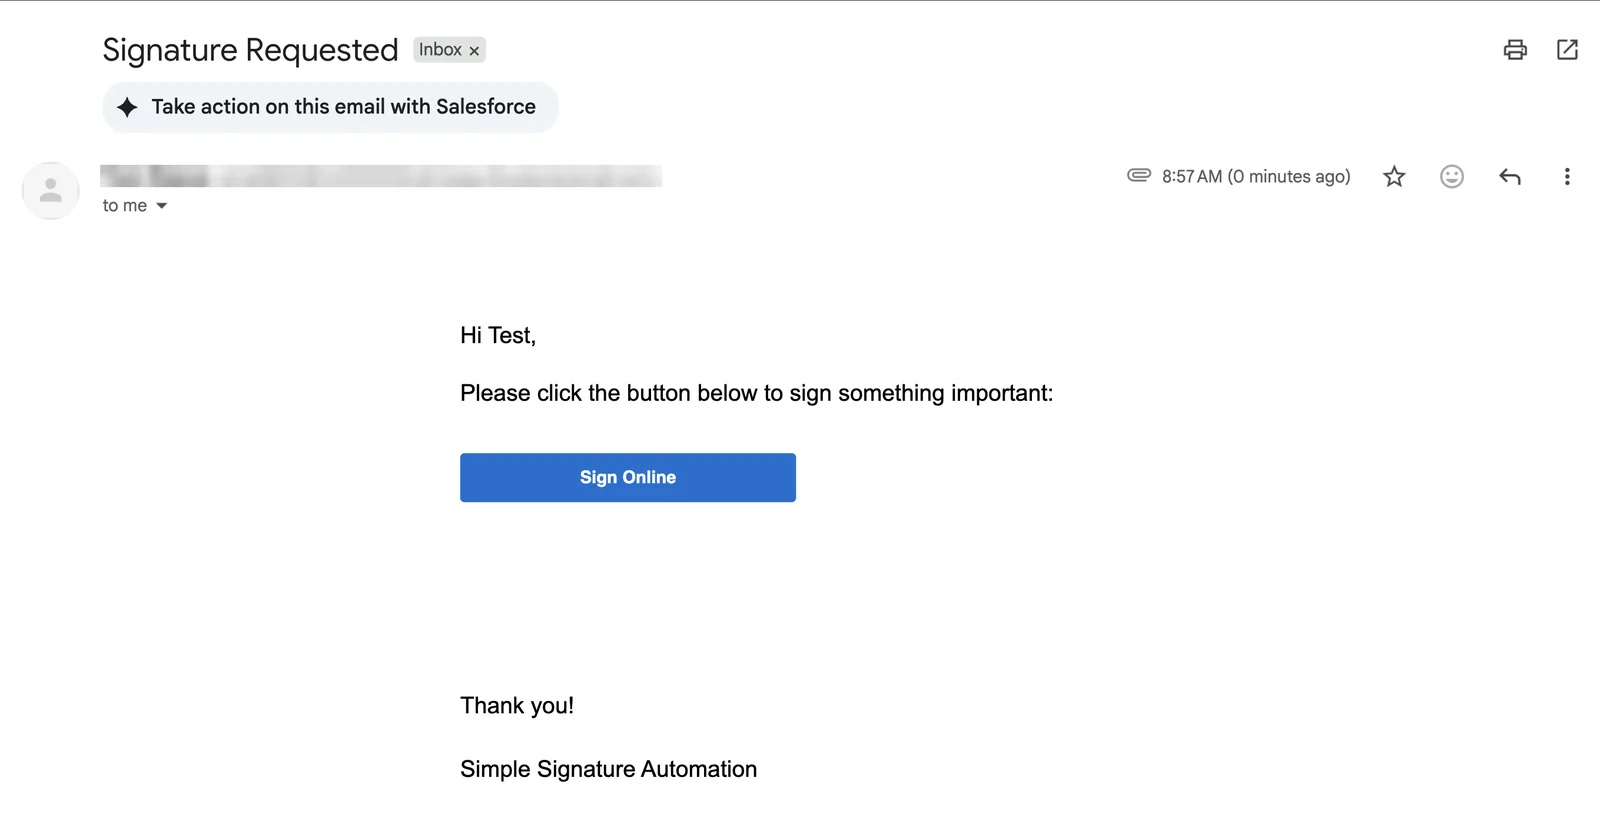
Fill in the form. Sign. Click Save Signature.
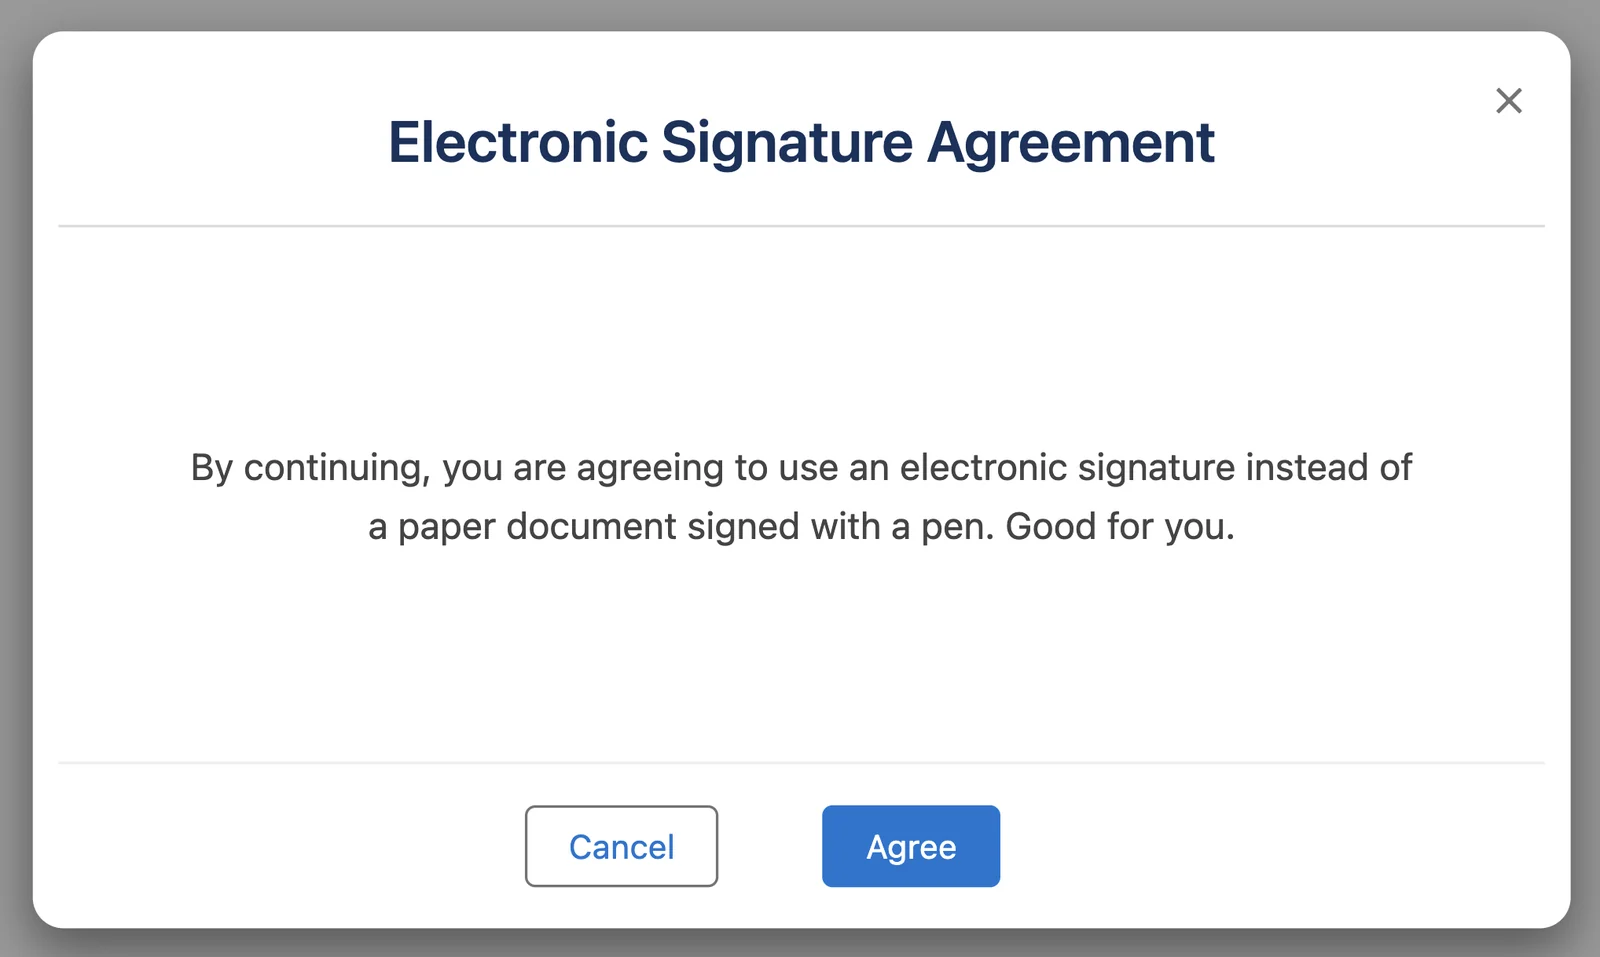
With Require eSignature Agreement on, the window Electronic Signature Agreement opens first. Click Agree.
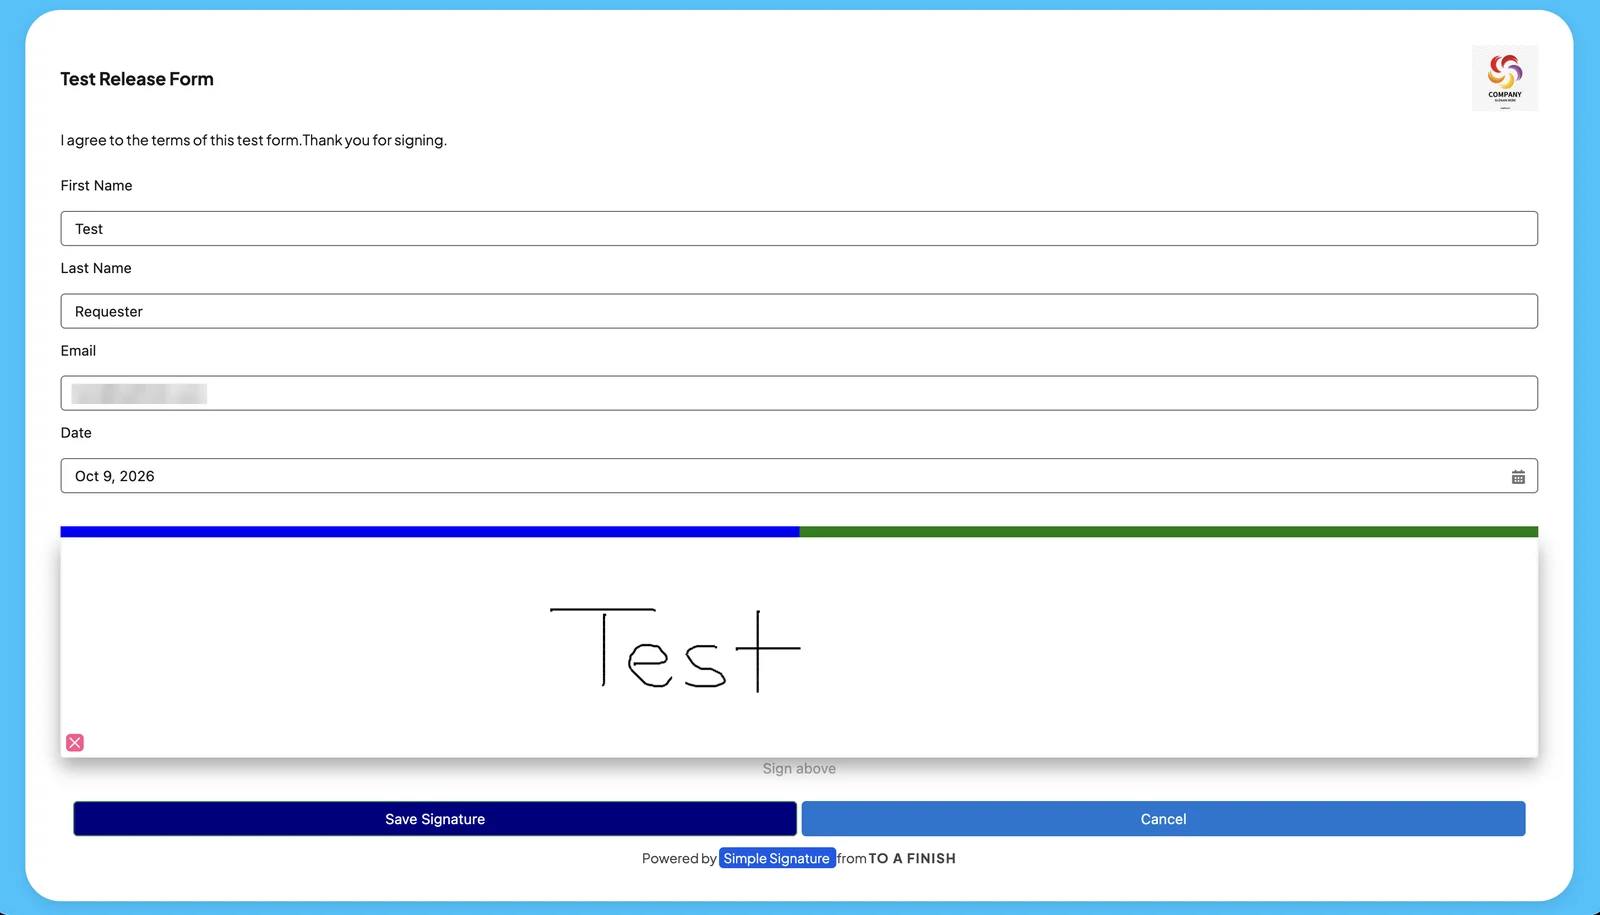
After the save, the page shows You may close this page.
Check the result in Salesforce.
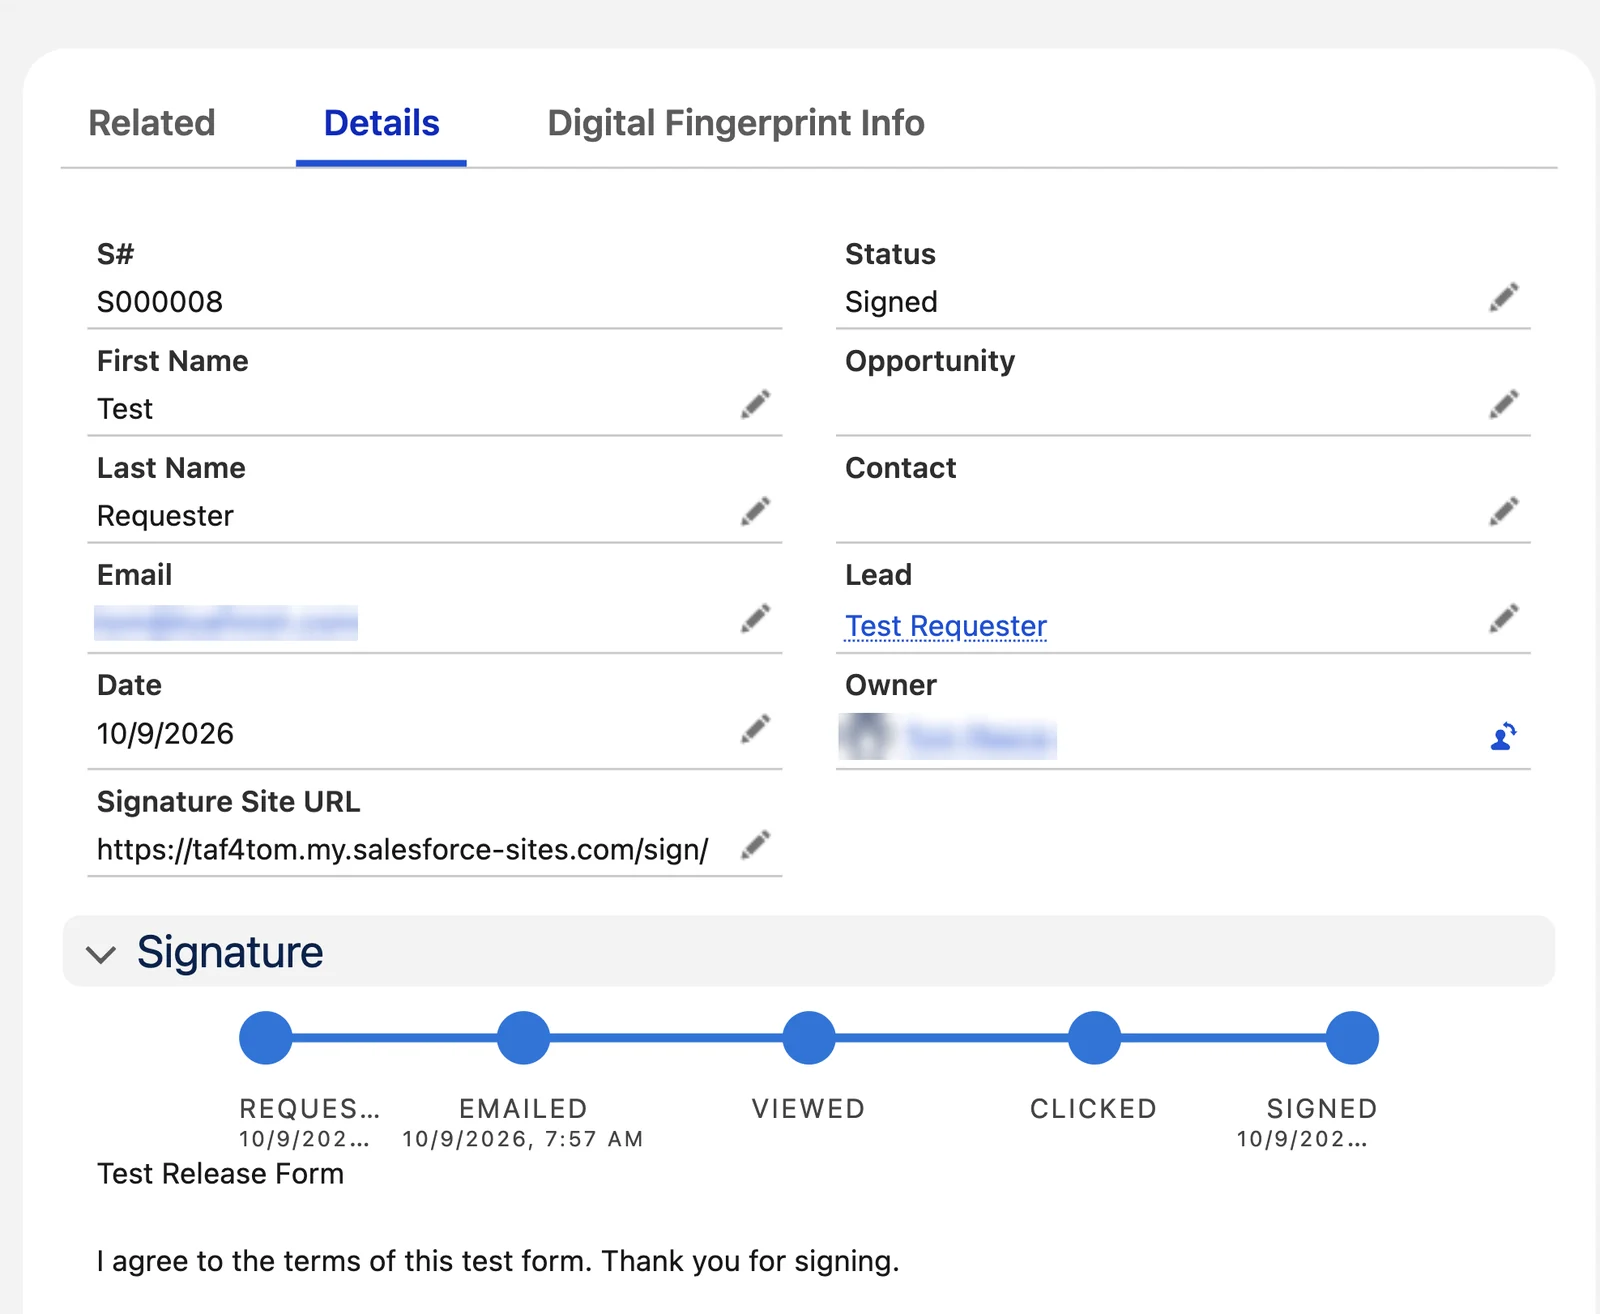
Open the Signature record. The Status reads Signed. The fields PDF Attached, PDF Attached to Parent and PDF Emailed show the time.
The signed PDF sits in Notes & Attachments of the Signature and of the Lead. With Use Files instead of Attachments on, it sits in Files. The signer gets a second email with the signed PDF, with the Subject Your Signed Form.
If the dates stay empty, see The signer signed, but no PDF comes.
Other ways to send a request
Any process that makes a ß Signature record with these values sends a request, for example a Flow, Apex code or a data load. A signature experience can also add a request button to the form. See Request parameters for an experience.
Applies to
Simple Signature 5.8.x, paid version. These steps come from the tested Simple Signature implementation guide, where they sit with the steps before and after them.
Was this helpful?
Thank you. It helps us know which articles work.
Related
Still stuck?
Open a case and paste the exact error text. A person reads every case.