

Verify records sent by email
How to do it in Address Verification, one step at a time.
Last updated 11 Oct 2026
Optional. For records that a site guest user or another system makes.
A guest user of a Salesforce Site often lacks the rights to verify a record. An email service solves this. Address Verification sends an email with the record ID to a Salesforce email address. Salesforce then verifies the record as a user who has an Address Verification permission set.
It also helps when a Flow runs as a user who lacks the rights. The email service moves the check to a user who has them.
Open Setup. Open Email Services. Click New Email Service.
In the Quick Find box, type Email Services. Click Email Services. Click New Email Service.
Fill in the email service. Then click Save and New Email Address.
Field Value Email Service Name Any name, for example Address VerificationApex Class AddressVerificationForSiteRecordsAccept Attachments None Advanced Email Security Settings Off Accept Email From Empty, or the one address that sends the emails Active Ticked The error routing below is optional. It helps you see emails that fail.
Fill in the email address. Then click Save.
Field Value Email Address Name Letters, numbers and underscores, no spaces. For example Address_VerificationEmail address Any value, for example address_verificationActive Ticked Context User Salesforce fills in your name. Pick a user with Address Verification (Admin) or Address Verification (User). Accept Email From Salesforce fills in your email address. Clear it, or type the one address that sends the emails. Copy the email address that Salesforce makes.
The record shows a long email address that ends in apex.salesforce.com. Copy all of it. Keep it private. Anyone who has it can start checks in your org, and each check uses a lookup.
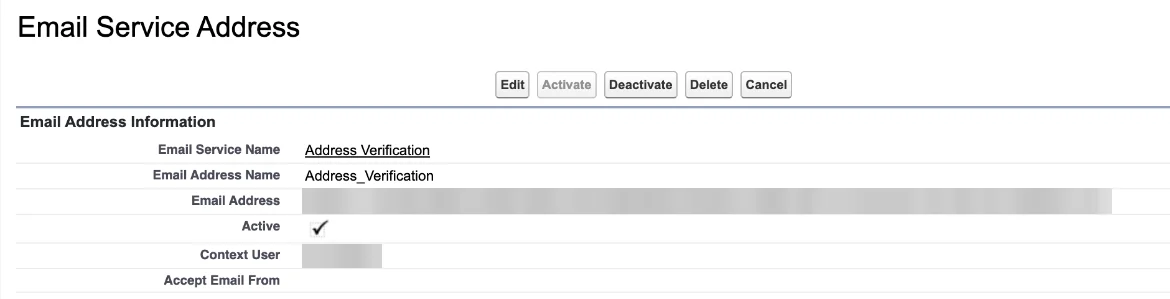
Send a test email to that address.
Send it from any address, or from the address in Accept Email From, if you set one. Use any subject. As the body, paste this text:
{ "vType":"Address", "sObjectName":"Object Name", "recordIds":[ "Record Id" ], "isRecheck":false }Replace Object Name with the API name of the object, for example
Location__c. Replace Record Id with the ID of a test record that is not verified. For more records, add more IDs with commas between them.To check email addresses, type
Emailin place ofAddress.Wait a minute. Check the test record.
The record shows the result of the check, for example Confirmed. It used one lookup.
Paste the address into Email Service Address. Then click Save All Settings.
On the setup page, open the Authentication tab. Under Optional Settings, paste the address into Email Service Address. Click Save All Settings.
If a button floats over the box, see A button on the setup page covers a field.
From now on, records with an address from a guest user with Address Verification (Guest User) get verified through the email service.
The guest user must be able to send email
Set and verify these email addresses. For help, open a case.
- The guest user of the site: in Setup, open Digital Experiences, All Sites, Workspaces, Administration, Pages, Go to Force.com, Public Access Settings, Assigned Users, Guest User.
- The Experience Cloud site: in Workspaces, open Administration, Emails, Email Address.
- If needed, an organization-wide email address for the guest user: in Setup, open Organization-Wide Addresses.
Applies to
Address Verification 7.3.x. These steps come from the tested Address Verification implementation guide, where they sit with the steps before and after them.
Was this helpful?
Thank you. It helps us know which articles work.
Related
Still stuck?
Open a case and paste the exact error text. A person reads every case.