

Install Address Verification
How to do it in Address Verification, one step at a time.
Last updated 11 Oct 2026
Install into a sandbox first. When the whole guide works there, come back and install into production.
If TAF sent you an install link, for example with an invoice or with a Smarty plan, open that link and sign in. Then go on at step 5.
Open the Address Verification listing on the AppExchange. Click Get It Now.
Go to Address Verification on the AppExchange. Sign in when the AppExchange asks. It shows a Trailblazer sign-in or a Salesforce login page. A Trailblazer account is the free login for Trailhead and the AppExchange. If the AppExchange lists your orgs and your org is not there, link it to your Trailblazer account first. The top of the site now reads AgentExchange. It is the same marketplace.
Pick your sandbox as the place to install.
A window asks Where do you want to install this package?. Pick the login of your sandbox. Then click the install button.
If the window offers only Install in Production, click Cancel. Open the Address Verification change log and click Install in a sandbox. Sign in to your sandbox, and go on at step 5.
Later, when the whole guide works in the sandbox, repeat these steps and install in production.
If a terms box shows, tick it. Then click Confirm and Install.
Some installs show the box I have read and agree to the terms and conditions. If yours does not, go to the next step.
Sign in to the org, if Salesforce asks.
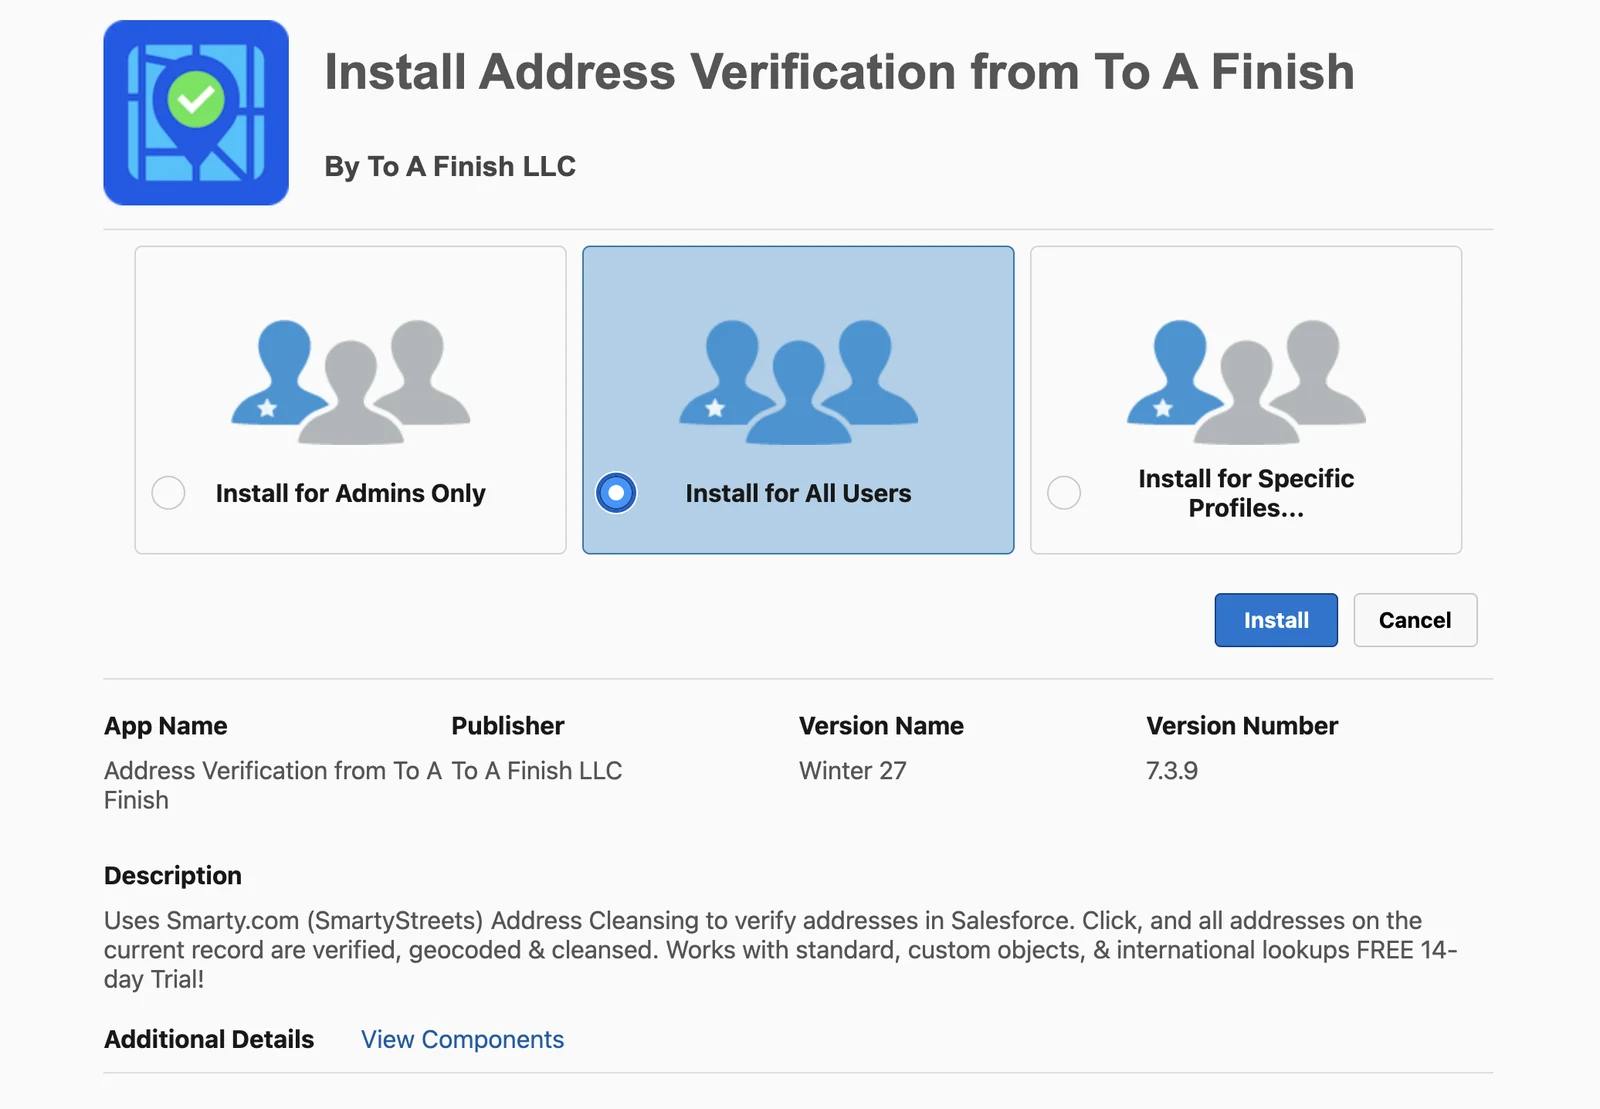
Salesforce opens the install page. Its title reads Install Address Verification from To A Finish. The Version Number sits below the buttons. When Address Verification is already in the org, the page offers Upgrade in place of Install.
Pick Install for All Users. Then click Install.
The three choices are Install for Admins Only, Install for All Users and Install for Specific Profiles. Only an admin sets Address Verification up, but every user who works with addresses needs access to its fields and buttons.
Approve third-party access. Then click Continue.
A window named Approve Third-Party Access lists the web sites that Address Verification calls. They are the Smarty services, Google Maps and the TAF service for email and phone checks.
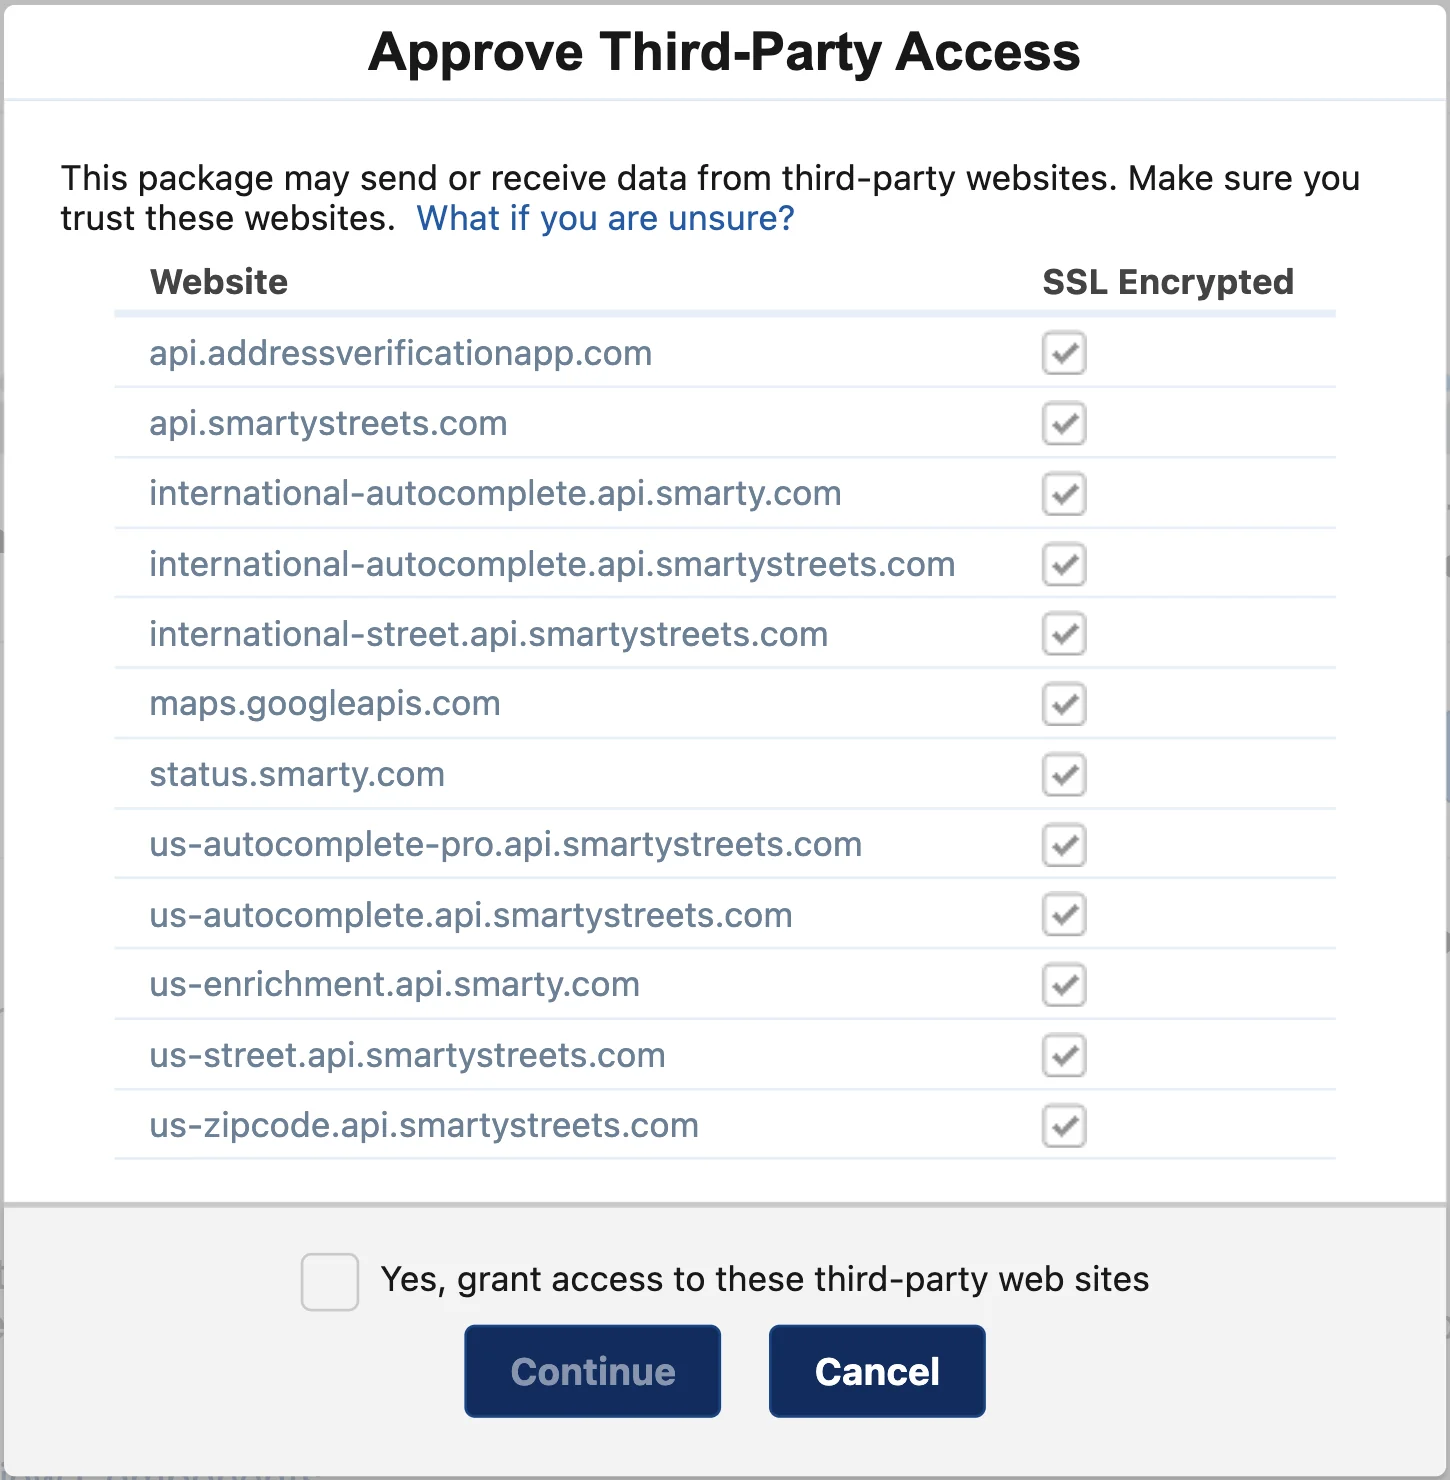
Tick Yes, grant access to these third-party web sites. Click Continue.
When the install takes a while, Salesforce says it will email you when it finishes. Installed Packages then lists √ Address Verification, with the namespace prefix
smartystreets. The name starts with a check mark. Many names in the app start with the prefix.Assign Address Verification (Admin) to each admin who sets up Address Verification.
Address Verification has four permission sets. This guide needs the first two.
Who Permission set What it allows Admins who set up Address Verification Address Verification (Admin) Full use of the app, with the setup page. Every other user who works with addresses Address Verification (User) Full use of the app, without the admin features. The guest user of a Salesforce Site Address Verification (Guest User) Checks of records that site visitors make. Skip it if you have no site. Users of an Experience Cloud site Address Verification (Community) Checks on an Experience Cloud site. Skip it if you have no site. Open Setup. In the Quick Find box, type Permission Sets. Click Permission Sets. Click Address Verification (Admin). Click Manage Assignments, then Add Assignment. Tick each admin. Click Next. Salesforce asks whether the assignment expires. Leave it with no expiration date. Click Assign.
Assign Address Verification (User) to every other user who works with addresses.
Go back to Permission Sets. Click Address Verification (User). Assign it the same way.
Applies to
Address Verification 7.3.x. These steps come from the tested Address Verification implementation guide, where they sit with the steps before and after them.
Was this helpful?
Thank you. It helps us know which articles work.
Related
Still stuck?
Open a case and paste the exact error text. A person reads every case.