

Mark changed addresses on a custom object
How to do it in Address Verification, one step at a time.
Last updated 11 Oct 2026
Only for addresses on a custom object. Accounts, Contacts and Leads get this from the app.
Verify skips an address whose Verified box is ticked, so it does not use a lookup twice. On a custom object, nothing unticks the box when the address changes. A record-triggered Flow does it.
On Accounts, Contacts and Leads, the triggers of Address Verification untick the box. They run for each object whose Active box is ticked on the Automation tab. A new install has Active ticked for all three.
This chapter builds the Flow for the address from Verify addresses on a custom object. The examples use the field labels from that chapter.
Keep this Flow on its own
Do not add these steps to a Flow that verifies records. This Flow must run as Fast Field Updates.
Open Setup. Open Flows. Click New Flow.
In the Quick Find box, type Flows. Click Flows. Click New Flow. Flow Builder opens in a new browser tab.
Click Record-Triggered Flow.
A window named New Automation opens. Under Frequently Used, click Record-Triggered Flow. The Flow opens at once.
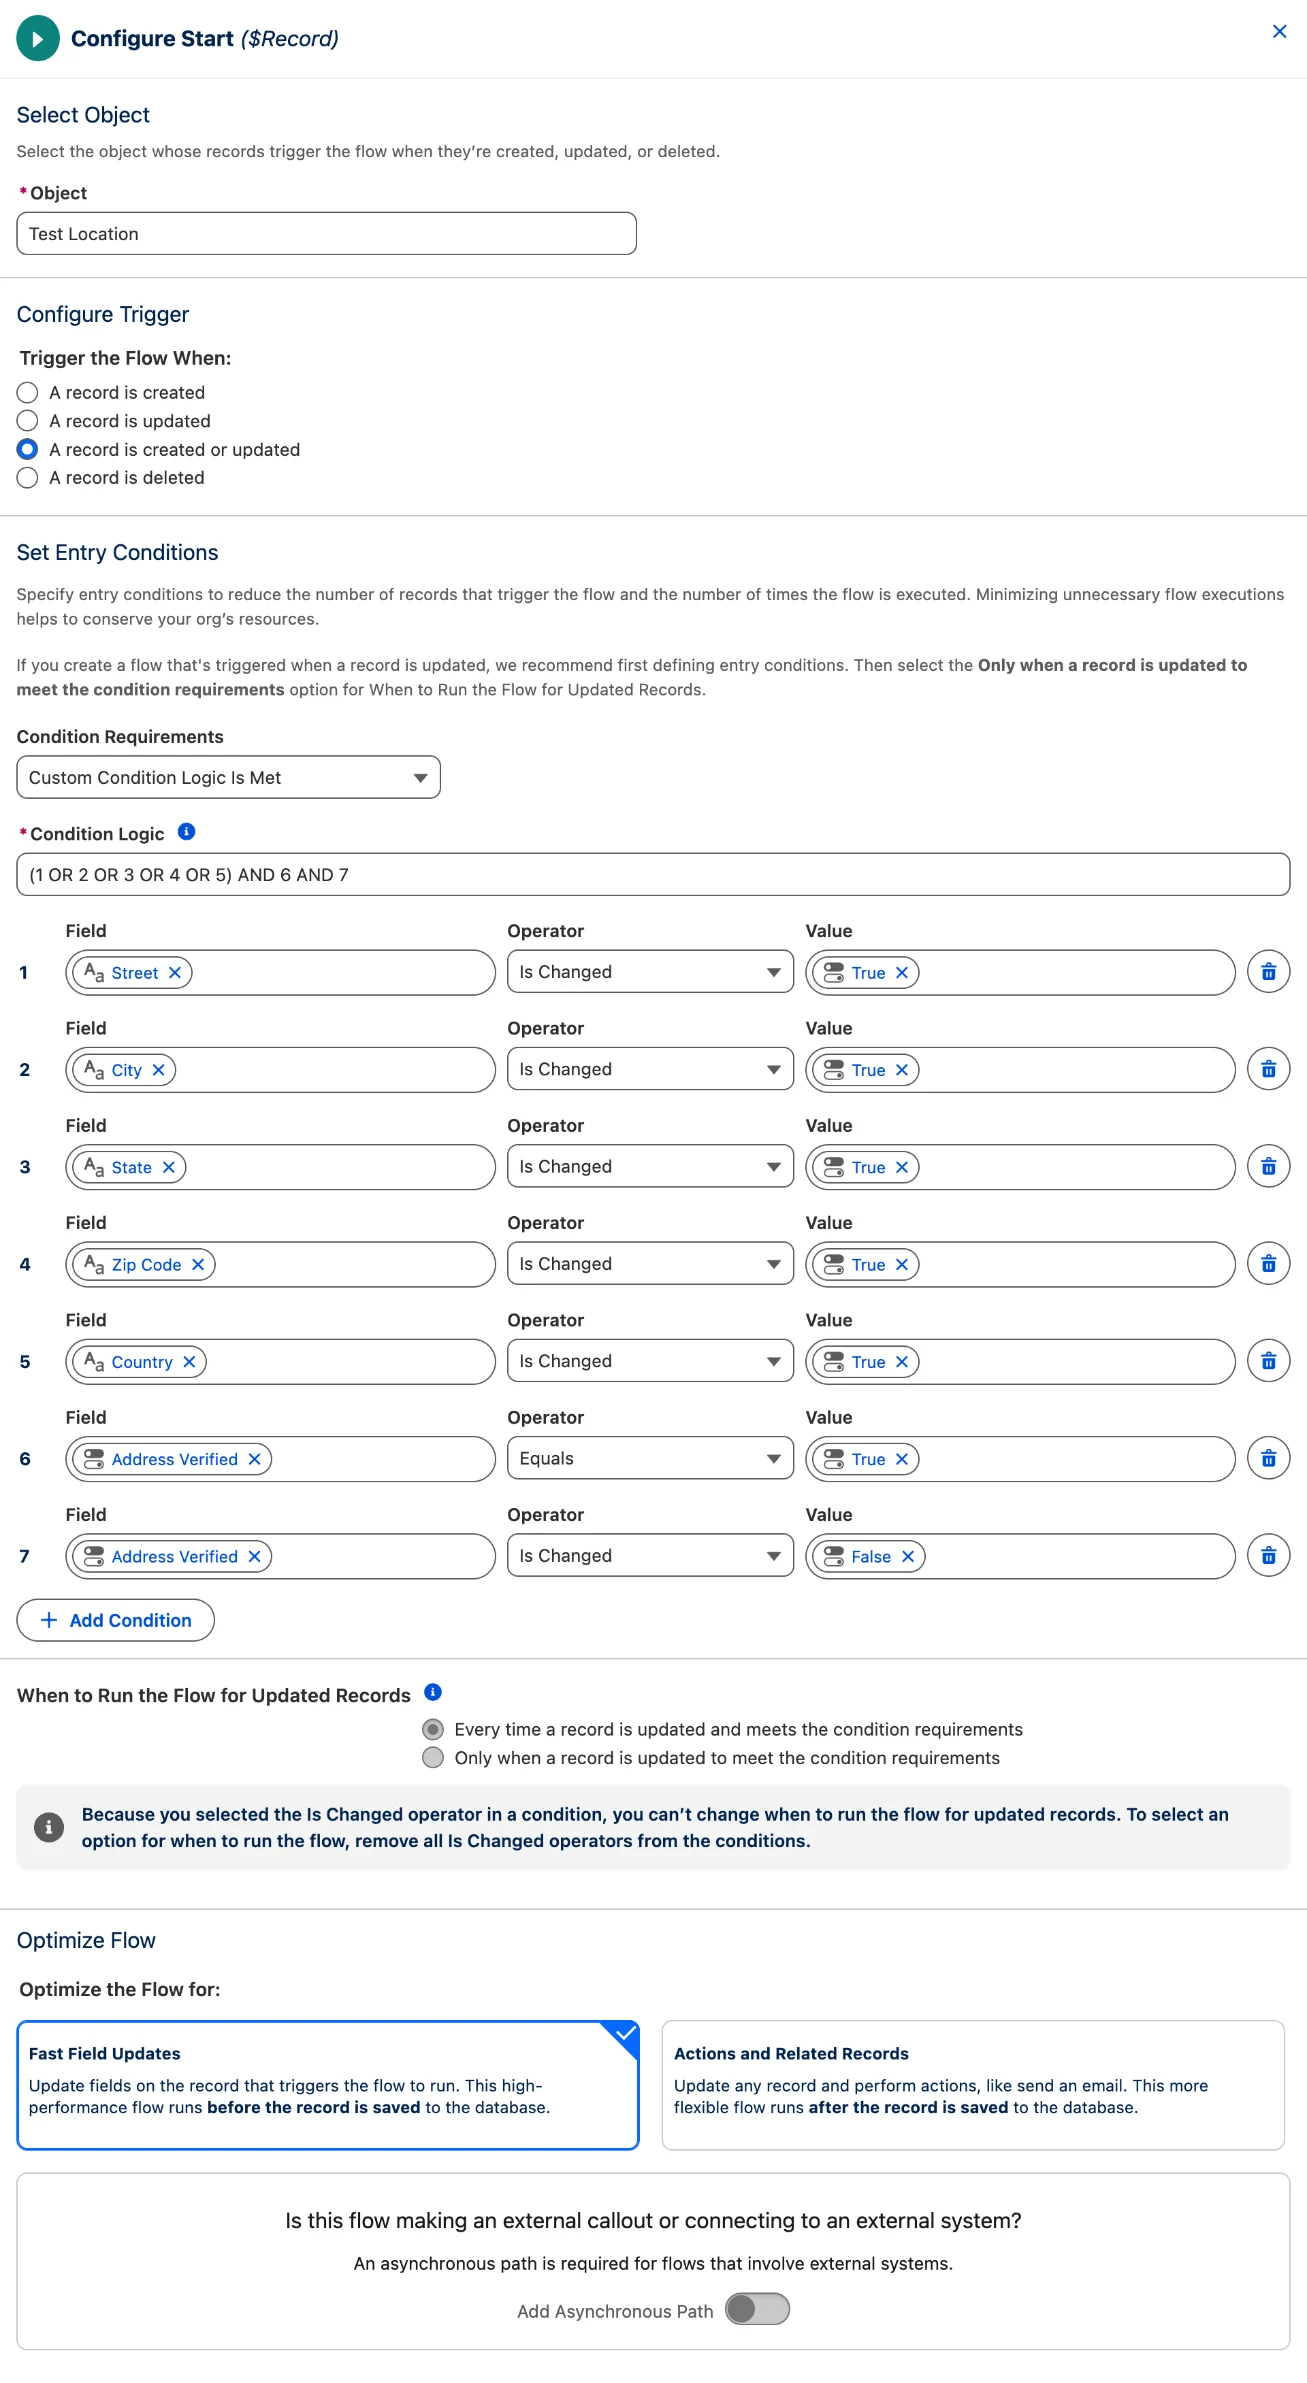
Set the object and the trigger.
A panel named Configure Start opens. Trigger the Flow When starts at A record is created, so change it.
Setting Value Object Your object, for example Location Trigger the Flow When A record is created or updated Condition Requirements Custom Condition Logic Is Met Add the seven conditions.
Click Add Condition for each new row. For True or False, pick the value under Global Constants.
Row Field Operator Value 1 Street Is Changed True 2 City Is Changed True 3 State Is Changed True 4 Zip Code Is Changed True 5 Country Is Changed True 6 Address Verified Equals True 7 Address Verified Is Changed False Row 7 matters. When Smarty corrects an address, Address Verification writes the new street and ticks Address Verified in one save. Without row 7, the Flow unticks the box at once, and Verify fails.
Type the condition logic.
The Condition Logic box sits above the conditions. It starts with 1. Replace it with:
(1 OR 2 OR 3 OR 4 OR 5) AND 6 AND 7The Flow goes on when any address field changes on a verified record, and the same save does not change Address Verified.
Check When to Run. Pick Fast Field Updates.
Under When to Run the Flow for Updated Records, Salesforce sets Every time a record is updated and meets the condition requirements. It greys the choice out, because of the Is Changed conditions.
Under Optimize the Flow for, click the Fast Field Updates card. The other card is the default. The Flow does not work without Fast Field Updates.
Leave Add Asynchronous Path off, at the bottom of the panel.
Click + under the start. Under Shortcuts, pick Update Triggering Record.
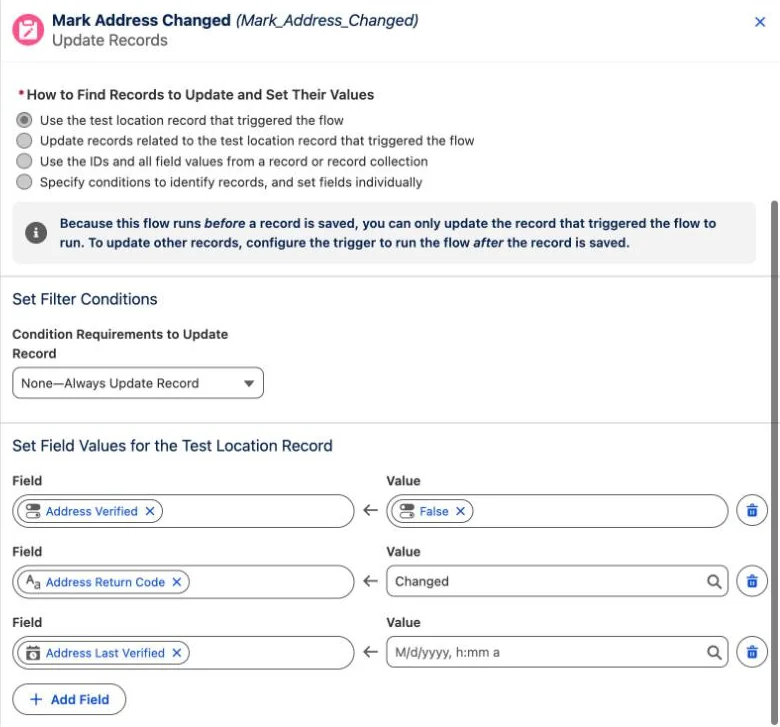
A panel named Update Records opens. Type a Label, for example
Mark Address Changed. Keep the preset choices for the record and the filter.Set two field values.
Click Add Field for each row. For Changed, type the word in the Value box.
Field Value Address Verified False Address Return Code ChangedOptional: add Address Last Verified with no value, to clear the date. Some orgs keep the date of the last check.
Click Save. Name the Flow. Click Activate.
Type a Flow Label, for example
Location Address Changed. Click Save. Click Activate.Test the Flow on a verified record.
Open a record whose address is verified. Change the street. Save. Address Verified is no longer ticked, and the Return Code reads Changed.
Click Verify Address to check the new address. It uses one lookup. Address Verified is ticked again, with the new result.
An Apex trigger can do the same job. It needs a sandbox and test code. For help with it, open a case.
Applies to
Address Verification 7.3.x. These steps come from the tested Address Verification implementation guide, where they sit with the steps before and after them.
Was this helpful?
Thank you. It helps us know which articles work.
Related
Still stuck?
Open a case and paste the exact error text. A person reads every case.