

Add the Verify button
How to do it in Address Verification, one step at a time.
Last updated 11 Oct 2026
The Verify Addresses action checks every address on the record. This chapter uses Account. Contact and Lead work the same way, but each object has its own action:
| Object | Action label | Action name |
|---|---|---|
| Account | Verify Addresses | smartystreets__Verify_AddressesComp |
| Contact | Verify Addresses | smartystreets__Verify_Addresses |
| Lead | Verify Address | smartystreets__Verify_Address_Component |
Open Account in Object Manager. Click Page Layouts.
Open Setup. Click Object Manager. Click Account. Click Page Layouts.
Open the layout your users work with.
Click the layout name, for example Account Layout. If you have more than one layout, click Page Layout Assignment to see which profile uses which layout.
Optional: add the Address Verification fields.
In the palette at the top, click Fields. Drag the fields you want to see into the layout, for example Billing Address Status and Billing Last Verified. A new section keeps them together.
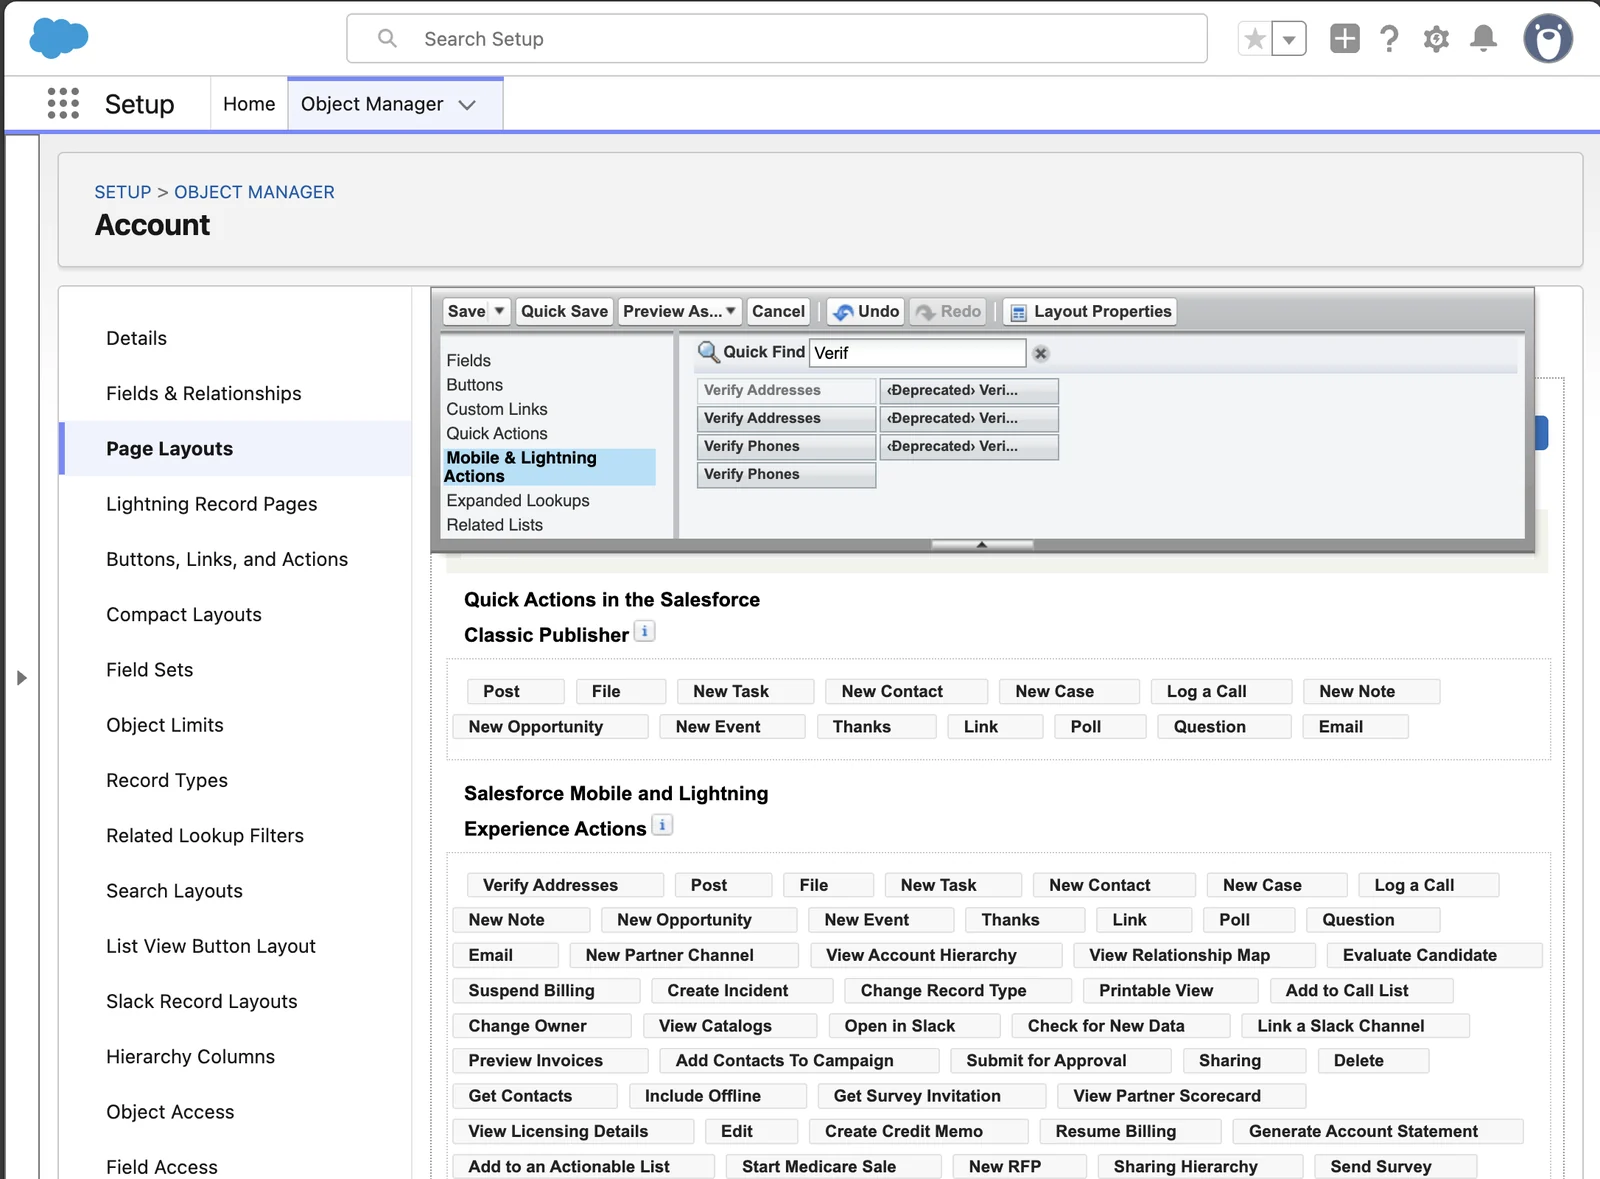
Drag Verify Addresses into the Salesforce Mobile and Lightning Experience Actions section.
In the palette, click Mobile & Lightning Actions. In the palette's Quick Find box, type
Verifto show only the Verify actions. More than one action reads Verify Addresses. Point at each one to see its name. The name of a Quick Action starts with the object name and a dot, for exampleAccount.On Account, use the one named:smartystreets__Verify_AddressesCompDo not use the actions that start with (Deprecated). If the section asks you to override the predefined actions, click the link to do so first.
Optional: add the Account History related list.
If you did Track address changes, click Related Lists in the palette. Drag Account History into the Related Lists section.
Click Save.
If Salesforce asks Save page layout changes?, leave the overwrite box as it is. Click Yes.
Do the same on each layout that needs the button.
Do the same for Contact and Lead.
Use the layouts of Contact and Lead, and the Contact History and Lead History related lists. Use the action name from the table at the top of this chapter. On Lead, the action reads Verify Address.
A button for lists
A list button can verify up to 200 records at once. Each record still uses its own lookups. See Verify many records from a list.
Applies to
Address Verification 7.3.x. These steps come from the tested Address Verification implementation guide, where they sit with the steps before and after them.
Was this helpful?
Thank you. It helps us know which articles work.
Related
Still stuck?
Open a case and paste the exact error text. A person reads every case.